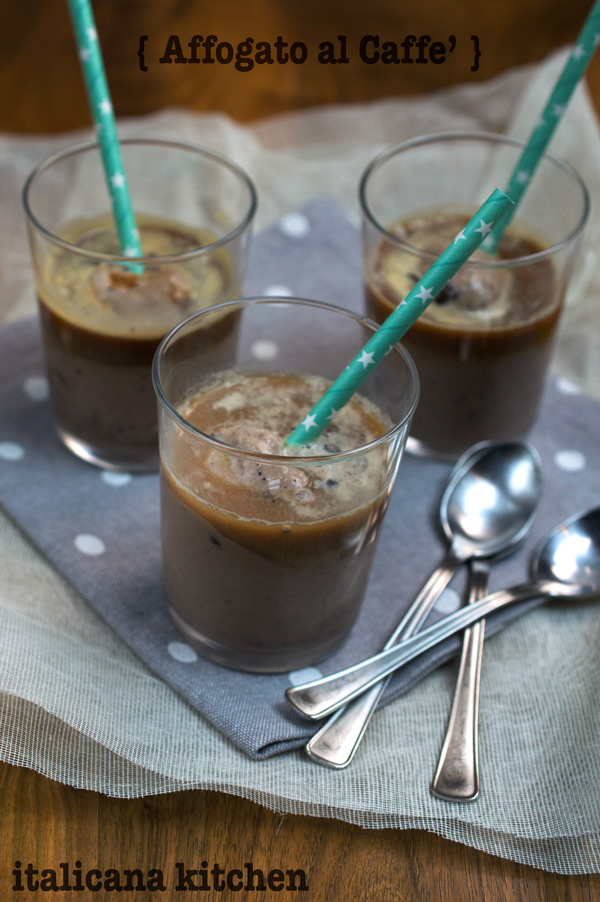
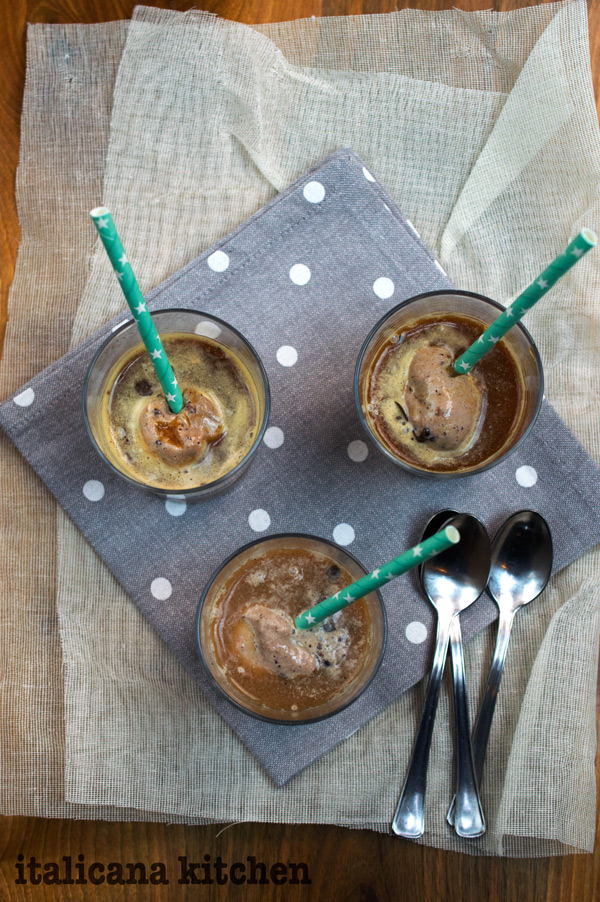
Affogato al caffè is one Italian dessert I can never resist. Made with a scoop of creamy gelato drowned (affogato) in a warm shot of rich aromatic Italian espresso, it’s my favorite drink for that needed pick-me-up during the day.
The portion size is so small :: piccola that you simply don’t feel guilty when eating this tempting dessert, unlike its American sister, the root beer float, that contains loads of ice cream and is drenched in half a can of soda. Or, at least that’s how we made root beer floats growing up in my household. The ice cream to root beer was always quite disproportionate.
The Italian affogato, however, is just the right size and can be consumed anytime of day; it’s perfect as a mid day pause from hours staring in front of a computer screen :: schermo or as an after meal dessert to wake you up before heading out to a club to dance with your friends. Since this drink only consists of two ingredients that you probably already have at home you don’t need to wait to come to Italy to try it. You can easily substitute the gelato for ice cream and use an Italian mocha pot to brew the espresso (they aren’t expensive and don’t take up room like an table top espresso machine does. After which you can use it to prepare espresso for daily consumption or for other desserts like Tiramisu.) I’ve also heard of non-Italians simply using strong coffee, although I’ve never tried it.
This dessert drink is also extremely versatile. You can experiment with different kind of gelato flavors or if you are craving something more decadent than just gelato and espresso, swirl some caramel or chocolate on the inside of the glass and top it with chocolate covered coffee beans ::i chicchi di caffè, white chocolate flakes or roasted hazelnuts. And, if your not in the mood for espresso, drown the gelato in Amaretto, an Italian liquor with a sweet almond flavor. The options are endless!
Made with a scoop of creamy gelato drowned (affogato) in a hot shot of rich aromatic Italian espresso, it’s a perfect drink for that needed pick-me-up during the day.
Serves: 1
Ingredients
1 shot warm espresso
1 scoop gelato or ice cream (vanilla, coffee, chocolate or another flavor of choice)
Instructions
Prepare 1 shot of espresso and pour it over 1 scoop of gelato that has already been placed into a glass. Buon appetito!
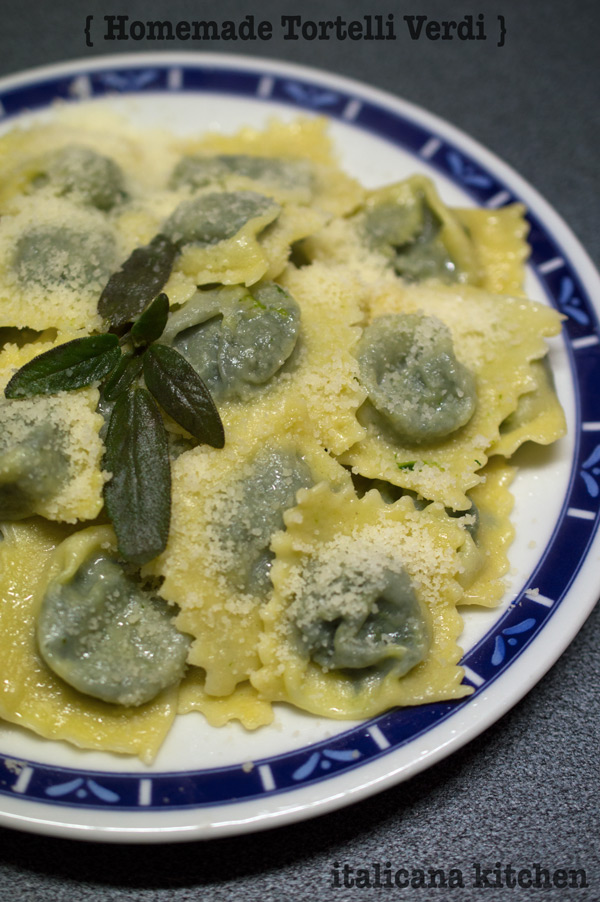
Each region in Italy has its own delicious and distinct cuisine. Liguria is known for its basil pesto and focaccia, Tuscany for it’s ribollito soup and florentine steak, and Emilia Romagna, the region where I live, boasts some of the most mouthwatering pasta dishes like lasagne, cappelletti and the renowned tortelli verdi.
My friend Elena was kind enough to share a tortelli verdi recipe with me that has been passed down in her family throughout the generations :: generazioni. Elena, like many Italian women, learned how to cook at a young age and spent countless hours in the kitchen with her grandmother and mother learning how to make traditional recipes by hand. It comes as no surprise that cooking has turned into one of her biggest passions and throughout the years she completed an advanced program at a school for chefs and has taken two professional courses (butcher and bread making) as well as participated in numerous cooking classes to satiate her culinary curiosity.
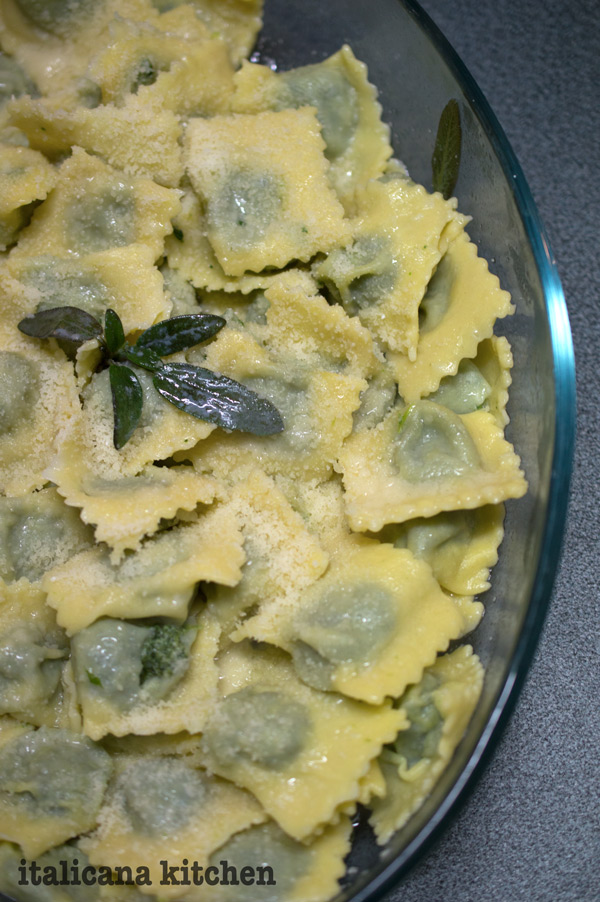
Tortelli verdi dates back to Medieval times and was a typical dish served by farmers :: contadini on the holidays (typically on Christmas Eve) while in modern times this exquisite dish is enjoyed all year round. While there are many variations to this classic dish, this particular recipe calls for egg pasta dough filled with spinach that is then formed into small squares and topped with sage infused butter.
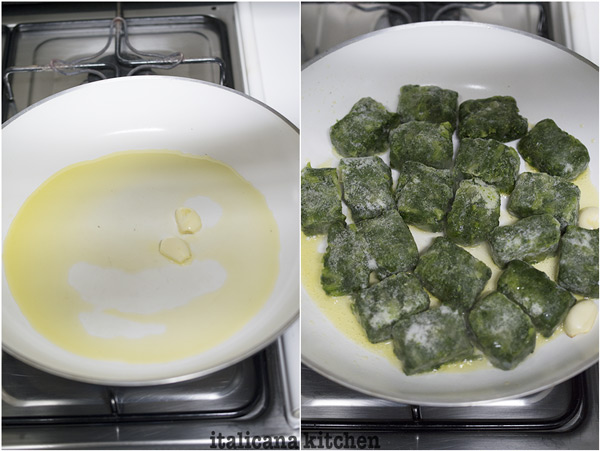
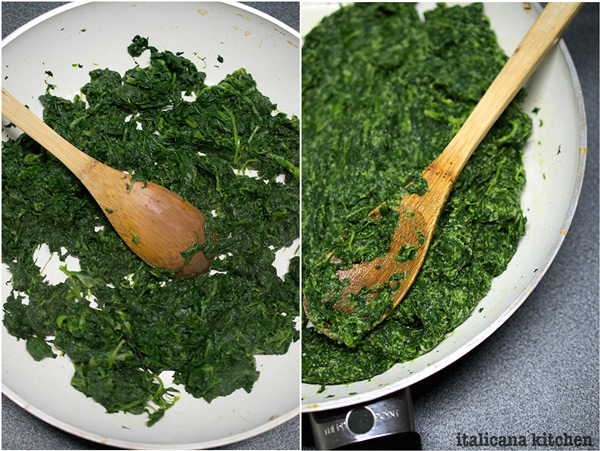
To begin, heat two tablespoons of extra virgin olive oil over medium heat in a large skillet then add two cloves of smashed garlic and cook for two minutes. Next add 450g of organic frozen spinach and one organic vegetable bouillon, cover and cook for 10-15 minutes then remove the lid and continue cooking until the spinach is dry.
Remove the skillet from the heat and cool. Discard the garlic and add 1 cup of grated parmigiano reggiano cheese and 3 tablespoons of dried bread crumbs. Stir well. To test if the filling has the right consistency :: consistenza, try to form a small ball. If it holds its shape, it’s ready; if it is too soft, simply add more grated parmigiano reggiano cheese and breadcrumbs until you are able to form a ball.
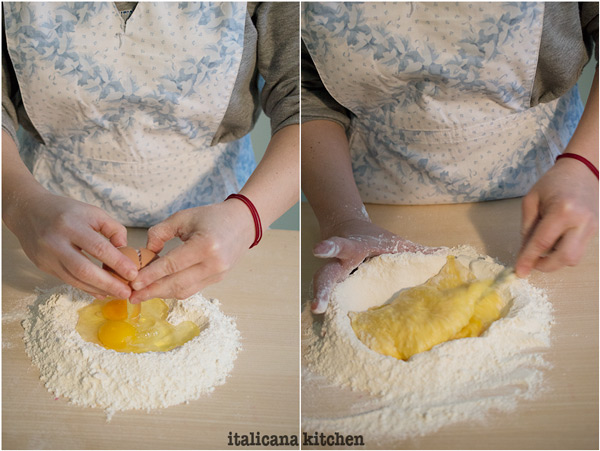
Now it’s time to make the pasta dough :: la sfoglia. Place 400g of organic type 00 flour on a clean surface, make a well in the center and crack in 4 eggs. Using a knife or a fork gradually combine the flour and eggs until you have a reached a dough consistency. In Italy type 00 flour is readily found in all supermarkets but in other parts of the word it may be found at a high price in specialty stores. Although I haven’t tried this recipe with all-purpose flour, according to this article by The Kitchn blog, they’ve found that it is generally fine to substitute all purpose flour for type “00” flour; recipes will come out fine, you will just notice a texture difference if you grew up in Europe or are familiar with type “00” flour.
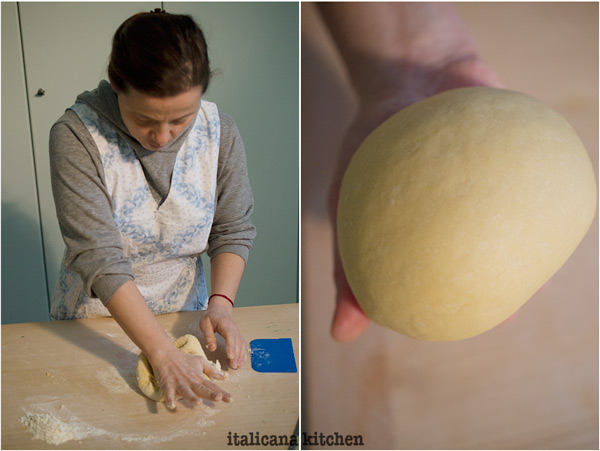
At this point knead :: impastare for 10 minutes then wrap the dough in plastic wrap and store in the refrigerator for 30 minutes. In the meantime, clean the counter in order to have space to roll out the dough.
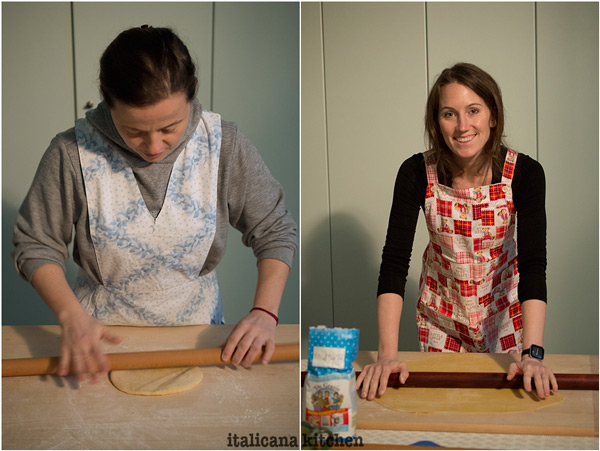
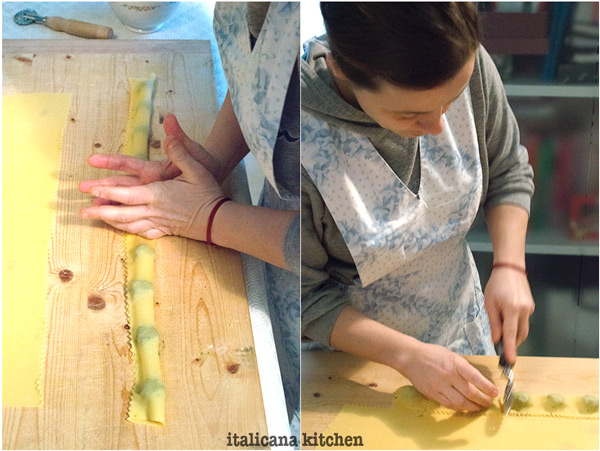
Divide the dough in two pieces, rewrap one of them and place in the refrigerator. Using a rolling pin :: un matterello, roll out the first piece of dough until it is as thin as a piece of paper. Work quickly because if the dough dries out when you make the tortelli the borders will not close well and the filling will leak outwhen the tortelli is being cooked.
Whereas a normal sized rolling pin is used in other regions in Italy, in Emilia Romagna a long rolling pin like you see in the photo is commonly utilized and passed down throughout the generations.
Using a frilled edge pastry cutter, cut a line at the bottom of the pastry sheet. Form little balls of spinach filling the size of small grapes :: le uva and position them in a line about 1/4 inch from the edge and 1/2 inch from one another. Fold the pasta sheet over the balls.
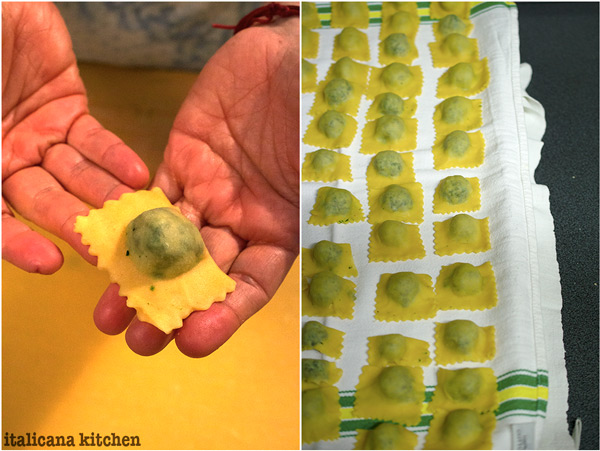
Cut the pasta sheet with the frilled edge pastry cutter where the overlapped edge touches the pasta sheet. Starting from the center, use your two pinkies :: mignoli to form a circle around each spinach ball and pat around it to seal, this also will allow the air to come out. Utilizing the frilled edge pastry, cut a line between each ball then with your fingers press down on all of the edges to make sure that the square pasta is completely sealed.
At this point :: a questo punto the tortelli verdi are ready to be cooked or conserved in the refrigerator (for a few hours) or in the freezer (for a few months).
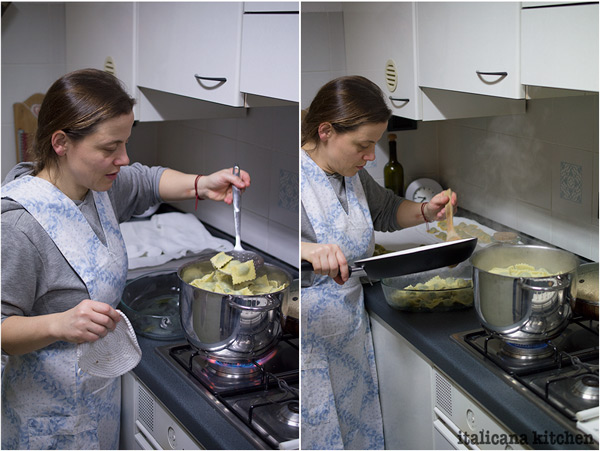
When you are ready to cook your tortelli verdi, bring a pot of water to boil, add salt and the tortelli verdi and cook for roughly 4-5 minutes. In the mean time, melt two tablespoons butter with 5 sage :: salvia leaves in a skillet. Drain the tortelli verdi, add them to the skillet and coat with butter paying attention to not break them while stirring. Serve immediately with grated parmigiano reggiano cheese.
Advice from Elena :: Consigli di Elena:
If you want the tortelli verdi to be more flavorful, substitute the extra virgin olive oil for lard or chopped pancetta.
If the spinach filling seems too salty, don’t add salt to the water before cooking the tortelli verdi.
If you want more delicate tasting tortelli verdi, add 160g of fresh ricotta to the filling and 4 additional tablespoons of breadcrumbs.
To conserve the tortelli verdi in the freezer, put them side by side on a paper tray and place them in the freezer until they are frozen. After which you can transfer them to a freezer proof plastic bag and replace them in the freezer.
Each region in Italy has its own delicious and distinct cuisine. Emilia Romagna, boasts some of the most mouthwatering pasta dishes like lasagne, cappelletti and these renowned homemade tortelli verdi.
3⅛ cup (400g) organic type “00” flour or all-purpose flour
For the sauce:
2 tablespoons (25g) butter
5 sage leaves
Instructions
For the filling:
Heat the extra virgin olive oil over medium heat in a large skillet then add the garlic and cook for two minutes. Next add the organic frozen spinach and one organic vegetable bouillon, cover and cook for 10-15 minutes then remove the lid and continue cooking until the spinach is dry.
Remove the skillet from the heat and cool. Discard the garlic and add the grated parmigiano reggiano cheese and dried bread crumbs. Stir well. To test if the filling has the right consistency, try to form a small ball. If it holds its shape, it's ready; if it is too soft, simply add more grated parmigiano reggiano cheese and breadcrumbs until you are able to form a ball.
For the dough:
Place the organic type 00 flour on a clean surface, make a well in the center and crack in the eggs. Using a knife or a fork gradually combine the flour and eggs until you have a reached a dough consistency.
Knead the dough for 10 minutes then wrap it in plastic wrap and store in the refrigerator for 30 minutes. In the meantime, clean the counter in order to have space to roll out the dough.
Divide the dough in two pieces, rewrap one of them and place in the refrigerator. Using a rolling pin, roll out the first piece of dough until it is as thin as a piece of paper. Work quickly because if the dough dries out when you make the tortelli the borders will not close well and the filling will leak out
when the tortelli is being cooked.
Using a frilled edge pastry cutter, cut a line at the bottom of the pastry sheet. Form little balls of spinach filling the size of small grapes and position them in a line about ¼ inch from the edge and ½ inch from one another. Fold the pasta sheet over the balls.
Cut the pasta sheet with the frilled edge pastry cutter where the overlapped edge touches the pasta sheet. Starting from the center, use your two pinkies to form a circle around each spinach ball and pat around it to seal, this also will allow the air to come out. Utilizing the frilled edge pastry, cut a line between each ball then with your fingers press down on all of the edges to make sure that the square pasta is completely sealed. Take the second ball of dough out of the refrigerator and repeat the process.
At this point the tortelli verdi are ready to be cooked or conserved in the refrigerator (for a few hours) or in the freezer (for a few months).
When you are ready to cook your tortelli verdi, bring a pot of water to boil, add salt and the tortelli verdi and cook for roughly 4-5 minutes. In the mean time, melt two tablespoons butter with 5 sage leaves in a skillet. Drain the tortelli verdi, add them to the skillet and coat with butter paying attention to not break them while stirring. Serve immediately with grated parmigiano reggiano cheese. Buon appetito!
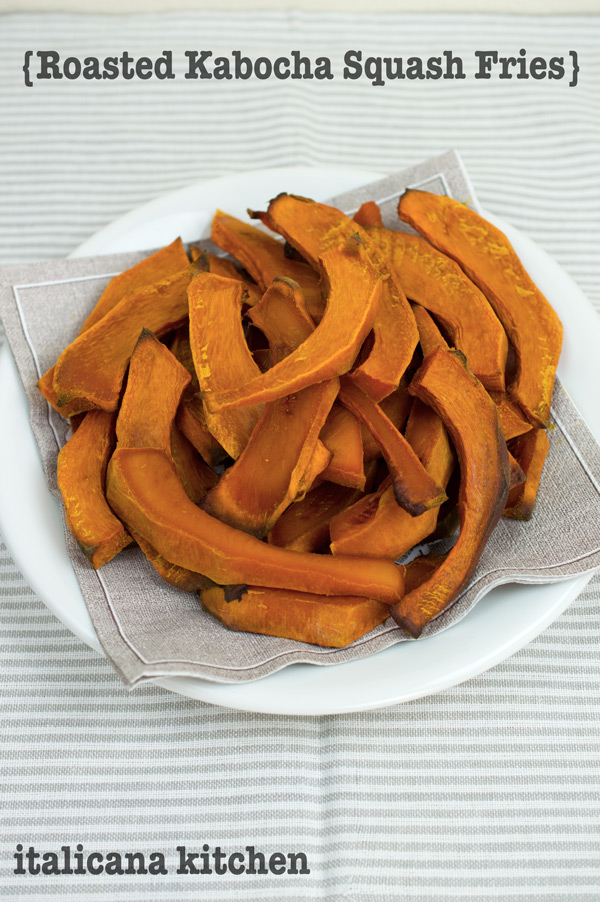
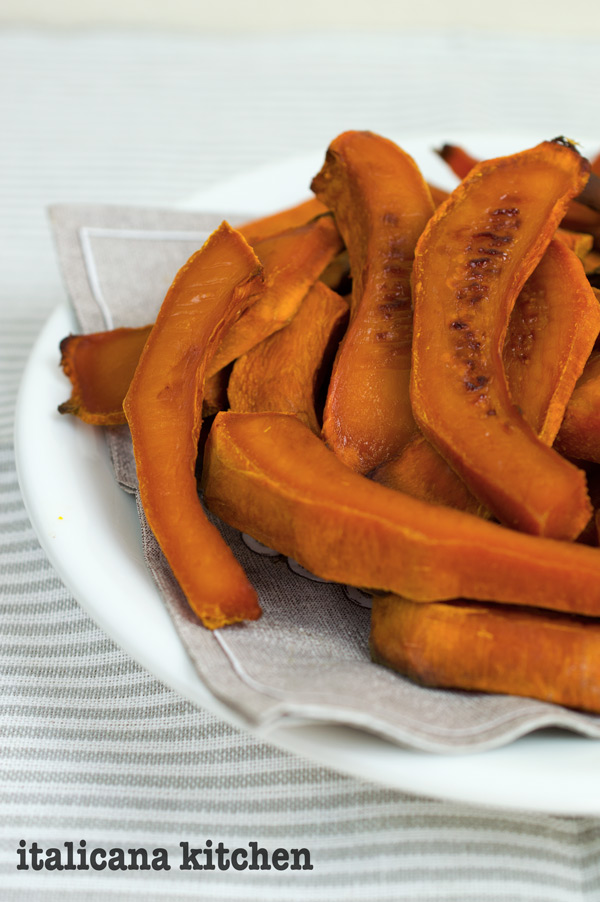
From autumn to spring pumpkins and squashes appear in many traditional Italian dishes. One of my favorites is this recipe for roasted kabocha squash fries.
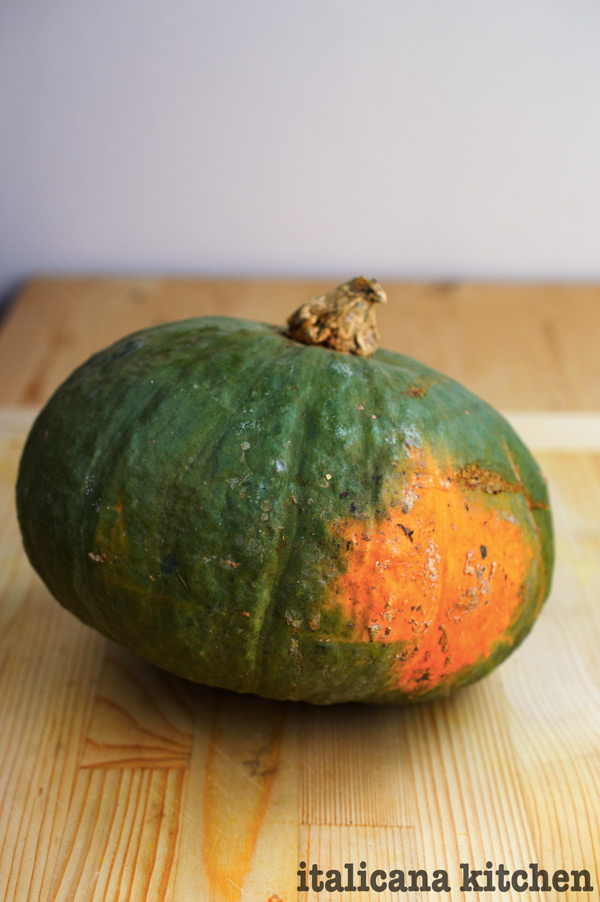
My new Italian aunt :: zia, Anna Rita, shared this recipe with me. Would you believe me that it only calls for one ingredient? Well, it’s true. All that is needed for this delicious side dish is a ripe kabocha squash. In Italian, there is no linguistic difference between pumpkin and squash and therefore you will find that all varieties (at least to my knowledge) are called zucca :: pumpkin. In the U.S., however, pumpkins are considered a type of squash but not all squash are a type of pumpkin; it’s like saying a Golden Retriever is a dog but not all dogs are Golden Retrievers.
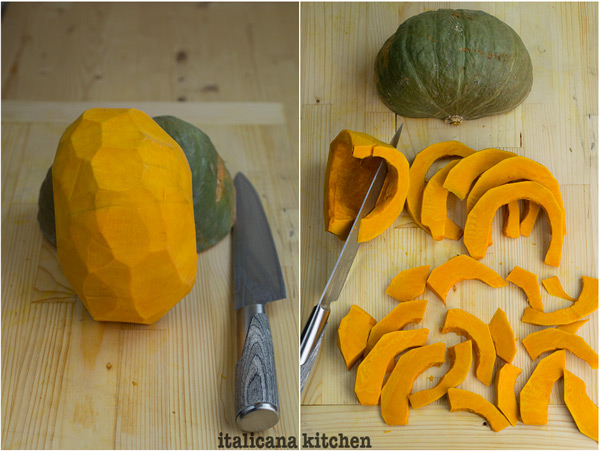
To prepare this recipe, simple cut the squash in half :: a metà. Scoop out the seeds and carefully remove the rind with a sharp knife. Next slice the peeled squash and cut the moon shaped crescents in half. The thickness of the slices depends on personal taste. Mr. Italicano likes thin slices so they are more crunchy whereas I prefer them thicker so they are dense.
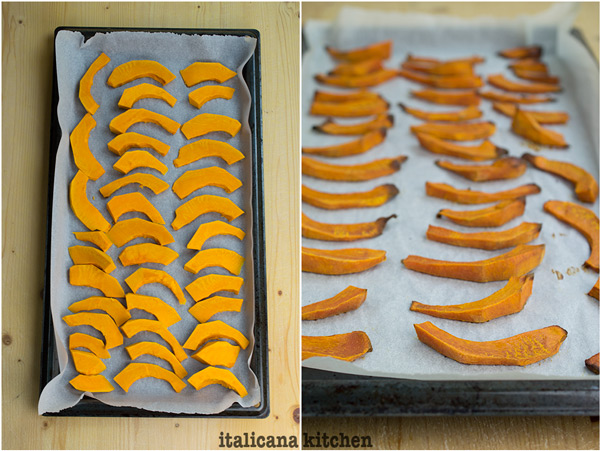
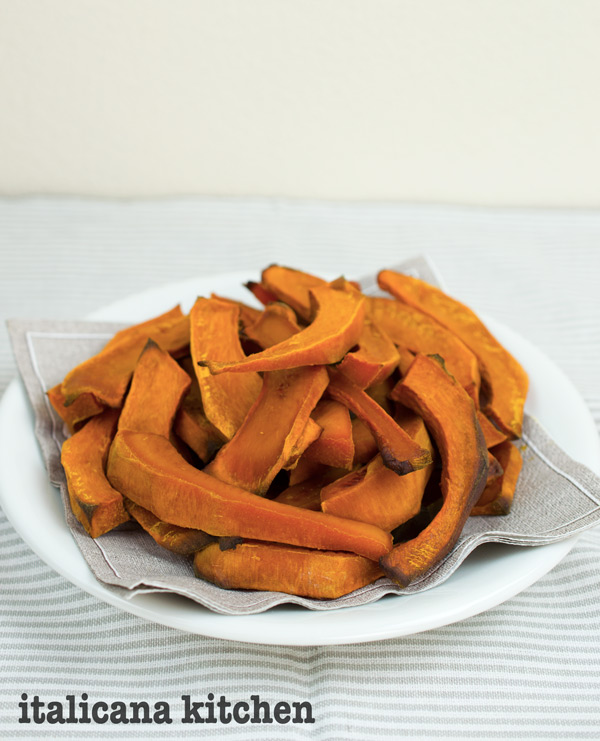
Distribute the pieces on a baking sheet lined with wax paper and bake at (170°C) for 40-60 minutes or until the squash has a deep orange roasted color. The time will vary every time depending on how you sliced them, so just keep an eye on them every 10 minutes. There is no need to flip :: girare the pieces, simply turn down the heat if the edges start to burn. For the roasted squash fries you see in the photo, I’ve baked them for 60 minutes and they were thickly cut.
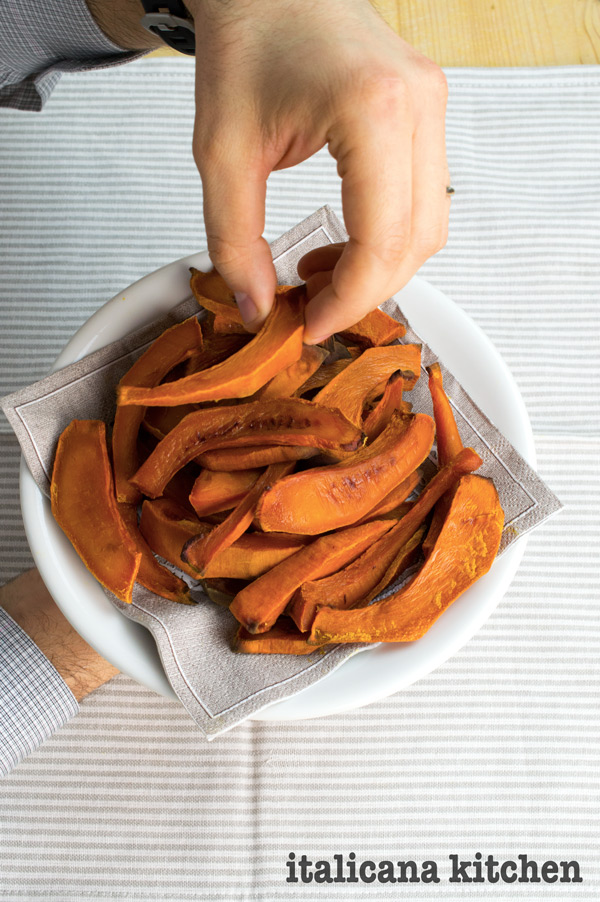
These roasted squash fries are madly addicting. Good thing they are 100% natural and are great for you. Pumpkins and squash are low-calorie and rich in vitamin A, C, beta-carotene and anti-oxidants.They are also kid-friendly and are the perfect healthy alternative to french fries :: patatine fritte. I love to eat them plain but you can also serve them with a healthy greek yogurt sauceif you like to dip your fries.
I live close to Mantova, a small town in Italy known for its annual pumpkin festival. Here there are lively markets and pumpkin/squash themed dinners that feature delicious recipes like tortelli di zucca :: pumpkin tortelli, risotto di zucca :: pumpkin risotto or gnocchi di zucca :: pumpkin gnocchi, just to name a few. My mouth is already watering.
Unlike classic potato fries, this is a side dish that can be served cold :: freddo. In fact, I usually make these ahead of time so it frees up the oven for other dishes that I need to prepare.
I have yet to try these fries with a different kind of pumpkin; if you do, please leave a comment below on how they turn out. The kabocha variety, also known as the Japanese pumpkin, is one of the sweetest (even more so than butternut) so there is no need for any olive oil or salt :: sale. Simply by roasting the pumpkin you are able to achieve a heavenly burst of flavor. Try these with a gourmet grilled cheese sandwich.
From autumn to spring pumpkins and squashes appear in many traditional Italian dishes. One of my favorite recipes is this roasted kabocha squash fries.
Serves: 2
Ingredients
1 kabocha squash
Instructions
Preheat the oven to 340°F (170°C).
Cut the squash in half. Scoop out the seeds and carefully remove the rind with a sharp knife.
Slice the peeled squash, cut the moon shaped crescents in half and distribute on a baking sheet lined with wax paper. The thickness of the slices depends on personal taste and will affect the baking time.
Bake for about 30-40 minutes for thinly sliced fries and about 60 minutes for thickly sliced. Check every 10 minutes to make sure that the fries are not burning; turn down the heat if needed. The fries are done when they have a deep roasted orange color. No need to flip or rotate the fries while baking.
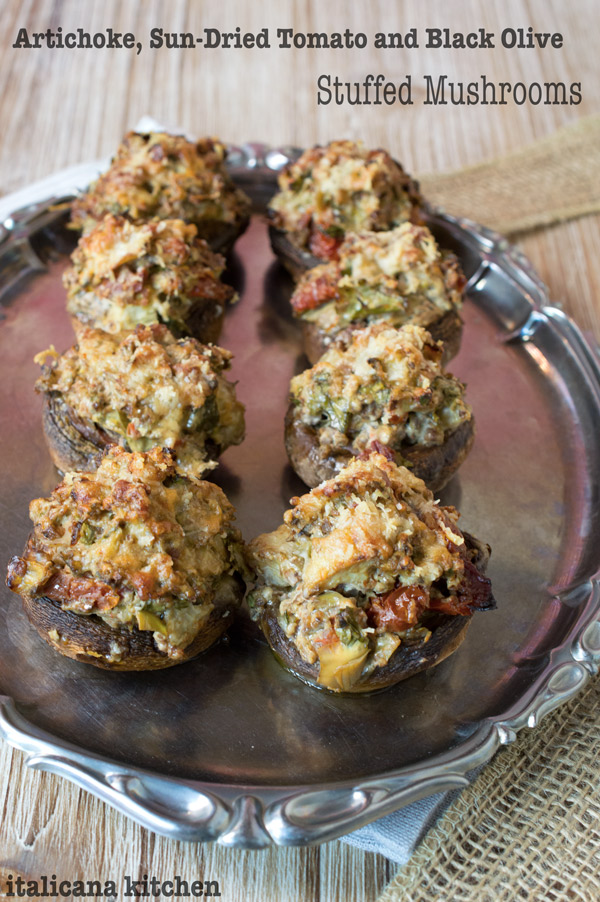
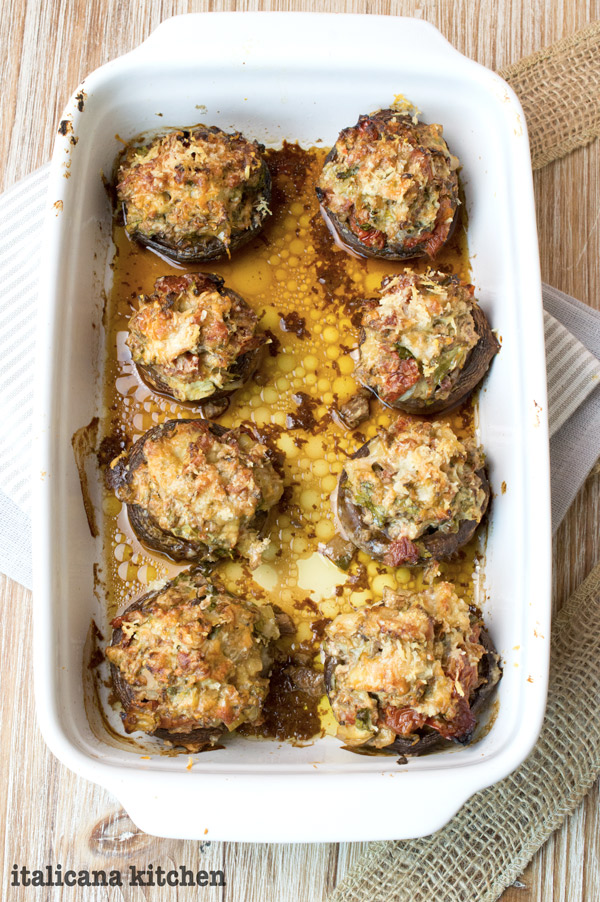
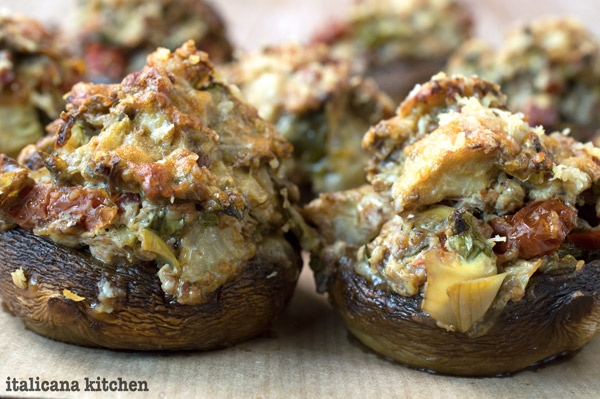
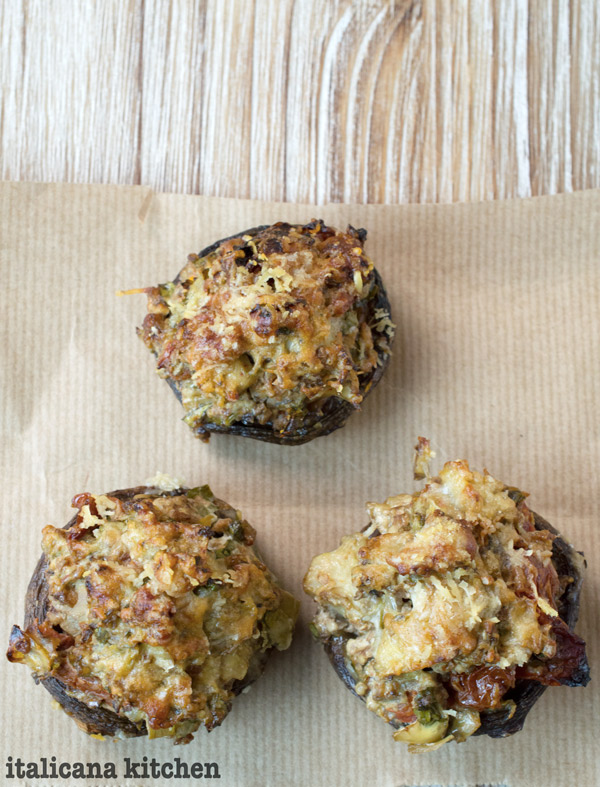
Stuffed mushrooms are the perfect solution when you want an elegant appetizer that is easy and quick to prepare.
I have a weird dinner party obsession: I need to make a 5 course meal when entertaining. I have this sinking guilty feeling that I am a horrible host if I don’t at least offer an appetizer, main dish, two sides and dessert. I’m sure my guests would be just as content with a pizza or a plate of spaghetti, but I just can’t get myself to be a minimalist cook :: cuoca. Not bad when you only have a few guests, but it gets a bit challenging when you try to pull it off with 10-15 people. Plus, a stressed out and irritable host dressed in a saffron cream sauce stained shirt is no fun.
Having spent many hours trying to cook up complex dinner party menus, I am finally getting a bit wiser (about time). Instead of 5 difficult and time consuming dishes :: piatti I now opt for four simple recipes and one that is a bit more adventurous in order to keep my sanity. I know…not brain surgery. However, if you’re like me when you have guests, you want to impress them with lavish dishes that have a killer presentation and you therefore think that you need to cook complex recipes.
And, now to add to this list are these stuffed mushrooms :: funghi ripieni. They are quick and effortless to prepare and frankly anything stuffed just looks gourmet. What are your favorite no-hassle, stylin party recipes?
Artichoke, Sun-Dried Tomato and Black Olive Stuffed Mushrooms
Stuffed mushrooms are the perfect solution when you want an elegant appetizer that is easy and quick to prepare.
Serves: 3-5
Ingredients
10 button mushrooms
½ cup (125g) light cream cheese
½ cup (90g) chopped sun-dried tomatoes in oil
½ cup (150g) chopped artichokes in oil
½ cup (50g) breadcrumbs
½ cup (56g) chopped black olives
Instructions
Preheat the oven to 375°F (190°C)
Clean the mushrooms well and carefully break of the stems.
Chop the stems in small pieces and place in a small bowl. Add the light cream cheese, sun-dried tomatoes, artichokes, breadcrumbs and black olives. Mix well.
Place the mushroom caps in a casserole dish and distribute the mixture among them.
Bake for 45-60 minutes or until the mushrooms are soft.
Notes
Note: I often bake the mushrooms earlier in the day then right before the dinner party, pop them back into the oven until reheated.
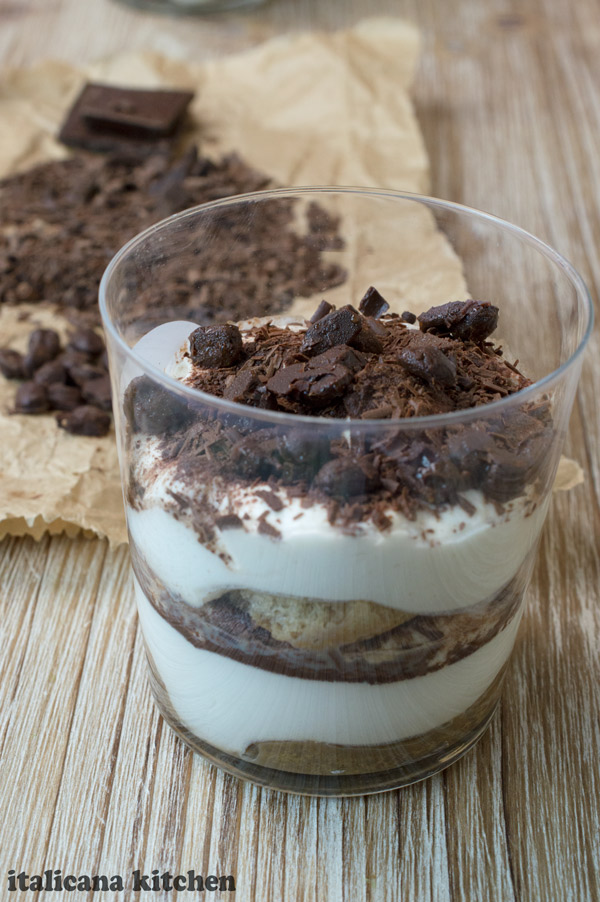
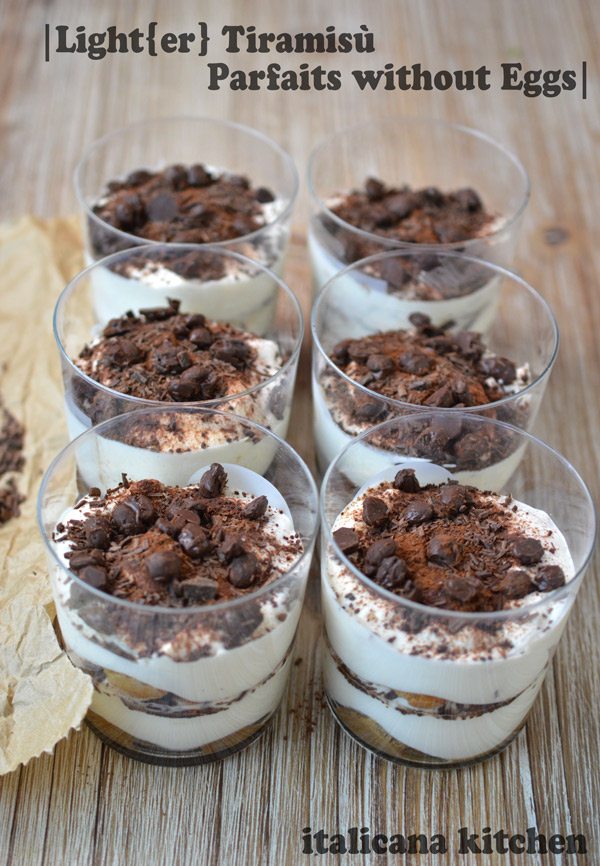
This lighter version of the classic Italian tiramisù is perfect for those who want all the delicious taste and less of the calories.
I’ve been wanting to make Tiramisù for over a month now, ever since I had spent the day at SIGEP, an international tradeshow for the artisan production of gelato, pastry, confectionery and bakery sectors. Upon returning home, I had a cravings to showcase a delicious Italian dessert on my blog, but which one? There are so many to choose from. Luckily for me, at the tradeshow I met Enrico Maltoni and Mauro Carli, the authors of the extraordinary book, Coffee Makers. While flipping through this bilingual coffee machine encyclopedia with over 2,700 images and 2,080 technical descriptions, I knew one thing :: una cosa: the recipe needed to contain Italian espresso. The decision to make Tiramisù, was thusly inevitable.
I didn’t want to make the classic recipe with raw eggs :: uova; ask Mr. Italicana I have quite a Salmonella phobia. I also wanted to cut down on some of the fat so I subsequently reduced the amount of sugar, and used half ricotta half mascarpone for the creamy texture (the traditional recipe calls for just mascarpone).
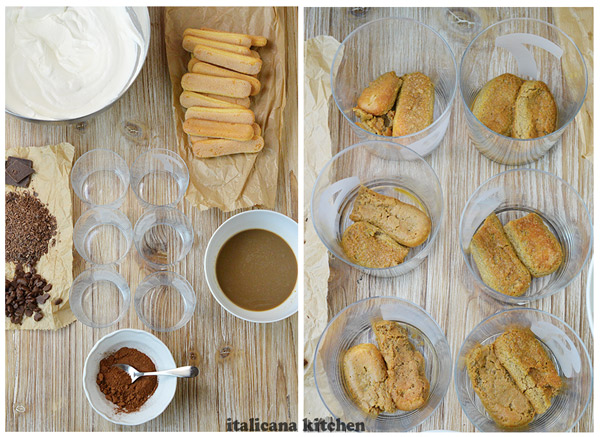
After you have all the ingredients prepared, the assembly begins by dipping the lady fingers in the espresso. I added a bit :: un po’ of bailey’s creme caramel but if you want a stronger coffee flavor you can skip.
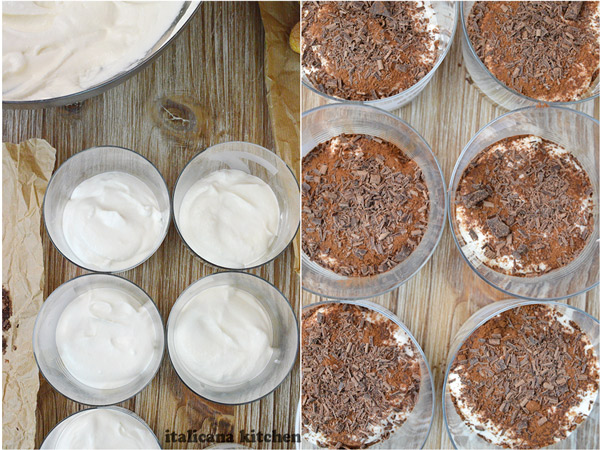
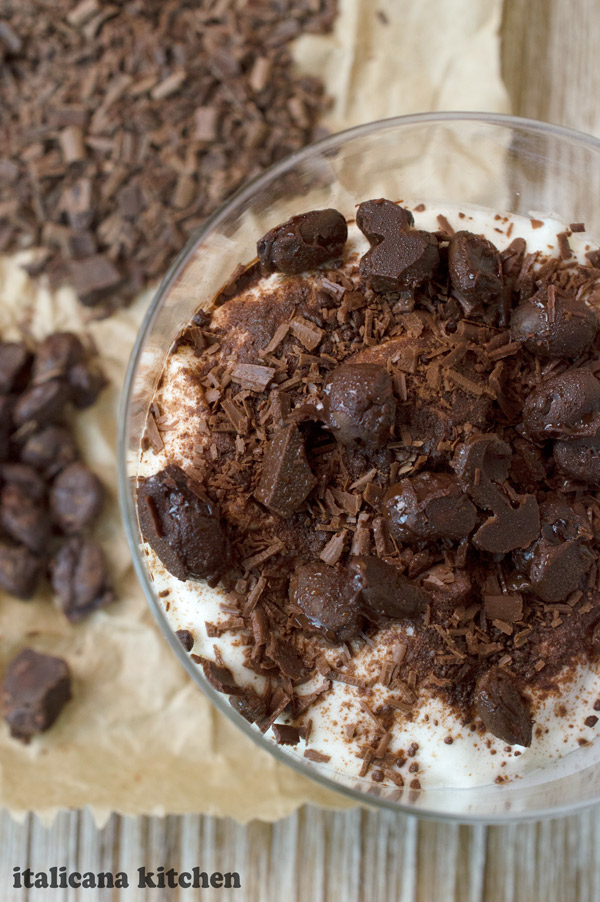
Next, pile on some of the whipped cream, ricotta and mascarpone mixture and top with unsweetened cocao :: cacao amaro and salted dark chocolate shavings.
Then repeat the steps and finish off your masterpiece with a small handful of espresso beans covered in creamy dark chocolate :: cioccolato fondente.
The work :: lavoro is finished and all that is left to do is pop the parfaits in the fridge.
A special thanks to Enrico and Mauro for the delicious inspiration and for the gorgeous and informative coffee table book. If you are passionate about the history :: la storia of coffee or know someone who is, then I definitely recommend picking up a copy as it is packed with thousands of photographs, patents, manuals, operating diagrams and technical captions. You can check out their website for local dealers and for information on upcoming temporary exhibitions that will display some of the rarest coffee makers in the world.
This lighter version of the classic Italian tiramisù is perfect for those who want all the delicious taste and less of the calories.
Serves: 6
Ingredients
For the dark chocolate covered coffee beans (optional):
1 ounce dark chocolate
¼ cup dark roasted coffee beans
For the tiramisù:
1 cup prepared espresso coffee
200g Savoiardi or Pavesini (Lady Fingers), about 12
4 tablespoons Bailey’s Creme Caramel, divided
1 cup (250ml) heavy whipping cream
1 cup (250g) mascarpone cheese
1 cup (250g) ricotta cheese
⅓ cup (70g) sugar
½ cup (50g) shaved sea salt dark chocolate
Unsweetened cacao, as needed
Salted dark chocolate, shaved
Dark chocolate covered coffee beans
Instructions
For the dark chocolate covered coffee beans (optional):
Use a double broiler or find a small and a medium sized pot. Fill the medium sized pot with water and bring to a simmer. Add the dark chocolate to the smaller pot and set it over the medium sized pot, stirring the chocolate with a spatula as it melts.
Remove from heat, add the coffee beans and stir until completely coated. Spread out the coffee beans on wax paper until dried.
For the tiramisù:
Prepare 1 cup of expresso and set aside.
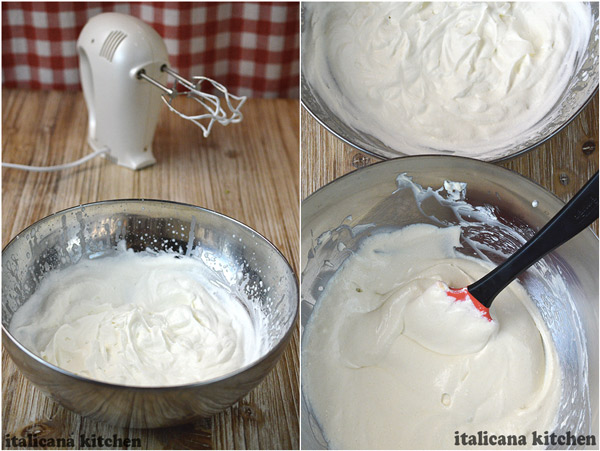
With an electric hand mixer, beat the heavy whipping cream until stiff peaks form.
In a separate large bowl, combine mascarpone, ricotta, sugar and 2 tablespoons Bailey’s Creme Caramel.
Fold the whipped cream mixture into the mascarpone mixture.
Add 2 tablespoons Bailey’s Creme Caramel to the cooled espresso.
Arrange your working station so you have 6 glass cups.
Break the Saviordo cookie in half, dip the two pieces in the espresso and gently line the bottom of one glass. Repeat for the other five glasses.
Add a layer of the mascarpone cheese mixture to each glass and even it out. Sprinkle a layer of cacao on top followed by a layer of shaved salted dark chocolate.
Repeat with the lady fingers dipped in coffee. Divide the rest of the whipped cream, ricotta and mascarpone cheese mixture among the glasses, followed by a layer of cocao, shaved chocolate and top it off with chocolate covered coffee beans, if desired.
Cover each glass with plastic wrap and refrigerate for at least 6 hours or overnight.
Remove from the refrigerator 20 minutes before serving. Buon appetito!
Notes
The reason that the total time is 6 hour and 30 minutes is that the tiramisù needs to be refrigerated for at least 6 hours before consumption.