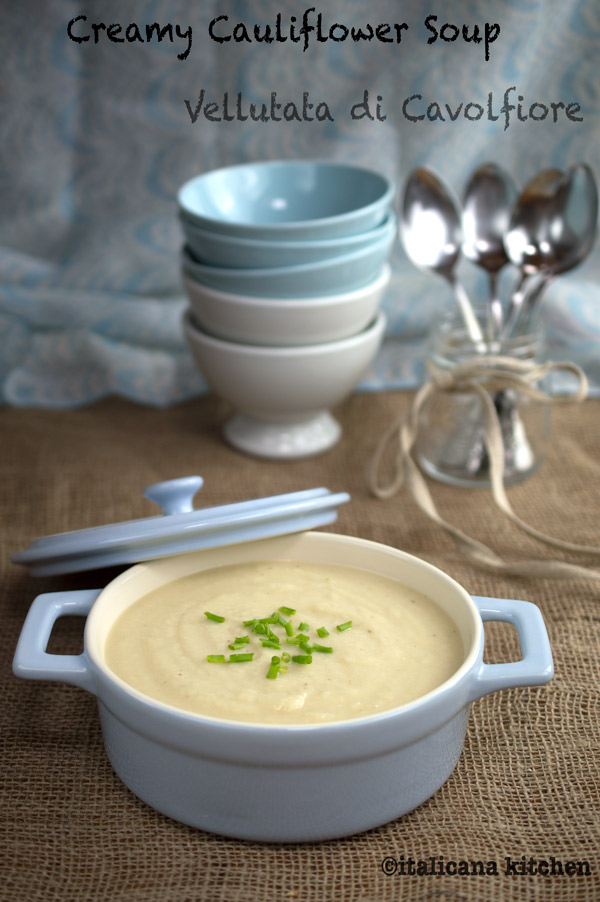
I made this creamy cauliflower soup :: vellutata di cavolfiore on a rainy cold day when a few of my Italian girlfriends came over for dinner. I think I’ve been away from Seattle too long as I am no longer acclimated to the incessant days of rain, where even in the most dreadful weather I would have still gotten dressed up in heels and headed out for a night on the town. Or, maybe I’m just getting old? The thought of heels, rain, traffic and parking is just too much effort. I would rather swap any such evening for the comfort of my home passed with good friends where a little jazz plays through the speakers, good food is on the table and my wine glass is full.
This creamy cauliflower soup has a delicate flavor, which was perfect for my friend Cecilia’s four year old daughter and one year old twins who went back for seconds. For adult taste buds, this soup is perfect paired with something bold like garlic and parmesan bread or a swiss chard ::bietole, fontina, avocado and whipped lentil grilled sandwich.
Since autumn :: l’autunno and winter :: l’inverno seem to last for ever, you’ll have plenty of time to experiment with more than one cauliflower soup. Here are some interesting versions of cauliflower soup by other food bloggers around the web:
Tasse D’Amour: The addition of cashews is interesting and probably gives the soup a delightful creaminess. I also like the chopped kale, roasted almonds and pumpkin seed topping that adds in nutrition and crunch to the creamy soup.
Kitchen Sanctuary: This is the recipe that my soup was adapted from. I think it is a great basic recipe on its own or for more curious cooks, a great starter recipe to build off of. I italianized my version by using Parmigiano Reggiano cheese in place of cheddar and added potatoes to give it more depth in texture.
All Spice and Nutmeg: This recipe has white beans in place of cream to get the silky consistency. What a great idea to cut down on calories. I will definitely keep white beans in mind for my next soup.
Right now it’s another cold, rainy :: piovoso and foggy day in Italy. If it weren’t for the cobblestone streets and bright colored houses surrounding me, I would think I was in Seattle. Maybe it’s mother nature trying to toughen me up so I get used to putting on those heels again and going out despite the bad weather; or maybe, it’s her way of telling me to make some warm soup and enjoy the coziness of home. I think I’ll choose the latter. And, you?
¼ teaspoon dried parsley or a handful of fresh parsley (optional)
Salt and freshly grated black pepper, to taste
Instructions
In a large pot, sautè the onion and garlic over medium-low heat in the extra virgin olive oil, until translucent but not brown; 4-5 minutes.
Add the cauliflower, potatoes, vegetable broth and ¼ teaspoon salt. Cover and bring to a boil. Reduce the heat and simmer until the cauliflower and potatoes can be pierced with a fork; about 10-15 minutes.
In a blender or with a handheld immersion mixer, purée the vegetables until smooth. Return to the pot, add the cream, Parmesan cheese and stir over high heat until the soup just begins to boil. Taste and adjust with salt and freshly grated black pepper.
Ladle into bowls and garnish with parsley, a dollop of Greek yogurt or drizzle of cream and chopped chives.
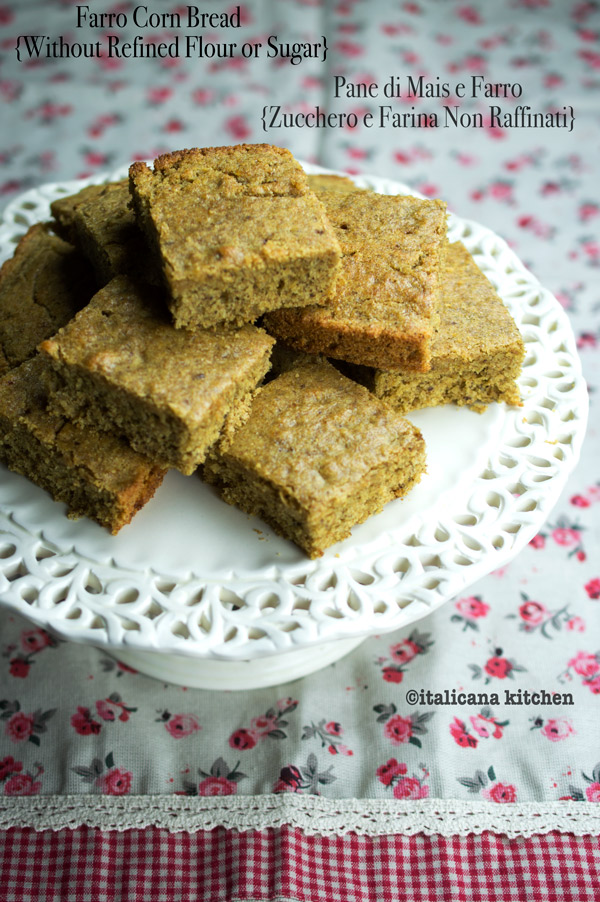
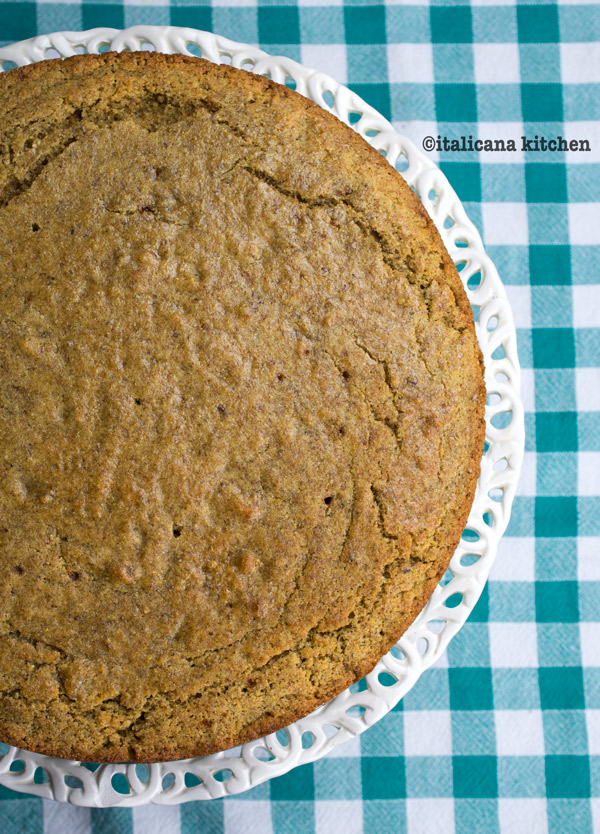
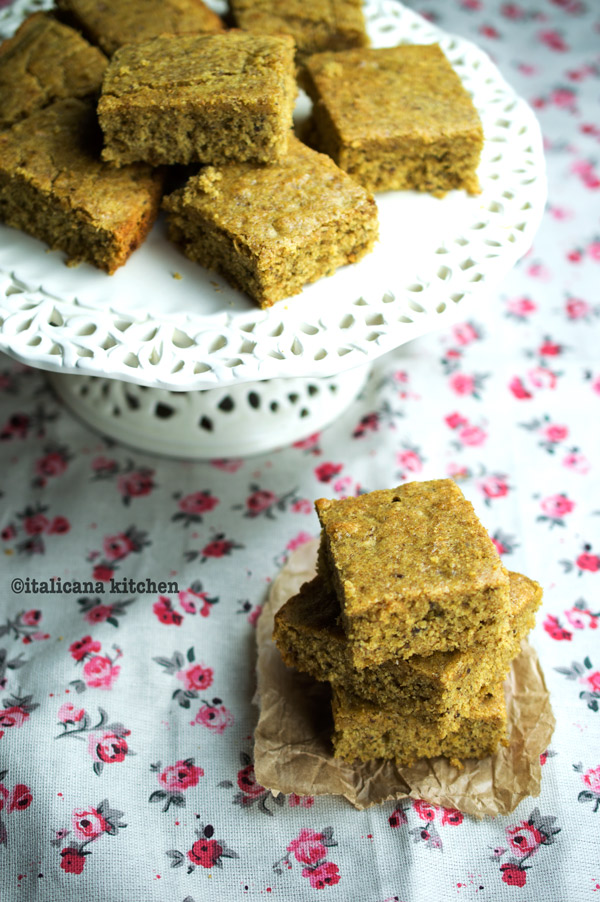
This farro cornbread is a healthier version of the classic recipe and is made without refined flour or sugar.
The thing I love about the holiday season is the food; the thing I hate about the holiday season is the highly caloric and fatty dishes that fill up the dinner table. I’m not against splurging occasionally for a special day, but holiday feasting isn’t just a one-day event. In America it kicks off on Thanksgiving :: giorno del ringraziamento and lasts through the 1st of January. There is over a month of holiday parties and happy hours with friends and family. There is over a month of eating and drinking way more than we normally would and eating way more unhealthy foods because we continue to tell ourselves that it’s a special occasion. Does this ring a bell? It does for me. This past year I’ve worked really hard on maintaining a healthy lifestyle and I don’t want to pick up the bad habits that I’ve worked so hard to kick.
I say bring on the holiday cheer by eating good healthy food that won’t leave you feeling guilty afterwards. And, why does healthy food :: cibo sano get such a bad wrap? There are so many ways that you can still get the same flavor in a classic dish but lighten it up by using healthier substitutions:
Baked goods: swap the oil and butter for apple sauce, bananas or prune purée.
Refined sugars: search for recipes that use all natural organic sweeteners like honey, maple syrup, molasses, agave etc.
Refined flours: look for recipes with ancient whole grains (farro,Khorasan Grano (kamut®, spelt etc.)
Sour cream and mayonnaise: use plain Greek yogurt. It has a similar taste and texture.
Not long ago I met a few American gals living nearby here in Italy and have been so kindly invited to their Thanksgiving party this Saturday. One of the recipes that I was asked to bring is cornbread. I found thiswhole grain skillet corn bread recipe from Martha Stewart that looked delicious and went about experimenting to make it even healthier and vegan friendly by cutting out the sugar, substituting flax seed + water for the egg and using a soy milk :: latte di soia. The result? A fluffy and delicous cornbread that you feel good about eating.
This farro cornbread is a healthier version of the classic recipe and is made without refined flour or sugar.
Serves: 8
Ingredients
1 slice lemon, squeezed
A little less than 1 cup soy milk
1 tablespoon (10g) ground flax seed
3 tablespoon hot water
¼ cup plus 1 tablespoon extra-virgin olive oil
1 cup (130g) medium grind cornmeal, preferably stone ground
1 cup (130g) farro flour
½ teaspoon (3g) baking soda
1 tablespoon baking powder
¾ teaspoon (6g) unrefined salt
Honey*, as needed (For a vegan version don’t include or you can brush with a little bit of maple syrup or molasses)
Instructions
Put a round 10-inch (26cm) pan or cast iron skillet in the oven and preheat 400°F (200°C).
In a 1 cup measuring cup, add the lemon juice then fill to the top with soy milk. Let sit for 2-3 minutes.
In a small bowl whisk together the ground flax seed, hot water and ¼ cup extra virgin olive oil.
In a medium bowl combine the cornmeal, farro, baking soda, baking powder and unrefined salt.
Add the soy and lemon mixture to the wet ingredients, stir well, then fold it all into the dry mixture and stir until just combined.
Add 1 tablespoon extra virgin olive oil to the preheated pan and swirl the pan around to evenly coat the bottom. Pour in the batter and smooth it out so it fills the entire pan. Bake for 16-20 minutes or until slightly golden brown and a toothpick comes out clean when poked in the center.
Brush lightly with honey, let cool, then cut into wedges.
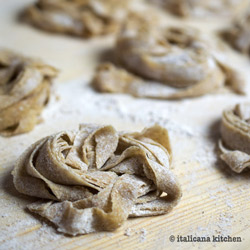
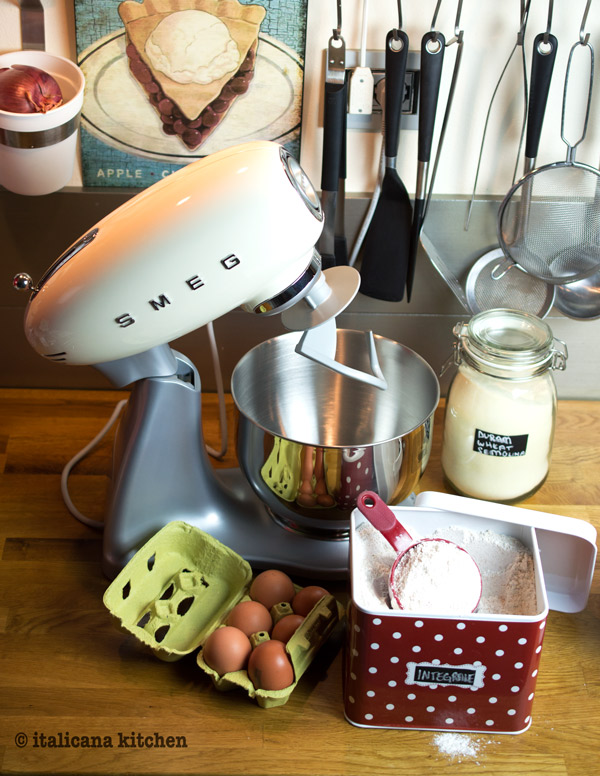
Tagliatelle is a traditional pasta from Emilia-Romagna, the region where I live. Tagliatelle is an egg pasta that resembles a long flat ribbon and is very similar to fettuccine, which are made in the same manner but are slightly wider in size. My mother-in-law Patrizia taught me how to make the traditional recipe by hand. (How lucky am I to have an Italian mother-in-law to pass down her secrets to me!) The traditional recipe is made with all-purpose flour or durum wheat semolina. I wanted to make a more nutritious pasta and therefore experimented 14 times (yes 14!) to find the right flours and amounts to create the perfect pasta that you can make entirely by hand or by using a stand still mixer. The winning flours that provided the perfect consistency were whole grain flour and durum wheat semolina.
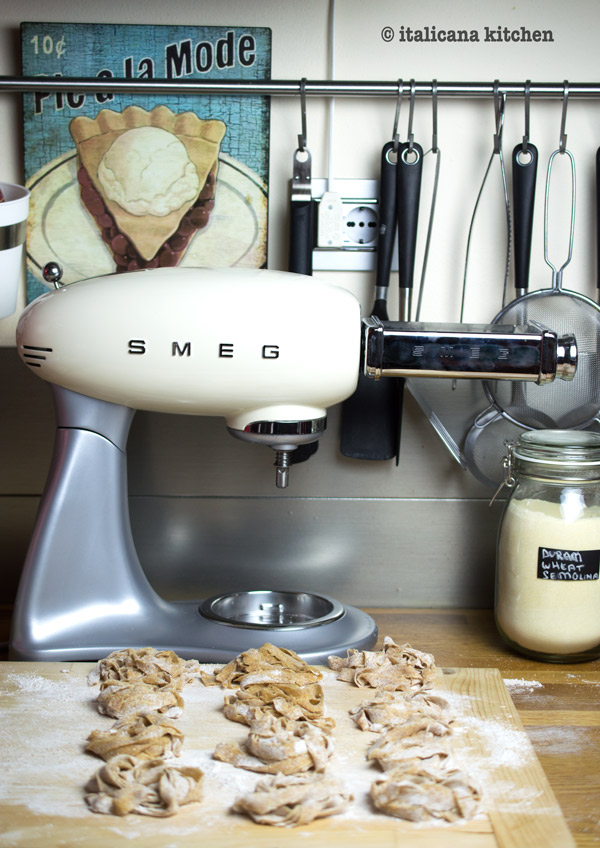
This Smeg stand mixer is the first one I have every used, and, I can honestly say that, I’m in love. I always thought that stand mixers were a big investment and took up a lot of countertop space; yet, that is so worth the trade off for efficiency in the kitchen. I am always in a race with time, and while this machine mixed my dough I was able to set up my work space, clean some dishes and take some pictures. Plus, I honestly don’t mind having this Smeg stand mixer on my countertops as the 1950’s design is absolutely gorgeous and adds an element of style to my kitchen.
After you have mixed up the ingredients, it is important to divide the dough into two balls, wrap them in plastic wrap and store in the refrigerator for at least 1/2 hour. Then divide the dough into four equal parts, pat them into a rectangle shape and flour them well.
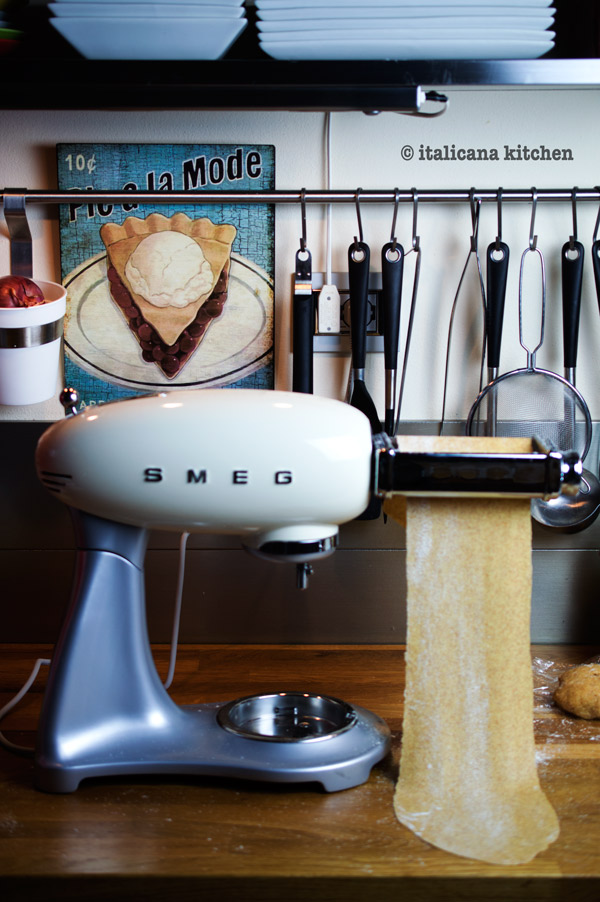
Flour the pasta roller accessory and run one piece of dough through it on setting 0 at speed 1 (the slowest.) Fold the dough over and pass it through again. Repeat another time. Continue to run the dough through the machine several times reducing the thickness from 0 to 5.
Repeat for all of the sheets of pasta, adding more flour each time to the pasta roller accessory.
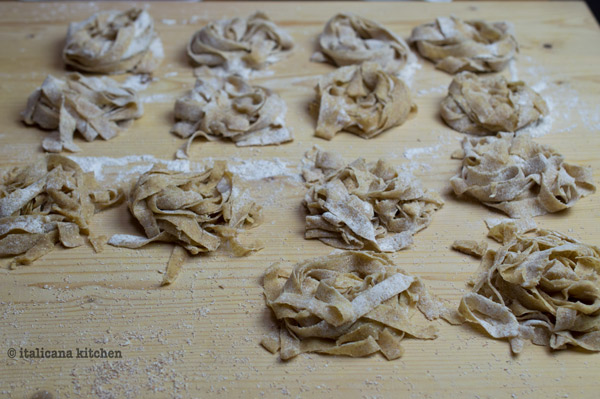
Generously flour a large wooden board and place the pasta sheets on top. Generously flour both top and bottom of the pasta sheets. If you don’t flour them enough, the pasta will stick to itself when rolled and will be impossible to unroll.
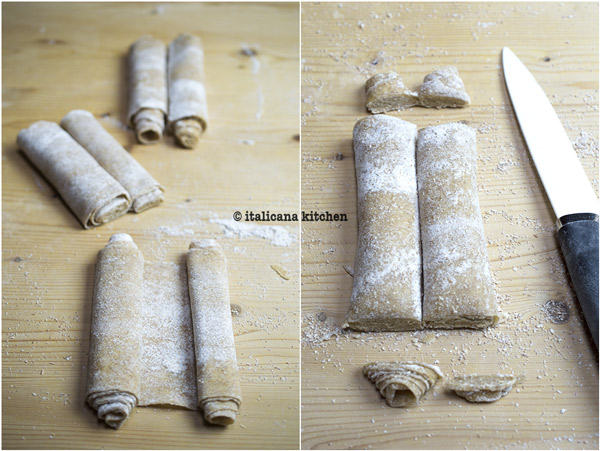
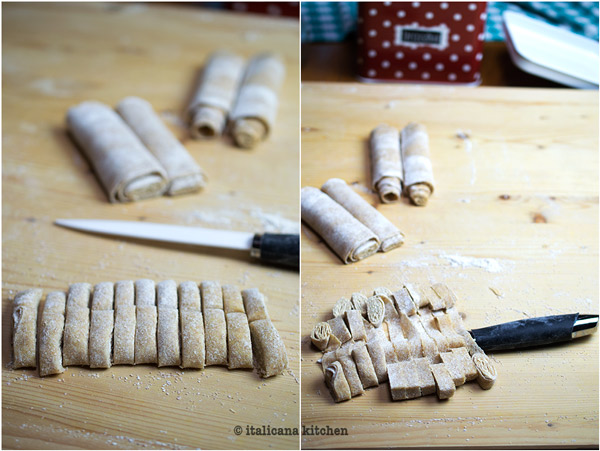
To easily unroll the tagliatelle ribbons, here is a little trick: instead of rolling the pasta sheet only to one side, roll both sides towards the middle, then even out the edges with a knife.
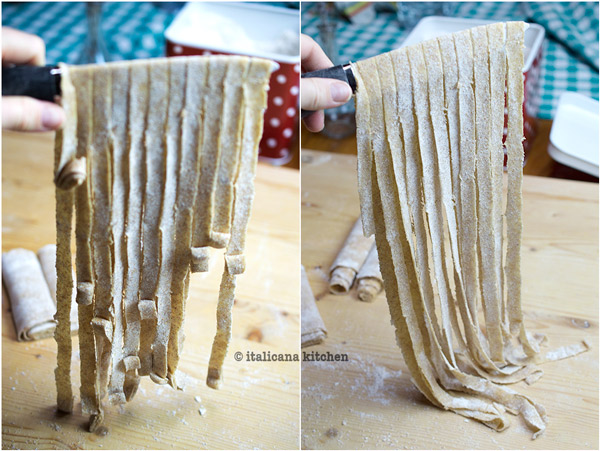
Slice the noodles so that they are 1/4 inch (10mm) and slide the knife under the pasta sheet.
Lift up with the sharp part of the knife pointing downwards so it doesn’t cut through the pasta sheet, and carefully unravel any pasta curls that didn’t automatically fall to the board.
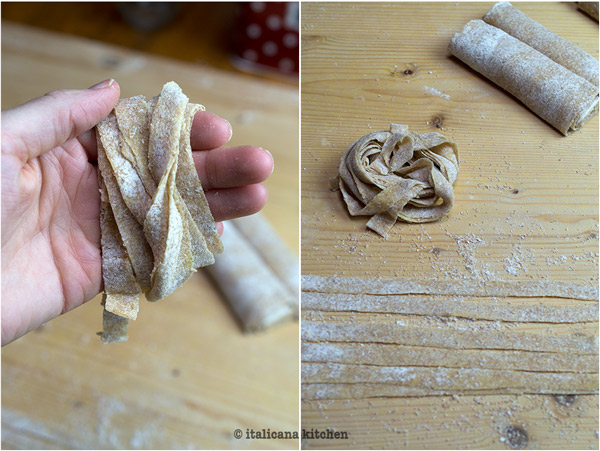
Lay out the pasta ribbons on the floured board. Take 3-4 ribbons in one hand and roll around your fingers as if you were rolling up a cord.
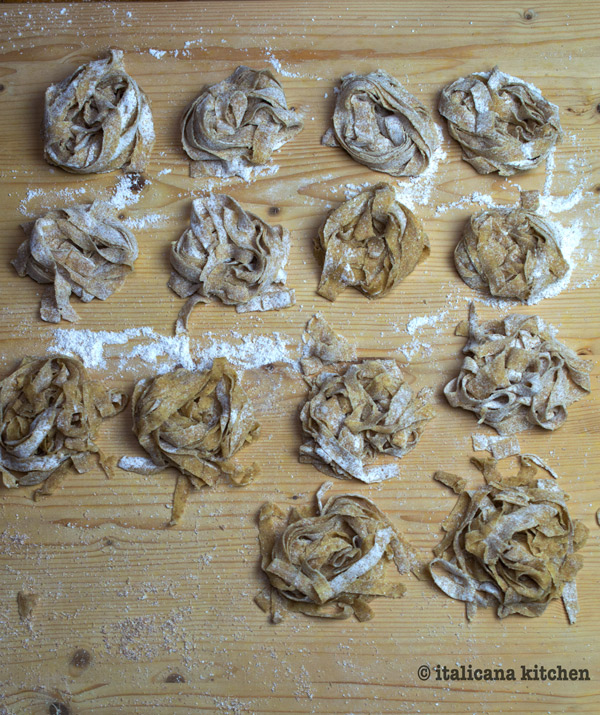
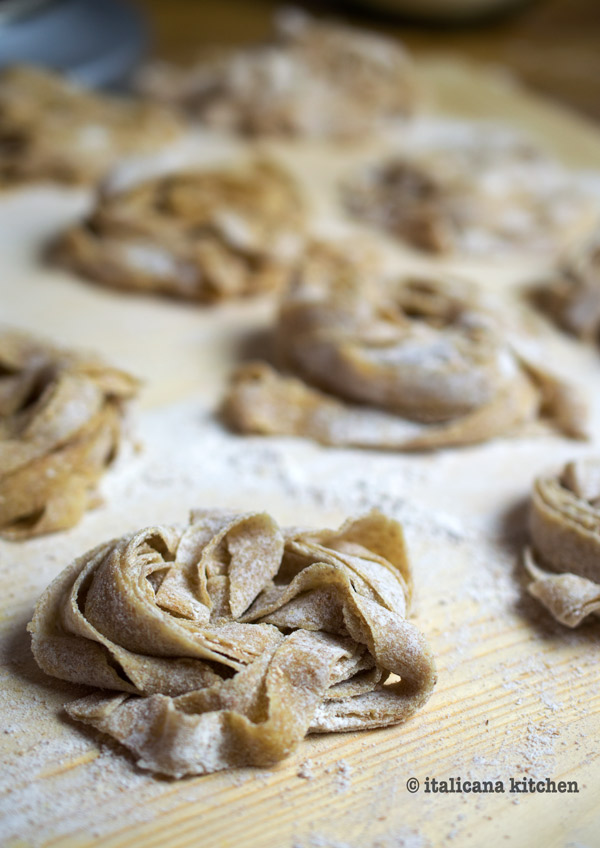
When all of the pasta has been loosely wrapped around your fingers, gently set it down on the floured board. These little clusters of pasta are called “nidi” in Italian, or “nests”, since they resemble bird nests. Repeat with the remaining dough.
It is usually recommended to allow fresh pasta to dry for a few hours before cooking; however, I couldn’t wait that long and tried cooking the pasta right after I made these and it turned out great.
The trick to a good Italian pasta is to generously salt the water after it is boiling; Mr. Italicano always notices if I forgot. This fresh tagliatelle only takes a few minutes to cook. I usually check after 2 minutes and every minute after until ready. The pasta should be “al dente” or slightly firm when bitten into.
The tagliatelle can be stored in the refrigerator for 1 day max, or you can freeze them. The best way to store them in the freezer is to put them on a cookie sheet so that they are not touching. Tuck them in the freezer until frozen, otherwise they will stick together, then you can place them in plastic bags, one on top of the other and take out the quantity you want as needed. Two little nests are 1 portion size.
Get a little taste of Italy without leaving your kitchen by making these handmade whole grain tagliatelle.
Serves: 4
Ingredients
1¾ cups (210g) whole grain flour
½ cup + 2 tablespoons (90g) durum wheat semolina
3 large eggs (2.2-2.4 ounces each)
2 pinches unrefined salt
1 tablespoon extra virgin olive oil
Instructions
Attach the dough hook to the stand mixer and add the flours, eggs, salt and extra virgin olive oil. Mix on speed 1 for five minutes. Stop the mixer and push against the dough with your finger. If it leaves an imprint (like a ripe peach) and doesn’t stick to your finger, it’s ready. If the dough, however, is sticky turn the stand mixer back on and gradually add a little more flour, stopping every so often to check the consistency until it no longer sticks to your finger.
If don’t have a stand mixer, follow the same procedure but knead by hand until the dough is homogenous, leaves an imprint when poked and isn’t sticky.
Divide the dough into two balls and wrap each one individually with some plastic wrap; place in the refrigerator for 30 minutes.
Attach the pasta roller accessory and sprinkle some flour on top. Divide each ball into two pieces (four pieces total), shape them into flat rectangles and flour generously on top and bottom. Pass one of the pieces through the machine on speed 1. Fold it back over on itself, and pass it through again. Repeat one more time before moving on to the next level of thickness. Pass the dough several times reducing the thickness from no. 0 to 5.
Generously flour a large wooden board and lay the pasta sheets on top as you roll them out.
If you are rolling out the dough with a rolling pin, it will be easier to divide the dough into two pieces and roll each one out on a generously floured wooden board. The dough should be rolled out thin enough that when you hold the dough up against a light you can see the light almost pass through.
Roll each side of the pasta sheet towards the center. Even off the ends with a knife but don’t throw away these scraps, you can stick them in the middle of the little pasta nests.
Slice the noodles so that they are ¼ inch (10mm) and slide the knife under the pasta sheet.
Lift up with the sharp part of the knife pointing down so it doesn’t cut through the pasta sheet, and carefully unravel any pasta curls that didn’t automatically fall to the board.
Lay out the pasta ribbons on a generously floured board. Take 3-4 ribbons in one hand and roll them around your fingers as if you were rolling up a cord.
When all of the pasta has been loosely wrapped around your fingers, gently set it down on the floured board. These little clusters of pasta are called “nidi” in Italian, or “nests”, since they resemble bird nests. Repeat with the remaining dough.
It is usually recommended to allow fresh pasta to dry for a few hours before cooking; however, I couldn’t wait that long and tried cooking the pasta right after I made these and it turned out great.
Bring a large pot of water to boil; add course salt then dump the tagliatelle inside. Cook for 2-3 minutes then check one to see if one is ready. The pasta should be “al dente” or slightly firm. If it is not ready, continue to cook for 1 minute and check again. Drain and serve with your sauce of choice and a big sprinkle of freshly grated Parmesan cheese.
Conservation
The tagliatelle can be stored in the refrigerator for 1 day max, or you can freeze them. The best way to store them in the freezer is to put them on a cookie sheet so that they are not touching. Tuck them in the freezer until frozen, otherwise they will stick together, then you can place them in plastic bags, one on top of the other and take out the quantity you want as needed. Two little nests are 1 portion size.
One of the things I love most about living in Italy is my weekly market ::mercato shopping. The entire city center of Correggio, a small town in the region of Emilia-Romagna, fills with clothing and food stalls and bustles with people.
On market day, I always meet my friend, Isabella, for an espresso at a café (or “bar” as they typically say in Italian) so we can do our grocery shopping together. At 8:15a.m. the small space is already packed with customers. We wait in a line as the people in front of us shoot down a shot of coffee in one or two sips :: sorsi, pay a euro and head out the door.
Usually by the time we arrive at the counter :: banco, the barista, who salutes us by name, has already prepared our drinks without us asking: an espresso for Isabella and a macchiato for me. (A macchiato is an espresso that is filled with a dollop of frothy milk. Think of it as a shot size cappuccino.)
Two minutes later we are out the door and on our way to the fishmonger :: pescivendolo. We wait for him to recommend the best fish that was caught that morning. He has a lot of fish that I have never heard of or eaten and I always ask him for recipes that I then slightly adapt like: baked sardines, striped red mullet orJohn Dory with capers and tomatoes.
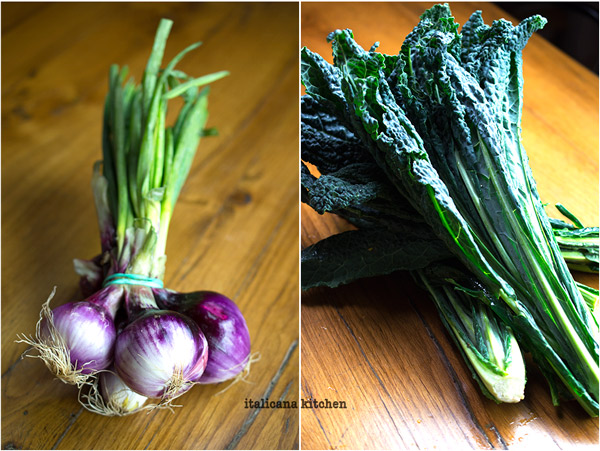
Next stop is the vegetable and fruit stand :: fruttivendolo. As I grab a number and wait my turn, each of the six employees greet me by name, their smiles and bubbling attitude makes produce shopping one of my favorite social events of the week.
I adore how the crates :: casse are always loaded with so much attractive and vibrant colored produce; this trip in particular I walked away with so many bags I could hardly carry them.
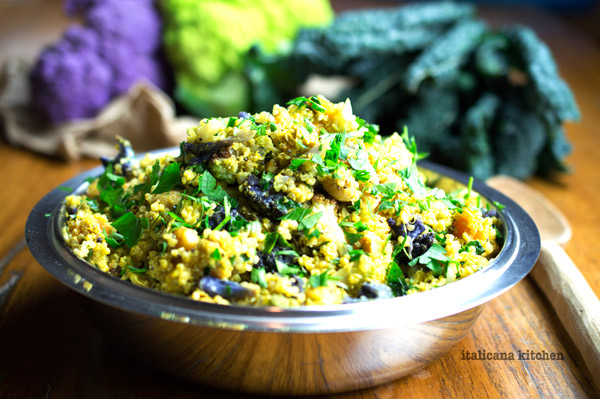
A little sweaty and a bit stronger from my veggie workout, I made it home :: casa and put myself to work roasting my little treasures; they were to be the stars in my roasted autumn vegetable salad with turmeric tahini dressing.
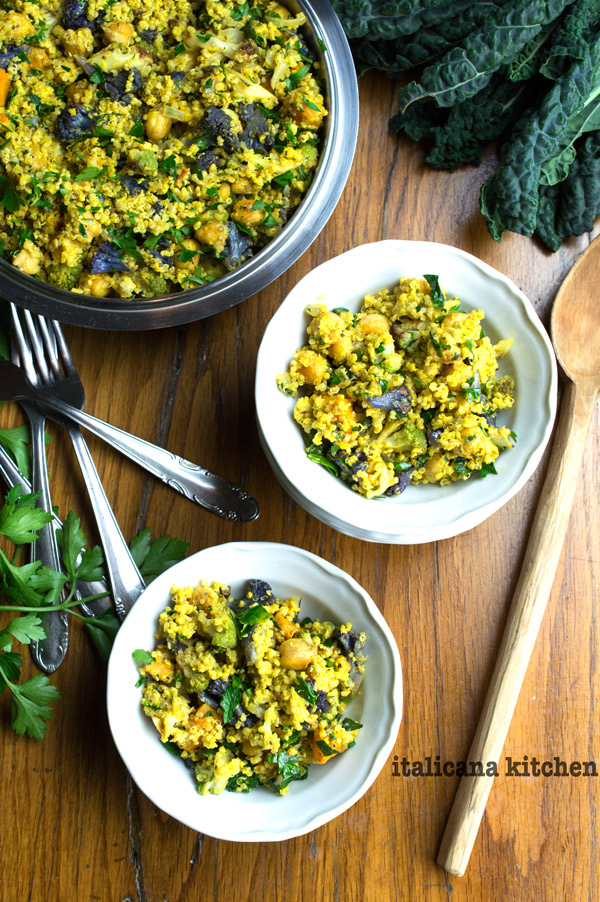
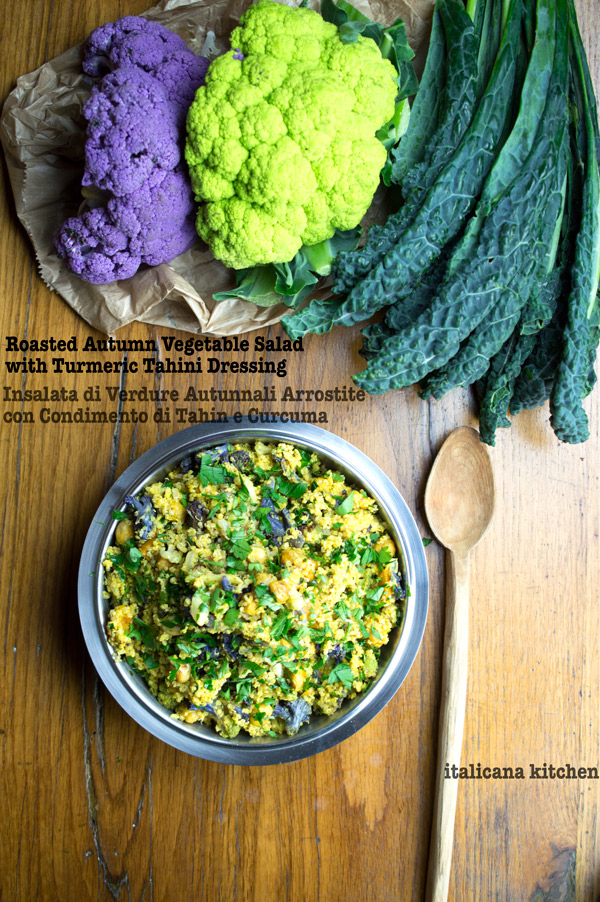
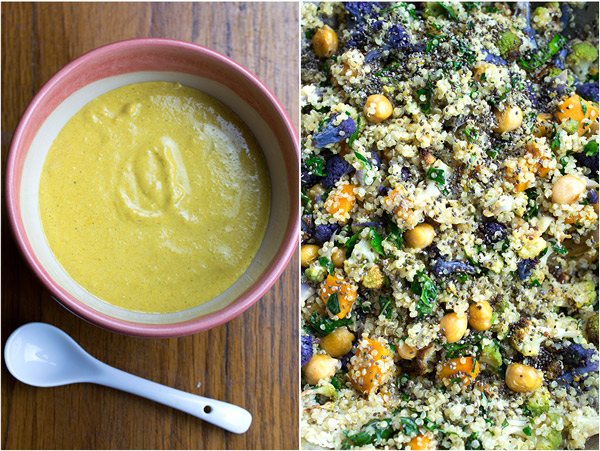
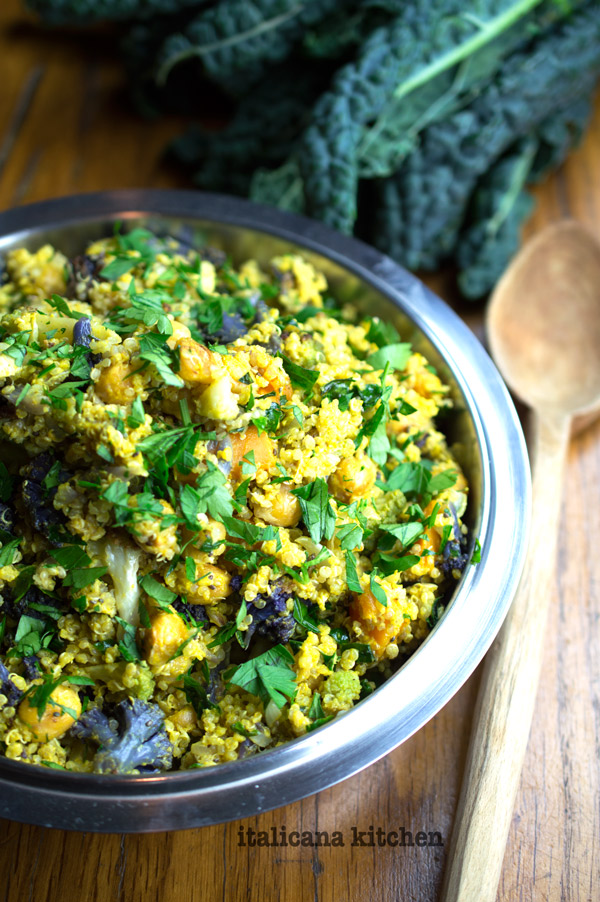
And, stars they were. The roasted pumpkin and green and purple cauliflower burst with sweet and caramelized flavors, harmonizing perfectly with the bitter kale, nutty quinoa, toasted chickpeas, and crunchy :: croccanti chia and sesame seeds.
I tossed this bowlful of goodness with a creamy turmeric tahini dressing to increase the warm and bitter :: amaro flavors to create a delicious fall lunch or dinner which would also make for the perfect vegetarian and vegan side for Thanksgiving day.
Roasted Autumn Vegetable Salad with Turmeric Tahini Dressing
Whenever Mr. Italicano makes himself bruschetta he rubs the toasted bread with a garlic clove :: spicchio di aglio before adding a drizzle of extra virgin olive oil. He then eats it plain, sprinkled with a bit of sea salt or a few chopped tomatoes, olives or marinated artichokes. Although the toppings may change, one thing that always remains the same is the garlic—it’s a must.
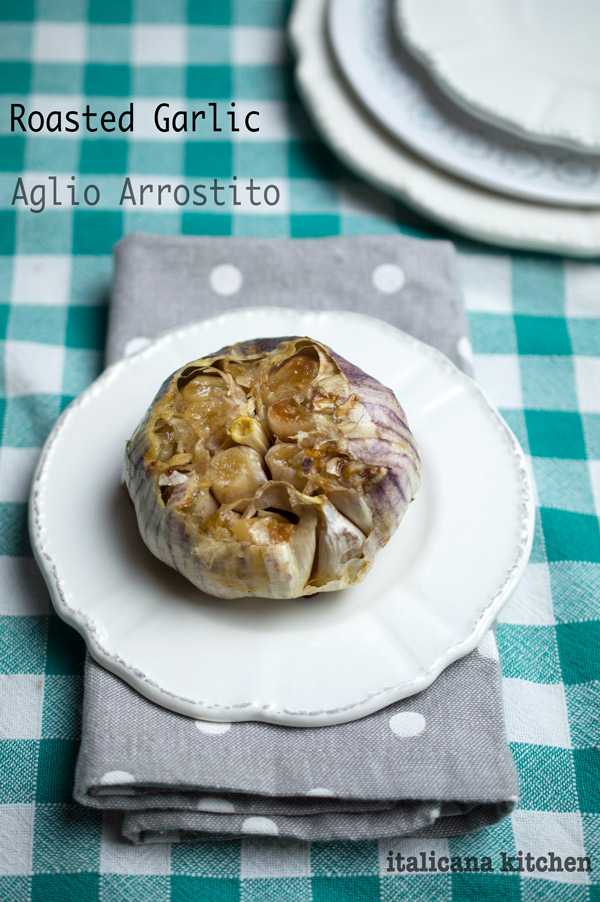
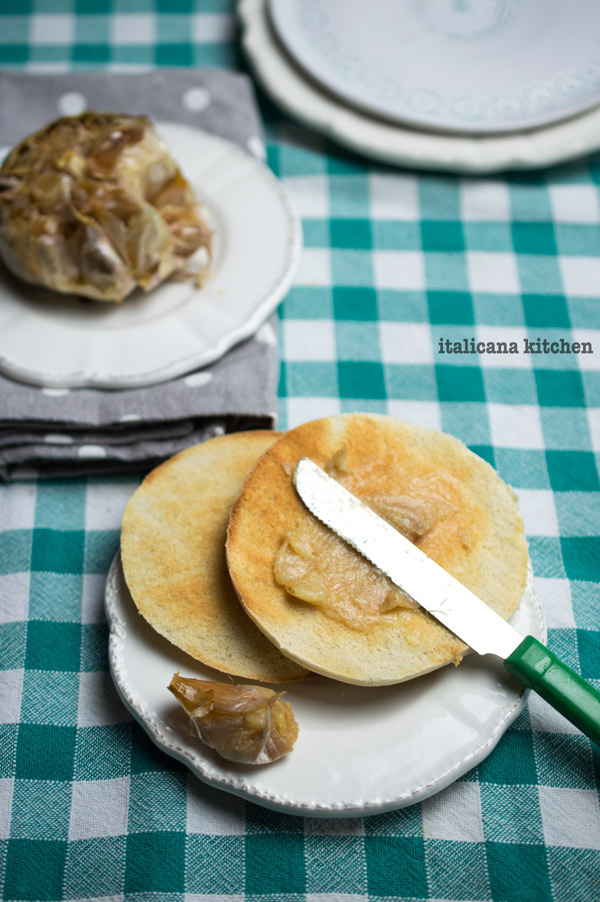
You would think that Italians, who are extreme garlic lovers, would be fully aware that by roasting the garlic first means that you don’t just have to rub :: strofinare the garlic on the bread to give it some aroma, but you can actually spread the garlic on top because it becomes soft and smooth like freshly churned butter. I thought roasted garlic was common everywhere, but to my surprise, Mr. Italicano had never even heard of roasted garlic, let alone tried it. Let’s just say, he was quite the happy camper to discover it.
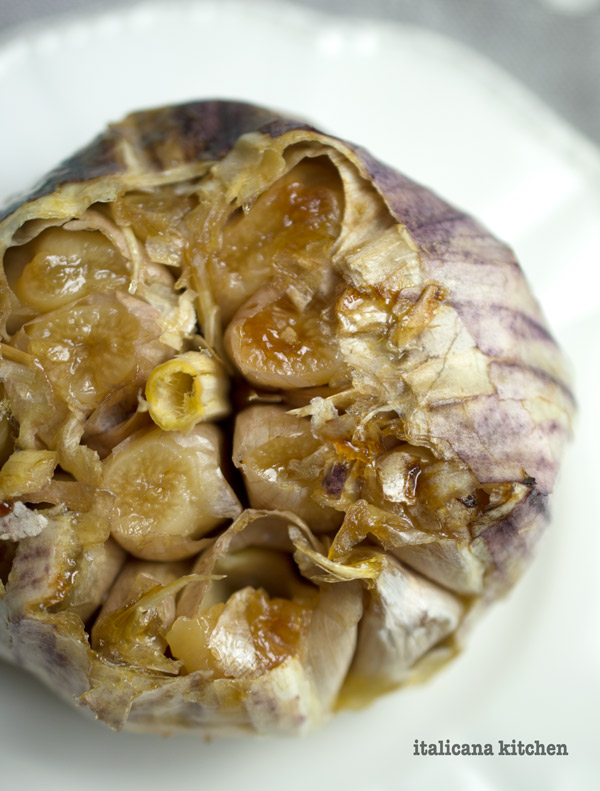
Roasted garlic isn’t as potent as fresh garlic; it’s like a creamy, buttery, caramelized, melt-in-your-mouth spread with a hint of garlic that is so addicting you might find yourself eating half a garlic bulb :: testa d’aglio. Which you should actually bring it on! Garlic has a ton of health benefits like fighting the common cold that circulates in this season, just to name one.
My sister-in-law :: cognata Jordan taught me how to roast garlic this way when I was in college in Seattle and would go to her and my brother Cliff’s apartment occasionally on the weekends for a home cooked meal. They both are exceptional cooks and I always looked forward to dinners with them because I felt like I was in some high quality gourmet restaurant. It beat out the Top Ramen or box mac and cheese by a zillion to one.
When I smelled this garlic roasting in the oven :: forno this afternoon, it brought me back to these family memories that were over a decade ago. Oh, the power of smell—how I adore you and your ability to transport me back in time, if only for a sweet and fleeting moment.
What I love about roasting garlic is how quick it is to prepare—less than 1 minute—and how elegant it is to serve, making it a fuss free appetizer you can serve at dinner parties. You can spread it on hot toasted bread, pita chips and crackers or stir it into sauces, pestos and hummus for a richer flavor sensation. It’s also perfect as a quick snack because, once cooked, you can store it in the fridge for up to a week and have it ready to slather on a piece of bread right out of the toaster.
Roasted garlic is the perfect appetizer for the winter holidays; it's easy to make, tastes amazing and it's super healthy.
Serves: 6-8
Ingredients
1 garlic bulb
Extra virgin olive oil
Instructions
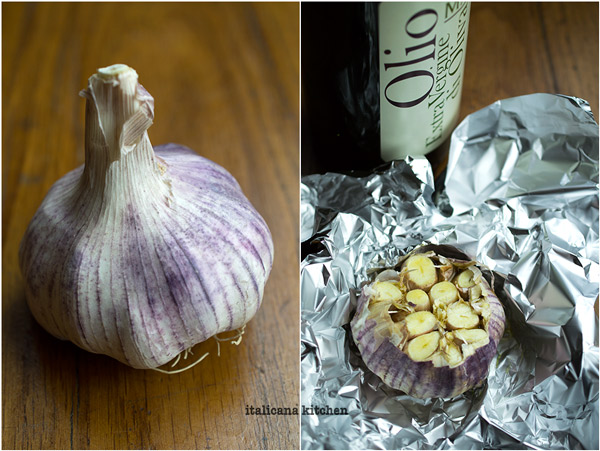
Preheat the oven to 400°F (200°C).
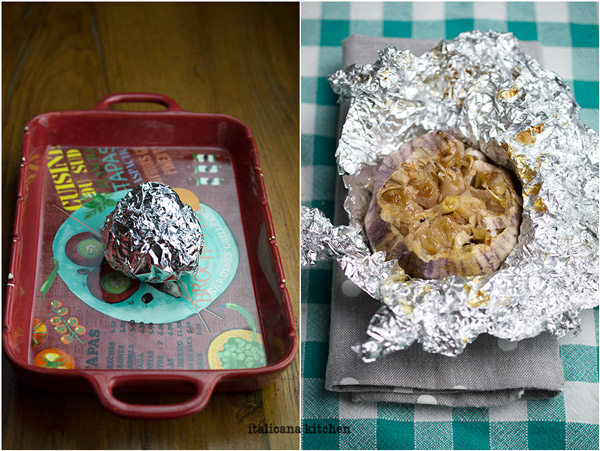
Peel off the outer layers of the garlic bulb then cut off ¼ inch from the top. Drizzle some extra virgin olive oil and rub it onto the cloves with your fingers. Wrap in aluminum foil, place in a casserole dish or on a baking sheet and bake for 40-55 minutes, or until the garlic clove when squeezed out of the clove comes out soft and creamy like freshly churned butter. Spread onto bread, pita chips, crackers or stir it into sauces, pestos and hummus. Store the roasted garlic in an airtight container in the refrigerator.

 I made this creamy cauliflower soup :: vellutata di cavolfiore on a rainy cold day when a few of my Italian girlfriends came over for dinner. I think I’ve been away from Seattle too long as I am no longer acclimated to the incessant days of rain, where even in the most dreadful weather I would have still gotten dressed up in heels and headed out for a night on the town. Or, maybe I’m just getting old? The thought of heels, rain, traffic and parking is just too much effort. I would rather swap any such evening for the comfort of my home passed with good friends where a little jazz plays through the speakers, good food is on the table and my wine glass is full.
 This creamy cauliflower soup has a delicate flavor, which was perfect for my friend Cecilia’s four year old daughter and one year old twins who went back for seconds. For adult taste buds, this soup is perfect paired with something bold like garlic and parmesan bread or a swiss chard :: bietole, fontina, avocado and whipped lentil grilled sandwich.
 Since autumn :: l’autunno and winter :: l’inverno seem to last for ever, you’ll have plenty of time to experiment with more than one cauliflower soup. Here are some interesting versions of cauliflower soup by other food bloggers around the web:
 Right now it’s another cold, rainy :: piovoso and foggy day in Italy. If it weren’t for the cobblestone streets and bright colored houses surrounding me, I would think I was in Seattle. Maybe it’s mother nature trying to toughen me up so I get used to putting on those heels again and going out despite the bad weather; or maybe, it’s her way of telling me to make some warm soup and enjoy the coziness of home. I think I’ll choose the latter. And, you?
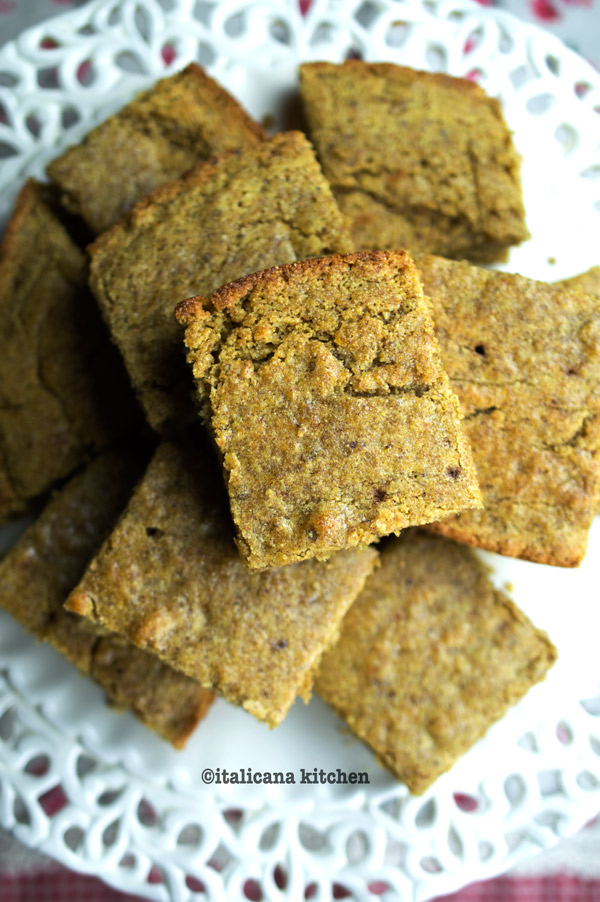


 After you have mixed up the ingredients, it is important to divide the dough into two balls, wrap them in plastic wrap and store in the refrigerator for at least 1/2 hour. Then divide the dough into four equal parts, pat them into a rectangle shape and flour them well.
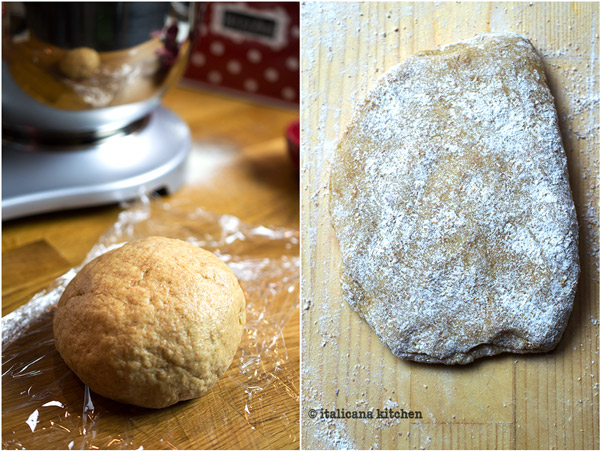


 One of the things I love most about living in Italy is my weekly market :: mercato shopping. The entire city center of Correggio, a small town in the region of Emilia-Romagna, fills with clothing and food stalls and bustles with people.
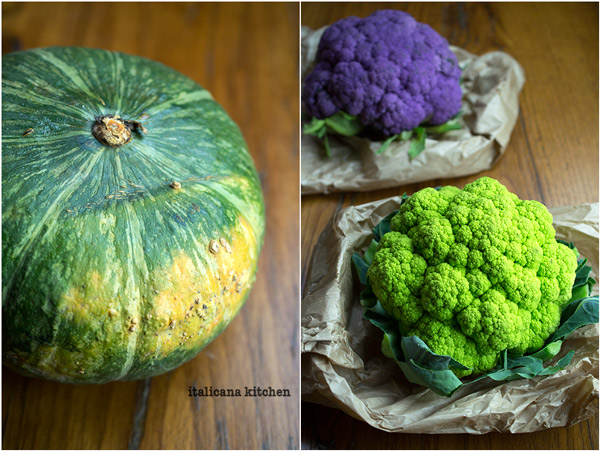

 And, stars they were. The roasted pumpkin and green and purple cauliflower burst with sweet and caramelized flavors, harmonizing perfectly with the bitter kale, nutty quinoa, toasted chickpeas, and crunchy :: croccanti chia and sesame seeds.
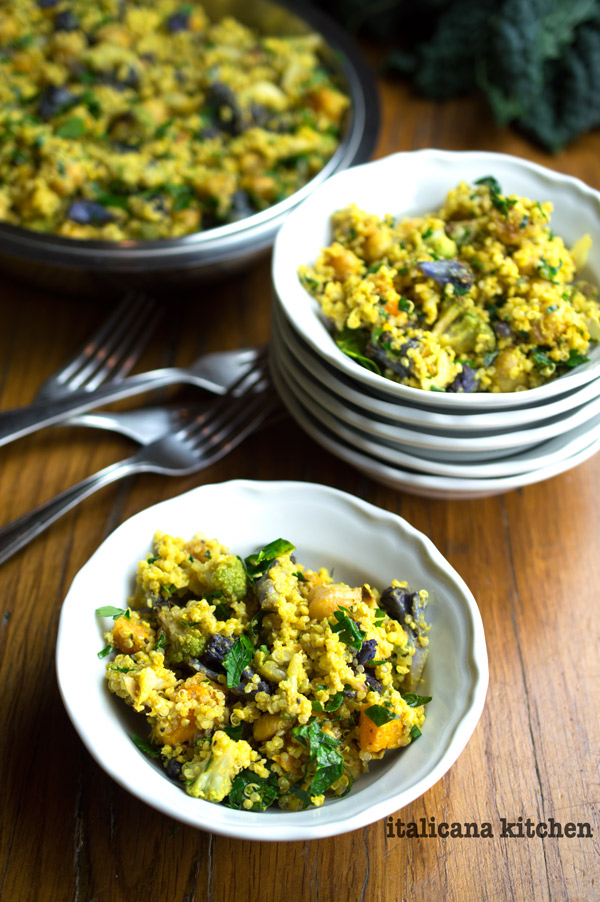 I tossed this bowlful of goodness with a creamy turmeric tahini dressing to increase the warm and bitter :: amaro flavors to create a delicious fall lunch or dinner which would also make for the perfect vegetarian and vegan side for Thanksgiving day.