Cheesecake has made the top 10 list of the recipes :: ricette most searched for on the internet by the Italians in 2013. The rest of the list contained Italian recipes; this delicious dessert was the only foreign outsider. This doesn’t surprise me, however. Italians are obsessed :: ossesionato with this rich and smooth sweet. How could anyone not be though? This is one dessert that brings a decadent grand finale to any meal.
Making this delicacy is quite a ruse; it looks hard to do but it’s easy as cake….cheesecake that is. Mu..ha..ha…ha…Ok, maybe that sounded funnier in my head :: testa. Sometimes I just can’t resist a good food pun. Back to the point at hand. Cheesecake looks gourmet but there really is not a lot of fuss going into making this dessert. I’ve listed 10 tips on how to make a perfect cheesecake under the recipe below. Although, all are important, I would just like to stress one particularly: use room temperature ingredients. This will allow the ingredients to blend together better producing a more uniform and smoother cheesecake. Although some recipes call for a hand mixer or stand mixer, I prefer to mix in all the ingredients :: ingredienti by hand to better control how much I stir the mixture since over mixing after the eggs are added will incorporate air and could be a cause of cracking during the cooling period. (And, frankly you get tired of mixing by hand so there’s less chance of over mixing.)
I wanted to try incorporating Italy’s delicious local cheeses :: formaggi into this recipe, so I decided to experiment with a three cheese blend: ricotta, goat cheese and cream cheese. The result was a smooth and creamy cheesecake.
I know many recipes call for a water bath when cooking the cheesecake; however, I didn’t use one and this recipe came out perfectly cooked without cracks. Just bake from 45-60 minutes, the center will jiggle. Just like Jello, the jiggle is important here. I then let the cheesecake cool in the oven :: forno for an hour, took it out and set it on a cooling rack at which point I carefully ran a knife along the inside edge of the springform pan so that during the cooling process when the cheesecake slightly shrinks it doesn’t strain and crack by the crust being stuck to the sides. Let it cool down on the rack for 2-3 hours before transferring to the refrigerator :: frigorifero.
Cheesecake is perfect :: perfetto for the creative cook. There are so many interesting and delicious modifications you can make depending on your mood, seasonal ingredients and type of presentation. Maybe you want to mix it up and use a chocolate cookie base or marble in swirls to the filling with a salted caramel sauce? Or, what about using fresh fruit :: frutta from your garden or the local market? I love presenting cheesecake in different ways, like my Blueberry Cheesecake Cupcakes that I made for Mr. Italicano’s birthday lunch. What are your favorite cheesecake combinations ?
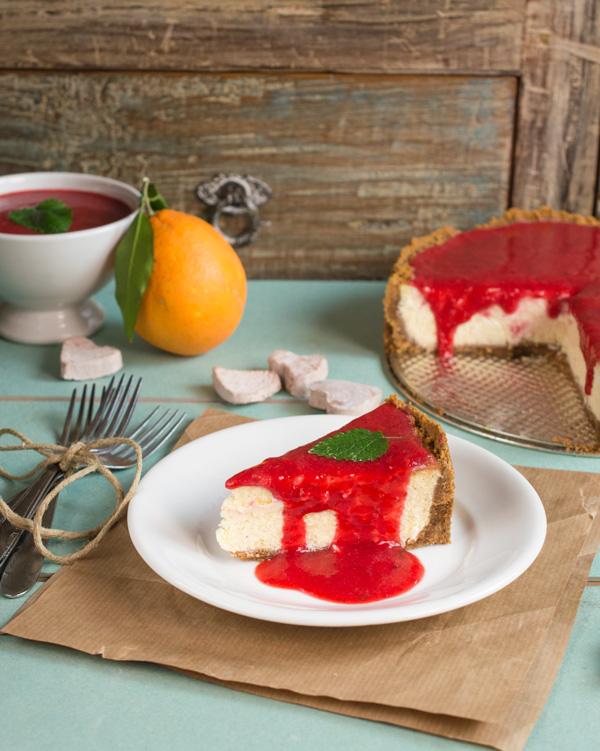
The slightly tart flavor of the blood orange pairs well with strawberries :: fragole to create a not overly sweet topping that is fresh and delicious. I find that most toppings don’t need the extra sugar and that they are better all natural. If your taste buds need more sweetness, however, just add 1/4 to 1/2 cup granulated sugar :: zucchero. Any leftover topping can be stored in the fridge and drizzled over pancakes, waffles, crepes or ice cream.
10 Tips to Get your Cheesecake to Come Out Perfectly.
1. Generously grease the bottom and sides of the springform pan before adding the crust.
2. Put the crust in the refrigerator for 30 minutes or freezer for 10 before adding the filling.
3. Be sure that ingredients are at room temperature. Take them out of the refrigerator 1/2 hour before you start making the filling. If you forgot, and you need to quickly bring the cheeses to room temperature, place the cheese (one variety at a time) in a microwave safe dish and microwave on high for 5-20 seconds. To bring eggs to room temperature quickly, place them in a bowl with warm water for 5-10 minutes.
4. You can mix the filling together as much as you want BEFORE you add the eggs; however, as soon as you add the eggs and flour, mix until just combined. Excessive beating will create air pockets that could cause the cheesecake to crack during the cooling process.
5. Don’t open the oven door during the baking process.
6. When the cheesecake is done the outside border should be rigid and the center should jiggle in the middle when the pan is slightly shaken.
7. Let the cheesecake cool directly in the oven for 1 hour before cooling on a baking rack.
8. Run a knife along the edge when you take the cheesecake out of the oven to help prevent cracking during the cooling process.
9. Cool at least 2-3 hours on a baking rack, and 5-6 hours in the refrigerator. However, the cheesecake will be even better if you let it cool overnight.
10. Wait to garnish the cheesecake until right before serving.
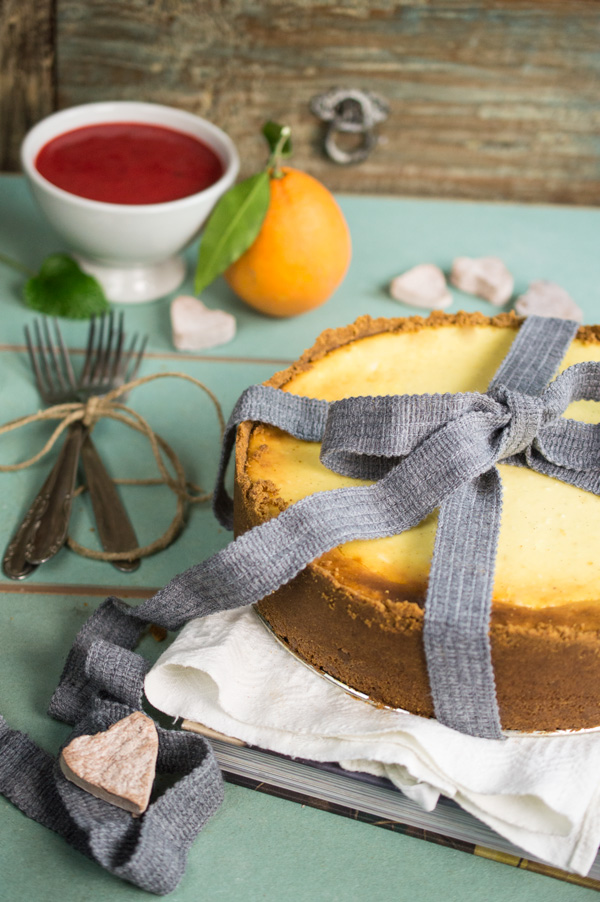
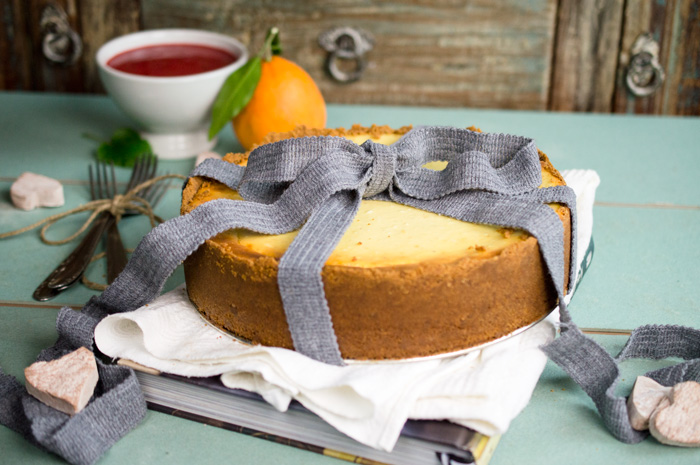
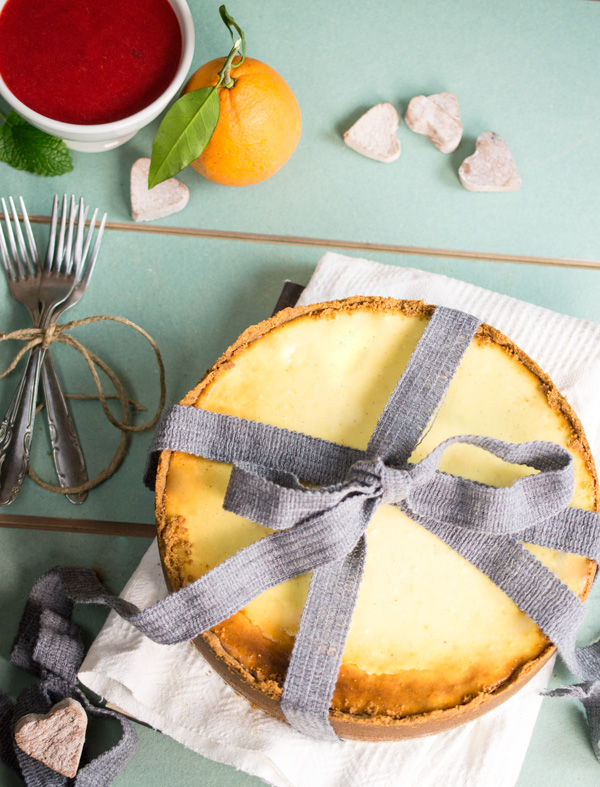
Italicana Kitchen Cheesecake with Blood Orange Strawberry Sauce
1 cup (250g) ricotta, drained, at room temperature
⅔ cup (140g) goat cheese, at room temperature
3 cups (750g) original cream cheese (not light), at room temperature
½ cup (150g) greek yogurt, room temperature
½ cup (125g) plain yogurt, room temperature
1 cup (200g) granulated sugar
1 teaspoon (2g) lemon zest (1/4 to ½ of lemon, depending on size)
Seeds from 1 vanilla bean
¼ teaspoon ground nutmeg
4 eggs, at room temperature
2 tablespoons flour
For the Blood Orange Strawberry Sauce:
14oz (400g) fresh or frozen strawberries, hulled
1 blood orange, rind removed and chopped
3 mint leaves + more for decoration
1 tablespoon cornstarch
Instructions
Finely grind graham crackers in a blender then pour into a medium sized bowl.
Add the melted butter, cinnamon and maple syrup and stir until combined.
Press the mixture into a generously buttered 9½ inch (24 cm) springform pan and distribute evenly along the bottom as well as up the sides leaving an inch or so from the top of the rim. Place in the refrigerator for ½ hour or freezer for 10 minutes.
Heat the oven to 325 f (160 C) and arrange the rack in the middle of the oven.
Using a large spoon, combine the ricotta, goat cheese, cream cheese, greek yogurt, sugar, lemon zest, vanilla bean seeds and nutmeg. Mix well.
Stir in the eggs one at a time then the flour and mix until just combined. Don’t over mix.
Pour the mixture into the prepared crust and spread it out evenly. Set the springform pan on a baking sheet and bake for 45-60 minutes. The outside edge will be rigid but the center should jiggle when the pan is gently shaken. Turn the oven off and let the cheesecake cool in the oven for 1 hour.
Remove from oven, then run a knife on the inside edge of the springform pan. This will help prevent cracking when cooling. Allow the cheesecake to cool on a baking rack for 2-3 hours before transferring it to the refrigerator for another 5-6 hours, although best if cooled overnight.
In the meantime, puree’ the strawberries, orange and mint leaves in a blender. Pour into a saucepan and add the cornstarch. Simmer for 5 minutes, stirring often. Transfer to airtight container and cool in the refrigerator for at least 1 hour before use. (If you want the sauce to be sweeter add ¼-1/2 cup sugar when you add the cornstarch).
When ready to serve, take out the cheesecake and let it sit at room temperature for 20 minutes. Unlock and remove the outer ring and place the cheese cake on a serving dish keeping the springform pan base still intact. Evenly distribute the blood orange strawberry sauce on top. Slice, decorate with mint leaves, if desired, and serve.
The cheesecake can be conserved int the refrigerator for 2-3 days. The cheesecake (or slices) can also be frozen for up to 2 months without the topping. Simply wrap with plastic wrap then foil and freeze. Allow the cheesecake/slices to thaw overnight in the refrigerator before serving.
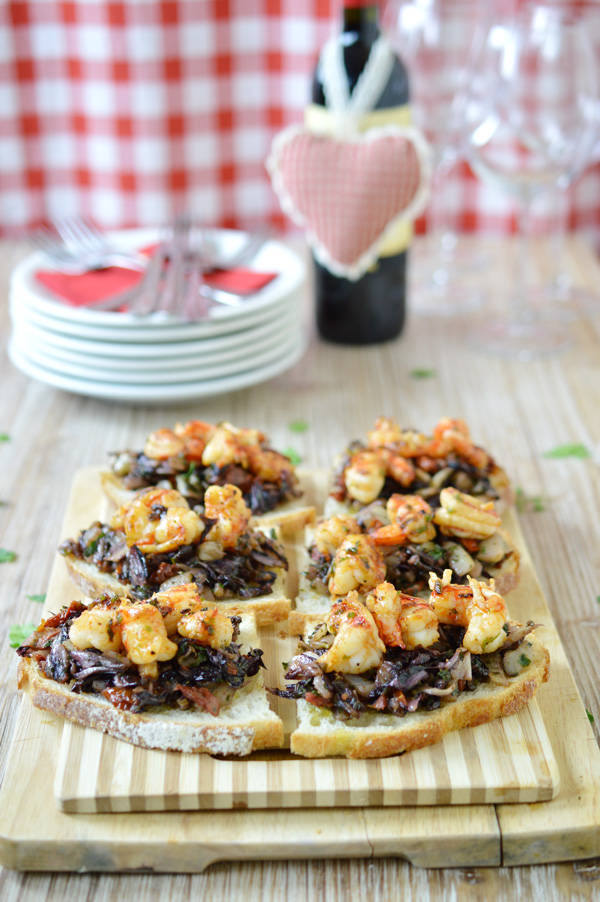
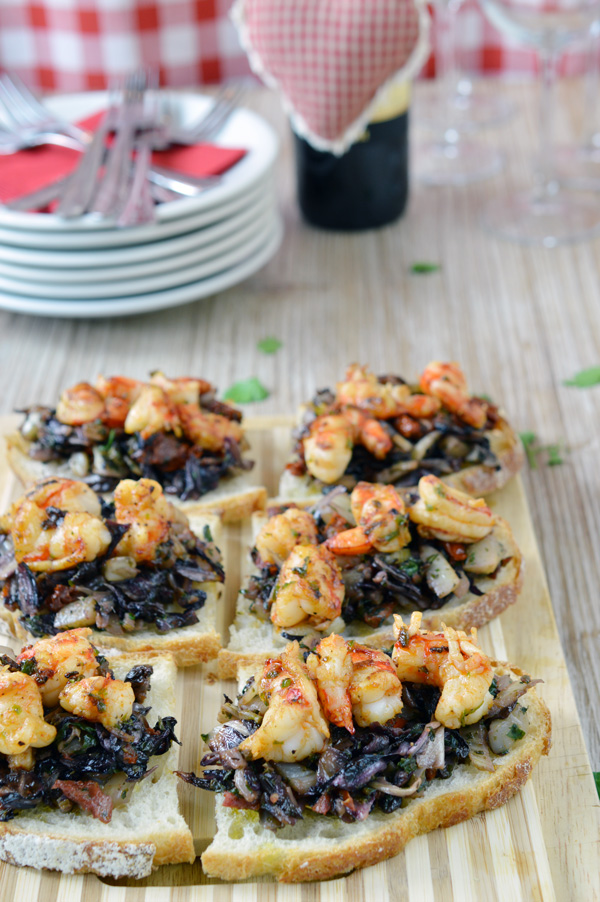
Without a doubt :: dubbio, this spicy shrimp, fennel and radicchio bruschetta recipe has quickly become my favorite bruschetta recipe of all time. Mr. Italicano agrees :: è d’accordo…he devoured this appetizer in minutes. I had to hoard a few on my plate :: piatto otherwise he would have also eaten my share!
Mr. Italicano and I had quite the interesting conversation :: conversazione when we bit into these delectable bruschetta creations. It went something like this:
“Mmmmm,” I said.
“Mmmmmmmmm,” Mr. Italicano said.
“Mmmmmmmmmmmm,” I responded.
“Mmmmmmmmmmmmmmmm,” Mr. Italicano exclaimed waving one hand in a circle, an Italian gesture that means this is freaking good! Actually, I don’t believe Italians have the slang word “freaking” in their vocabulary but the phrase “this is delicious” just doesn’t give the punch of how astronomically good these are!
I’m sure that if someone were eavesdropping on our conversation, we could have been mistaken as primitive Neanderthals. Somehow we just weren’t able to vocalize a string of consonants and vowels to create a sentence :: una frase, as that would have required releasing our clench from our beloved bruschetta. I don’t think so!
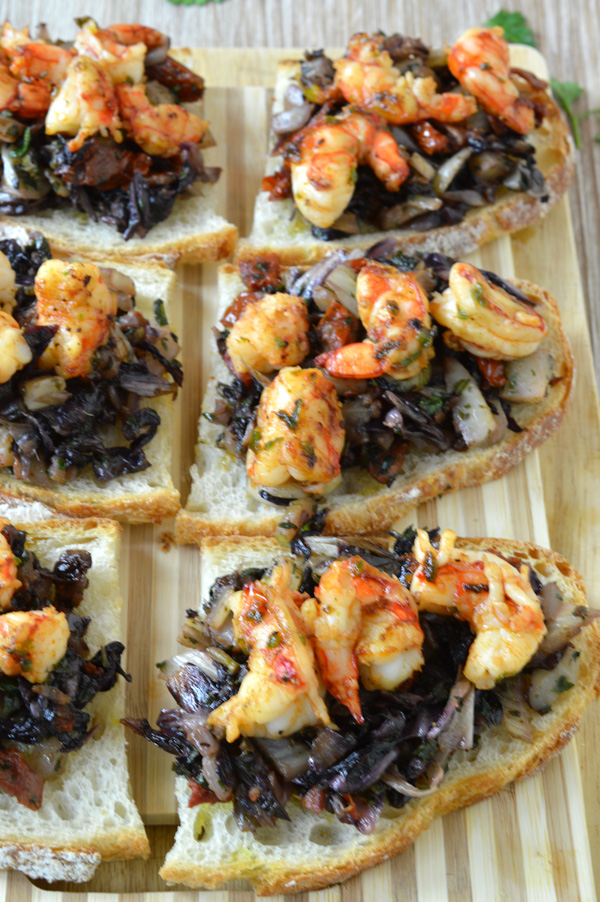
What makes this bruschetta not just good but incredible :: incredibile? Freshness and spiciness are the keywords we’re looking for here. Fresh vegetables, herbs, artisan bread and shrimp are coupled with a subtle kick to create a perfect sensation for the palate.
I only used half of a chili pepper, which gives just a slight punch when you bite into the bruschetta but does not evoke tears streaming down your face. If you want to cry :: piangere, just up the amount; however, I haven’t tested it and it could drown out the other delicious flavors.
The quality of bread is also important for this recipe. I can’t even fathom making this recipe on pre-packaged sliced white bread. *Shiver.* There are so many good rustic breads to be found at the grocery store or local bakery :: forno locale. By rustic, I mean moist on the inside and golden and crusty on the outside. I am known to wait 20 minutes in line at a small bakery near my house just to get the best quality bread. I even have to arrive early, because if I show up near closing time all the bread will be sold out, it’s happened before.
I’ve made this recipe twice now and both times I am taken back on how good it is. They always say that a way to a man’s heart is through his stomach :: stomaco, so ladies, if you want to impress a new guy in your life I definitely recommend whipping up this appetizer followed by Baked Sole with Blood Oranges.
Do you know how to correctly say this appetizer? Most Americans pronounce the “che” in bruschetta like they would in the word :: parola moustache. The “che” in Italian is always a hard sound like the “k” in the word skate, so pronunce the word like “bru’sket’ta. Always, always, always pause after the first double letter (I am a huge violator of this) otherwise it’s not pronounced correctly and you may be ridiculed *cough, Mr. Italicano, *cough. Test your pronunciation out the next time you are in an authentic Italian restaurant and let me know how it went!
This spicy shrimp, fennel and radicchio bruschetta recipe has quickly become my favorite bruschetta recipe of all time. What makes this bruschetta not just good but outstanding? Freshness and spice are the keywords we’re looking for here. Fresh vegetables, herbs, artisan bread and shrimp are coupled with a subtle kick to create a perfect sensation for the palate.
Serves: 6 pieces
Ingredients
Yields: 6 pieces
5 tablespoons extra virgin olive oil, divided
2 cloves garlic, smashed
¼ fennel, chopped
½ head radicchio, coarsely chopped
½ cup chopped sun dried tomatoes
Salt and freshly ground pepper, to taste
⅛ teaspoon dried rosemary (if you have fresh, even better, I didn’t)
⅛ teaspoon dried oregano (if you have fresh, even better, I didn’t)
¼ cup chopped fresh basil
¼ cup chopped fresh parsley
1 tablespoon pesto (store bought or homemade)
6 slices of rustic artisan bread
10 fresh shrimp, deveined and cut in half
½ red or green chili pepper, deseeded and finely chopped
⅛ teaspoon paprika
Instructions
Preheat the oven to 400°F
Heat 2 tablespoons olive oil in a skillet over medium heat. Add garlic and cook for 2 minutes.
Add fennel and continue cooking for 15 minutes.
Add radicchio, sun dried tomatoes, salt and pepper, rosemary, oregano, basil, parsley and pesto. Cook for 10 minutes, stirring often.
Line baking sheet with parchment paper. Position the bread on the sheet, rub each piece with a clove of garlic followed by a drizzle of olive oil. Bake for 5-7 minutes until crunchy.
Heat 2 tablespoons olive oil on high heat in a separate skillet or sauté pan. After 1 minute add the shrimp, chili pepper, paprika, salt and pepper. Sauté for 3 minutes, stirring and flipping the shrimp often.
Spread out the bread on a cutting board or serving plate, distribute vegetable mixture on top followed by 3-4 pieces of shrimp on each bruschetta.
Drizzle with remaining olive oil and chili peppers that were left in the pan. Serve warm and dive in!
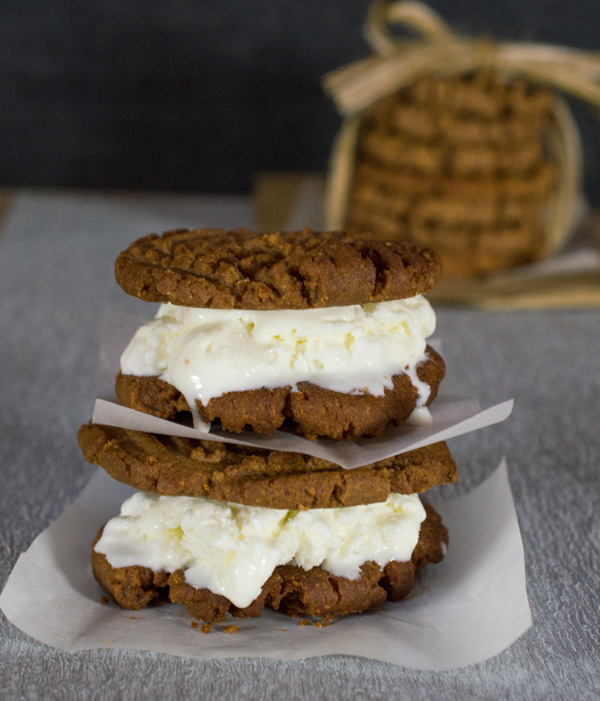
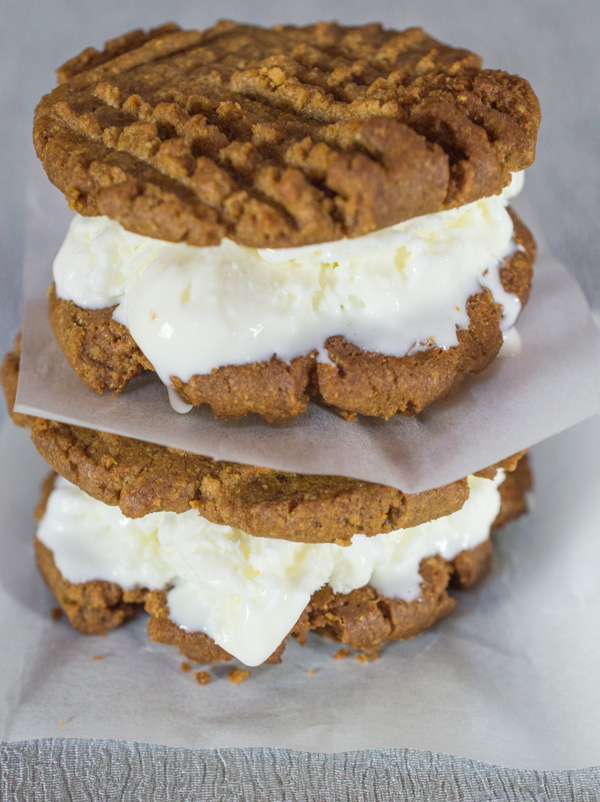
Do you love peanut butter? Do you love Nutella? Ever thought of blending them together to make a mouthwatering peanut butter and Nutella ice cream sandwich?
One of the things I absolutely love about living a culturally split life, is the fact that I can blend both worlds in the kitchen to fulfil both my native and acquired hunger cravings. Peanut butter :: burro di arachidi was a staple in my all-American childhood and still continues to be one of my best friends today, well, that was until I moved to Italy nearly 5 years ago and Nutella took the place at the end of my spoon :: cucchiaio. For all you Nutella virgins, this delicious smooth sauce is a blend of chocolate and hazelnut flavors with a variety of uses much like peanut butter: slather it on toast, swirl it into gelato or eat spoonfuls straight out of the jar :: barratolo. (Anyone else guilty of this?)
What would the world be like without peanut butter….Nutella….or ice cream?
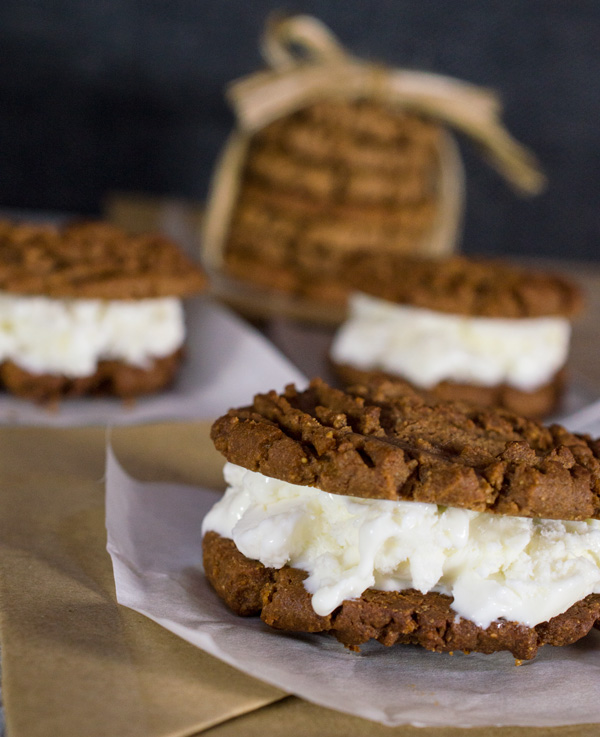
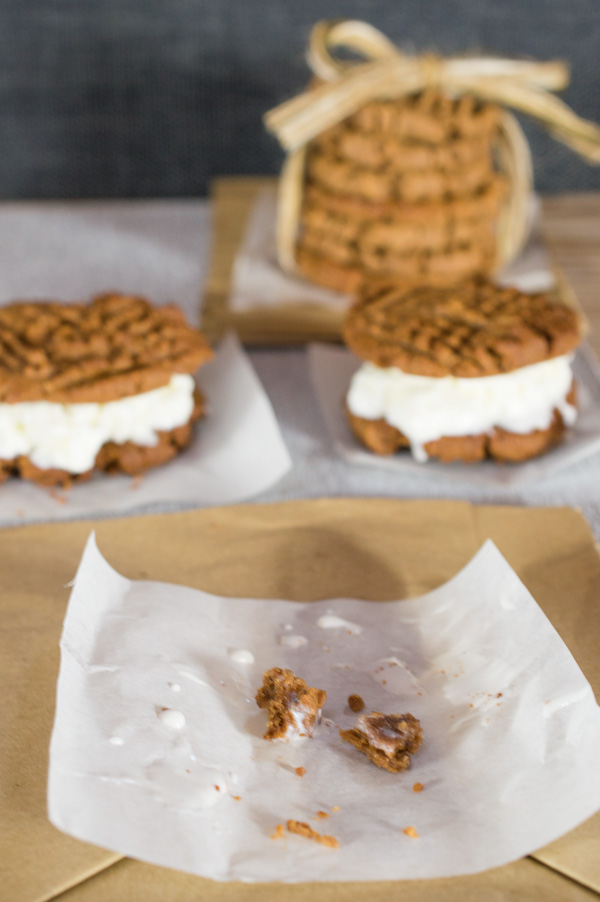
So to appease my indecisive taste buds I decided to combine these two delicious spreads to create a heavenly ital-american dessert :: dolce. These peanut butter and Nutella cookies can be eaten alone, or as this recipe calls for, as a melt-in-your-mouth ice cream sandwich :: panino.
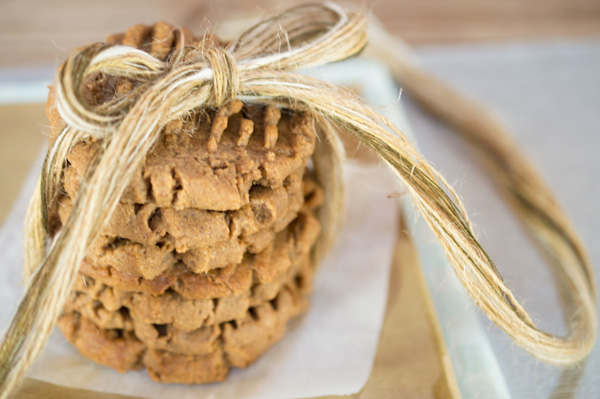
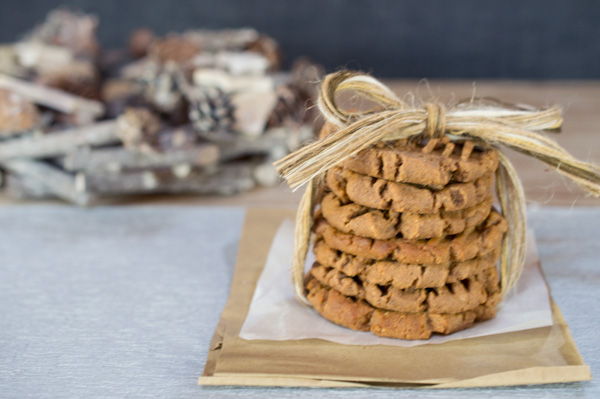
Tie some twine around these cookies and give as presents to family and friends.
::Did you know?::
In America we often ask for a “panini” to intend “sandwich”. The phrase, “May I have a sun dried tomato and pesto panini, please?” is wrong. In this context you are asking for many sandwiches, not just one. I won’t go into an elaborate Italian grammar explanation, just remember that: panino=1, panini=more than one.
Peanut butter and Nutella combine to make a decadent dessert.
::Did you know?::
As we know in America, we typically pay per scoop :: pallina of ice cream. If we want one or more flavors we usually need to pay for them individually.When you order gelato at a gelateria, an Italian gelato shop, on the other hand, you always have the option to have multiple flavors in one cup/cone for the same price :: prezzo. For instance, in a small cup/cone you can have two flavors and a medium cup/cone three flavors etc. When you order a to-go container, this rule also applies and you get to pick up to six flavors per container; talk about amazing…especially for people who like to have loads of flavor options. It’s also great for this recipe as you can have a variety of gelato sandwiches without having to have 6 different ice cream tubs in your freezer!
These ice cream sandwiches are too good to resist!
Mouthwatering Peanut Butter and Nutella Ice Cream Sandwiches
Do you love peanut butter? Do you love Nutella? Ever thought of blending them together to make a mouthwatering peanut butter and Nutella ice cream sandwich? Keep these ice cream sandwiches on hand in the freezer as treats for the kids or an easy and delicious dessert for dinner parties that you can make ahead for a stress-free dessert. These are also gluten free.
Serves: 26 cookies (13 gelato panini)
Ingredients
For the cookies:
2 cups all natural peanut butter
½ cup sugar
2 eggs
2 Tablespoons Nutella
Seeds from 1 vanilla bean ( or 2 teaspoons vanilla extract)
For the ice cream and decorating:
Ice cream or gelato, flavor of choice
Chocolate chips, sprinkles or nuts (optional)
Instructions
1. Preheat the oven to 350 F. Line a baking sheet with parchment paper.
2. Combine the cookie ingredients in the order given and mix together with a hand mixer until the ingredients are combined. To open the vanilla bean, simply slice down one side and scrape out the tiny beans with a dull knife.
3. Roll the mixture into walnut sized balls and set them on the lined baking sheet. Using a fork, make multiple criss crosses on the ball to flatten each ball.
4. Bake for 10-12 minute in a ventilated oven, or until the edges are gold brown. Let the cookies cool on a baking rack.
5. Take the ice cream or gelato out of the freezer and let it thaw until it is just soft enough to scoop. Put the chocolate chips, sprinkles and nuts in separate shallow bowls (put a small amount and continue to add more when needed). Spoon a spoonful of ice cream on the bottom side of the cookie and top with the bottom side of another cookie to create a ice cream sandwich (in other words, the flat parts of the cookie should be touching the ice cream.)
6. Roll the edges in one of the dry toppings, wrap with plastic wrap and immediately put the cookie into the freezer. Repeat. Allow the ice cream sandwiches to rest in the freezer for at least 30 minutes before eating otherwise the soften ice cream will come out the sides when you take a bite. Unwrap the needed amount and serve immediately.
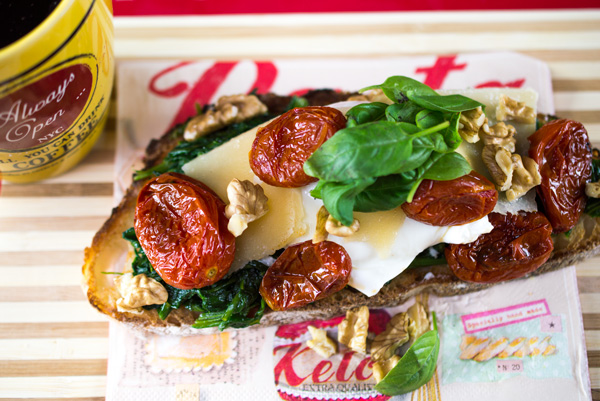
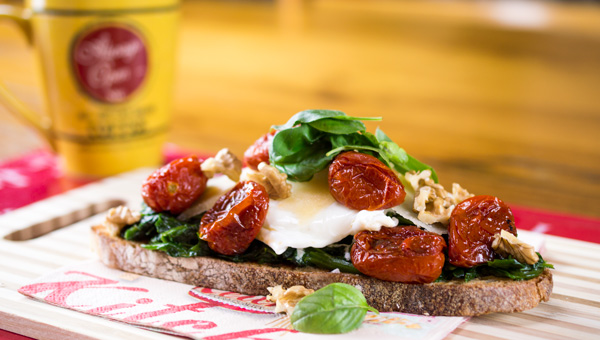
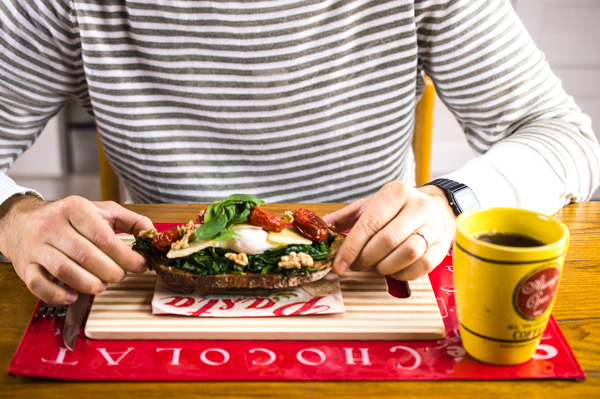
This breakfast bruschetta is my favorite recipe to get my day off on a delicious start. Packed with fresh vegetables and protein, it’s my go-to breakfast when I need a lot of energy to fuel me until lunch. This recipe is for one but can easily be multiplied for the whole family.
Notice how I created an Italian flag bruschetta? This wasn’t intentional but it did make me laugh after I had thrown together all of my favorite ingredients and the colors that dominated were red, green and white. Coincidence? Probably not, just my Italian-infatuated-mind taking control.
Be sure to pick up some Italian artisanal rustic bread, it really does make a difference on the overall taste. Rub the piece of bread with a clove of garlic if you like or you can skip that part and just drizzle the bread with a bit of olive oil before you stick it in the oven. Of course, if you are in a hurry you can always pop the slice of bread in the toaster.
Even when tomatoes are out of season, you can get a caramelized and intensified flavor simply by roasting them. This recipe only calls for five roasted tomatoes but it seems like a lot of effort to roast such a small portion so I usually do a whole tray full and keep the extras in the fridge (up to 5 days) or freezer (up to 6 months).
Left over roasted tomatoes are extremely versatile and can enhance the flavors of pastas, soups and sandwiches. In my gourmet grilled cheese sandwich I used fresh datterini tomatoes, but I’m sure it would be even more flavorful with these instead.
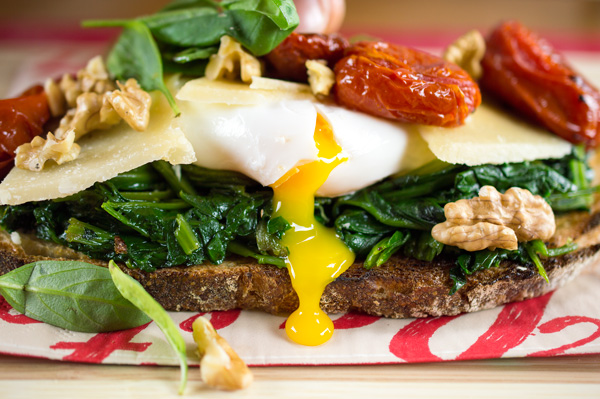
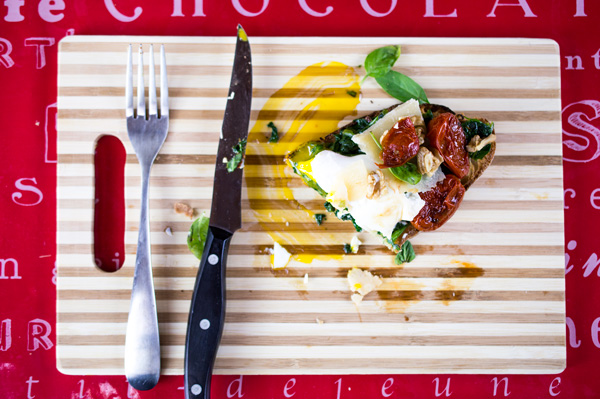
Giant green basil leaves add not only a vibrant color to the breakfast bruschetta, but also a burst of freshness. Try it out for yourself and let me know what you think!
This breakfast bruschetta makes for a delicious start to your day. Packed with fresh veggies and protein, it will keep your energy going until lunch time.
5 datterini, cherry or baby plum tomatos
2 tablespoons extra virgin olive oil
Sea salt and pepper, qb
1 small handful spinach, washed then chopped
1 spoonful pesto
1 egg
2 slices Parmigiano Reggiano cheese (otherwise known as Parmesean)
Small handful of fresh basil
4 walnuts, shelled
1 slice of rustic bread
Instructions
Preheat the oven to 400 F.
Line a rimmed baking sheet with parchment paper, add the tomatoes, drizzle with 1 tablespoon olive oil and sprinkle with sea salt and pepper. Roast for 15 minutes. (I tend to make a large batch and keep the rest of the roasted tomatoes in the fridge (up to 5 days) or freezer (up to 6 months).
Meanwhile heat a small sauce pan with water over high heat.
In a small pan heat 1 tablespoon olive oil over medium heat. Add the spinach and saute’ until wilted, about 5 minutes. Stir in the pesto.
Once the water has boiled add a pinch of salt then reduce to a simmer. Gently crack in the egg. For a super runny egg, cook for about 2 minutes. For an egg yolk that is slightly runny it will take 3-4 minutes. With a slotted spoon life up the egg and gently wiggle to see if it is at the right consistency. You can tell by how much the yolk wiggles and if the egg white firms up. If it’s not, return it to the pan and cook for another minute. When the egg is done, take it out with a slotted spoon and let it drain for a few seconds over the pan. Gently blot with a paper towel.
Toast the bread in the toaster or stick it into the warm oven for a few minutes. I usually rub with garlic and drizzle with olive oil before putting it in the oven, but you can also skip this step.
Now we’re ready to stack the bruschetta. Place the warm bread on a plate. Add the spinach and the poached egg followed by the cheese, roasted tomatoes, basil and walnuts. Season with additional salt and pepper and enjoy!
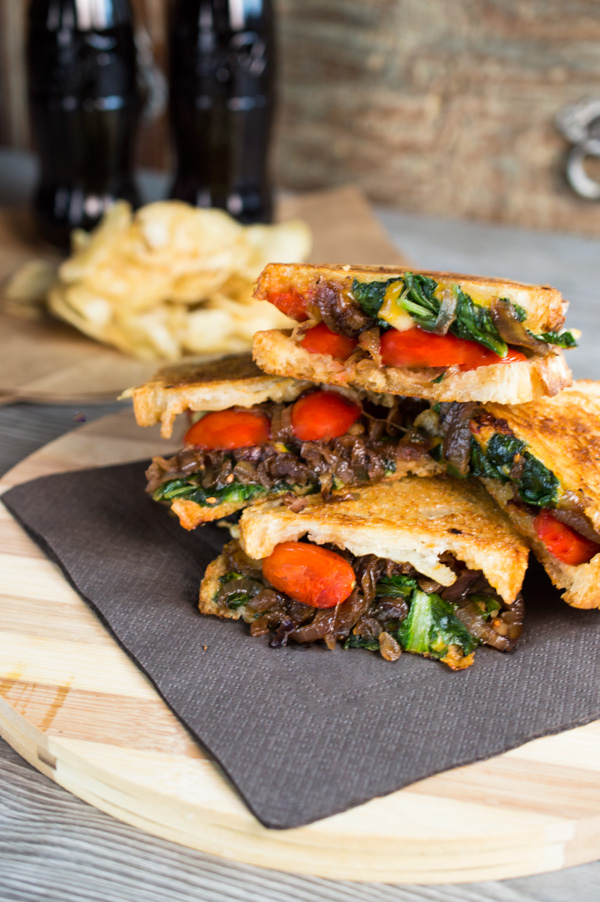
There is probably nothing more comforting than the first bite of a hot grilled cheese sandwich; melted cheese enclosed in buttery toasted bread is enough to make me go weak in the knees :: ginocchia.
Perfect for when you want to liven up the classic grilled cheese sandwich.
To appease my tastebuds and health conscience, I’ve added a few more flavor combinations and nutrients to create a veggie-packed balanced meal. Even if your not a big onion :: cipolla fan, these ones caramelized in balsamic vinegar, or as the say in Italian, aceto balsamico, are robust in flavor and are surely able to convert even the most timid. The rest of the veggie filling, including chard, tomato and basil, complete the fresh food experience. Then of course there is the cheese :: formaggio. Cheeessseeee. Such a dreamy word that just by saying it, my mouth is already watering. I’ve used two types of cheese, but feel free to substitute with whatever you have in the fridge :: frigo.
This adult grilled cheese sandwich is packed with savoury veggies and melted cheese.
Living in Italy for almost five years, I have become fascinated by the entomology of words, especially foreign words and how they become commonly used in other languages :: lingue. I find it quite amusing that in the the Italian language some words are translated while others retain the English words or even become modified in significance. “Computer” and “mouse” are two commonly used English words that have entered into the vocabulary of Italians; however, the word “keyboard” has been translated to “tastiera”. The reason behind this, I do not know. Why not keep all the words in English or simply translate them all to Italian? Surely, some gnome lexicographer with a big bushy beard gets a kick out of making life hell for foreign language learners like myself. I can just imagine his kiddish laugh :: risata as he jumps up and down in a giddy state while he picks which words remain in English and which are translated. Little punk.
This chard and caramelized balsamic onion grilled cheese sandwich is an instant crowd pleaser.
And, then there are words that are retained in English but whose contextual meaning has been modified. Take the word “toast,” for example. Only this morning did I have a lovely debate with my Italian husband :: marito over the word. I asked him if he wanted a piece of toast in Italian and he asked me why I as offering him a piece of toasted bread. “Toast,” he said, “is two pieces of toasted bread with cheese and ham inside.” What the what? Italians use our English word and then change the meaning entirely? I need to be on the look out for these words; otherwise, who knows in the future when an English word like “grateful” could be modified by the Italians to mean “pig’s head.” Yah, that might just make for quite an embarrassing moment…So back to the important task at hand, food…and specifically these Swiss Chard and Caramelized Balsamic Onion Grilled Cheese Sandwiches. These make the best lunch when you need something simple to make but want to impress your guests. Pare them with potato chips or a roasted tomato soup.
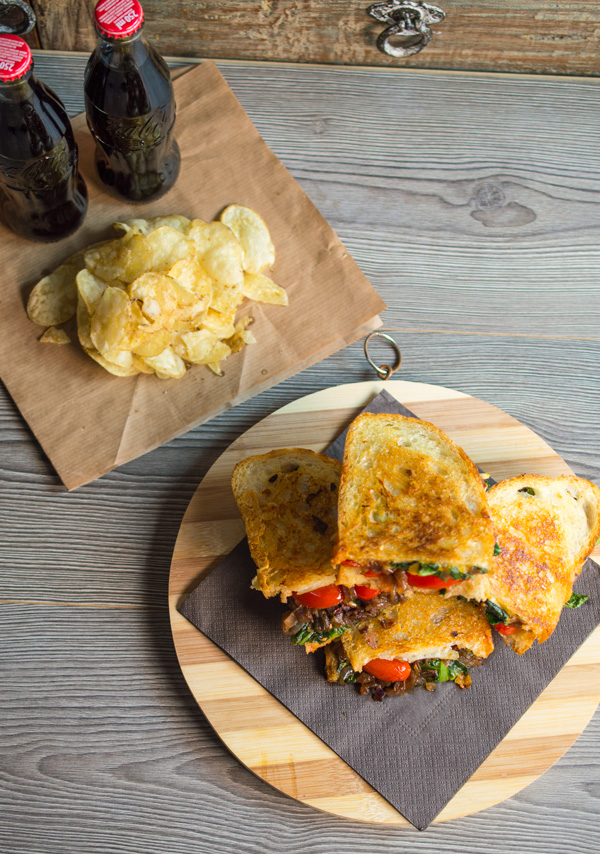
This gourmet grilled cheese sandwich pares perfectly with potato chips or a roasted tomato soup.
A grilled cheese sandwich is such a simple, yet truly satisfying food. It brings me back to childhood memories. Ah, the good carefree days when my biggest worries in the world was what games to play :: giocare. Now, at 30, I still yearn to be reminded of these moments, it’s truly the simple things in life that are the most important, after all. What are the memories that this classic sandwich bring back for you?
Turn your ordinary lunch into a mouthwatering meal with this Gourmet Grilled Cheese Sandwich; made with sautéed chard, caramelized balsamic onions and melted cheese, this an irresistible version on the classic sandwich we all love.
Serves: 2
Ingredients
For the caramelized balsamic onions:
2 Tablespoons extra virgin olive oil
1 large red onion, thinly sliced
2 pinches of salt
⅛ teaspoon freshly ground black pepper
1 Tablespoon sugar
1 Tablespoon balsamic vinegar
For the grilled cheese:
1 Tablespoon extra virgin olive oil
3 swiss chard leaves, coarsely chopped
Salt and pepper, as needed
1 Tablespoon unsalted butter
4 slices bread (I used a type of crusty Ciabatta bread)
4 thin slices aged pecorino cheese (or any hard white cheese)
4 thin slices cheddar cheese
5 Datterini tomatoes or 1 tomato, sliced
¼ cup fresh basil
Instructions
For the caramelized balsamic onions:
1. Heat the extra virgin olive oil in a medium sauté pan over medium-low heat. Add the onions, salt and pepper and saute’, stirring occasionally for 5-10 minutes until the onions are soft.
2. Add the sugar and continue cooking for 5 more minutes.
3. Add the balsamic vinegar and turn the heat to low. Continue cooking the onions and stirring occasionally, about 15-20 minutes until the balsamic vinegar is reduced and not runny.
For the grilled cheese:
1. Sauté the chard leaves in two tablespoons of extra virgin olive oil and cook over medium heat, stirring occasionally until the chard leaves are very soft. Salt and pepper to taste.
2. Butter all four slices of bread on one side.
3. Take one piece of bread and place butter side down into the a large sauté pan. Stack with two slices of pecorino cheese, half the tomato slices, half the caramelized onion, half the sautéed chard, two slices of cheddar cheese and half the basil. Place the other half of bread on top, butter side up. Repeat the process for the second grilled cheese sandwich.
4. Turn the heat on to medium and toast until the bread is golden and the cheese is melted. Flip the sandwich to the opposite side until the bread is toasted as well. Cut in half and serve immediately.