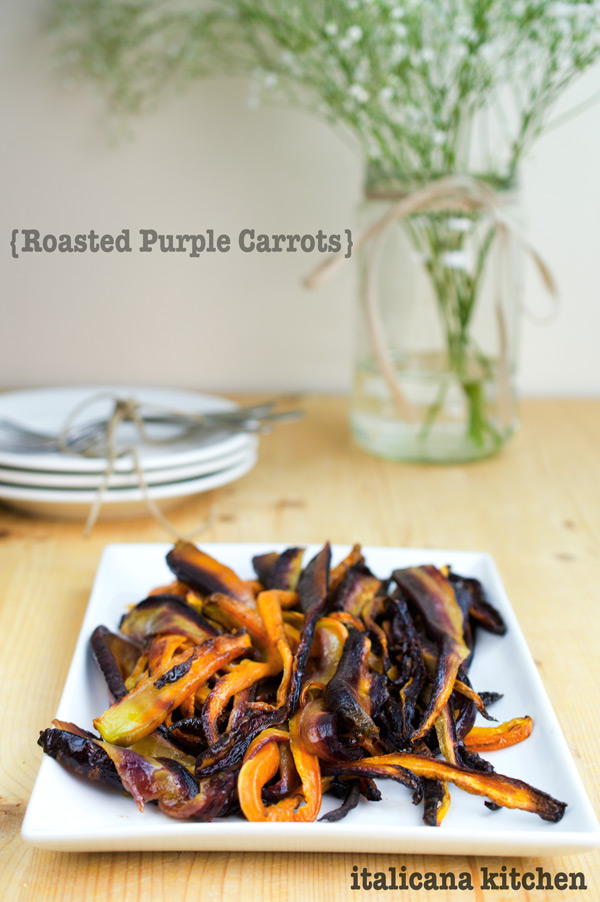
Just like my kabocha squash fries, these roasted purple carrots are another solution for a side dish that is super healthy and loved by the whole family.
Like I’ve mentioned in many of my previous posts, I love simple cooking. Not only is it easier, but it is also quicker since you are using a short list of ingredients and surely healthier than prepackaged meals full of preservatives. Remember that our body is like a car :: macchina; what you put inside it will affect its performance. Would you dare put coca cola in the gas tank? Probably not, so why should we nutriate our bodies with a sugary drink either? Not to say every now and then I don’t splurge (I have a strange affection towards Mt. Dew) but I do keep things in moderation by keeping in mind the 80/20 rule.
The trick to simple cooking is good quality products :: prodotti. They don’t need to the most expensive on the shelf, but there is something to say about quality. Don’t chimp on good extra virgin olive oil, with just this one ingredient you can create endless recipes.
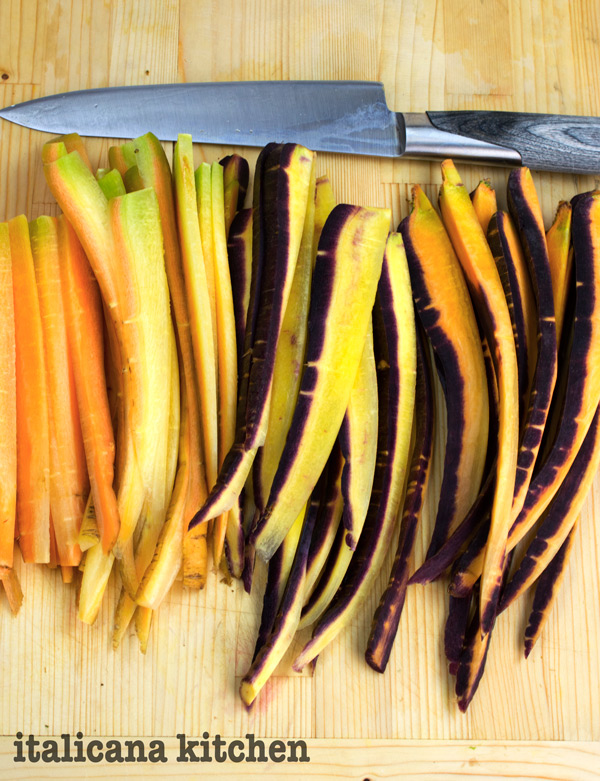
These roasted purple carrots were part of my dinner party menu, and everyone had seconds. Secretly I was hoping they wouldn’t so I would have leftovers—selfish, I know, but they were so good it was hard to share! Luckily they are easy to make so I can make them when I want without any effort. I used both purple and orange carrots but you can also use just one color. Just wash the carrots well, cut them in strips :: strisce, place on a baking dish lined with wax paper, drizzle with a good quality extra virgin olive oil, sprinkle with course salt and bake for around 20 minutes. You can serve them warm or cold.
These roasted purple carrots are another solution for a side dish that is super healthy and loved by the whole family.
Serves: 4 people
Ingredients
4 large purple carrots (or orange or a mix)
Extra virgin olive oil
Course salt
Instructions
Wash the carrots well, cut them in strips, place on a baking dish lined with parchment paper, drizzle with a good quality extra virgin olive oil, sprinkle with course salt and bake for around 20 minutes at 400°F(204°C). You can serve them warm or cold.
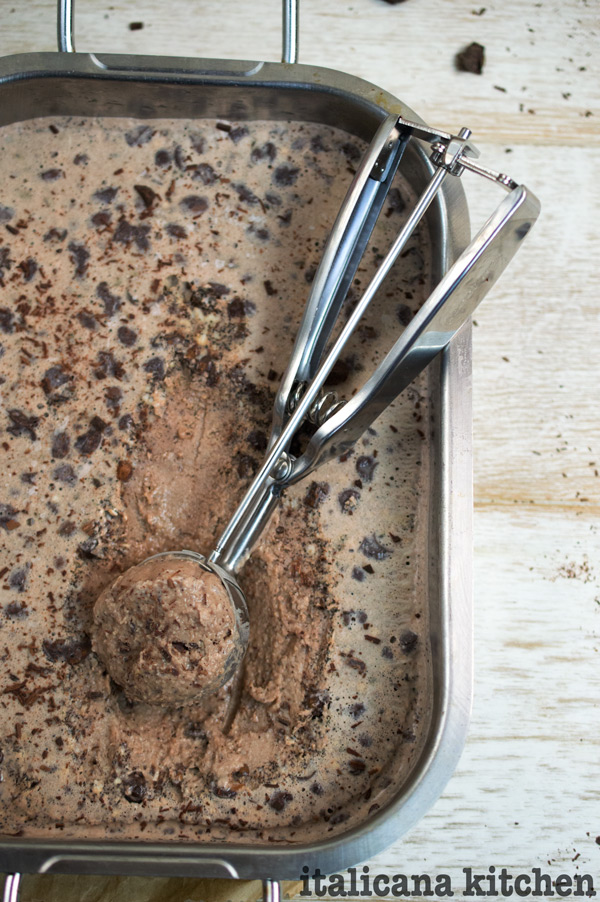
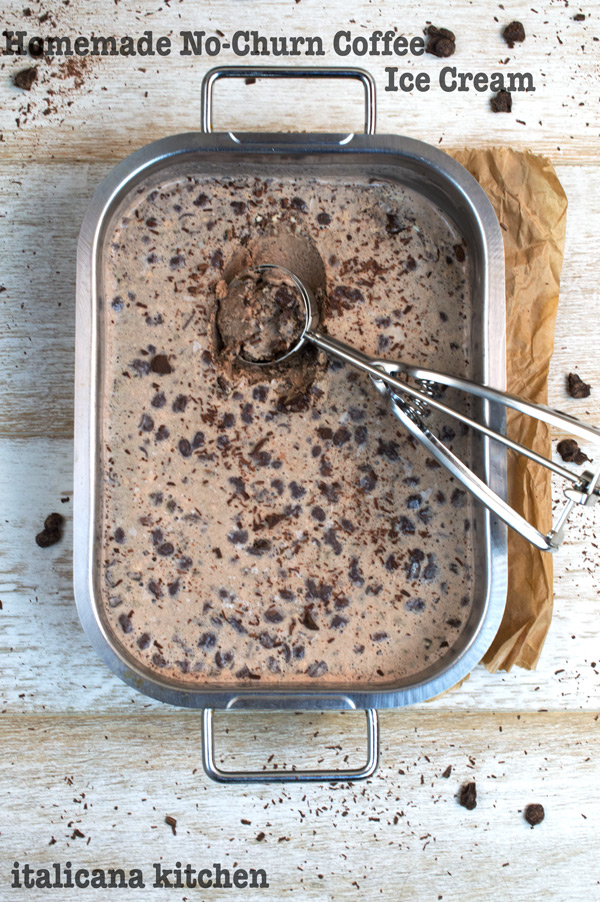
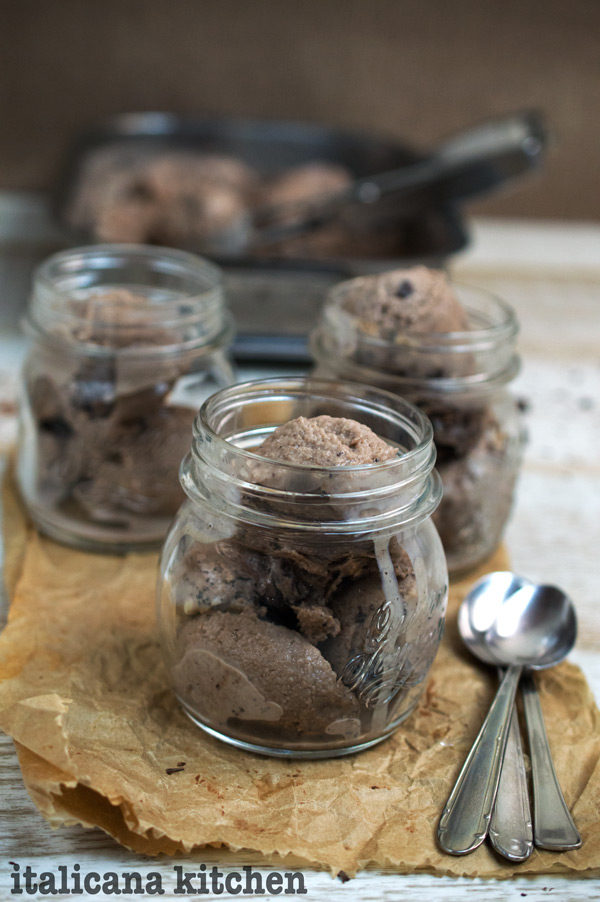
Who would have thought that making homemade coffee ice cream would be so easy. This recipe is awesome. There is no ice cream machine needed, it calls for just 4 ingredients and the prep time is around 5 minutes. After which, just pop it into the freezer. I love simplicity.
I grew up in a family where soda was drunk on special occasions, yet ice cream was eaten every evening after dinner like it was going out of style. We always got our ice cream from the “Schwan’s man” as we called him, the driver of the Schwan’s distinctive yellow trunk that delivered frozen goods; I think his name was Carl. He rang our door bell every 2 weeks and was always dressed in a blue jacket and some kind of crazy hat :: cappello. My two older brother’s and I would race to the door to let him in as our dad trailed behind. Carl would hand us a brochure of the flavors but we usually always got the same kinds: 1 gallon of strawberry, 1 gallon of chocolate, 1 gallon of vanilla, one 1/2 gallon of cookies n’cream, one 1/2 gallon of chocolate chip cookie dough and one 1/2 gallon of mint chip. A small amount, huh? That usually lasted us 2 weeks, and sometimes we ran out before then. Like I said, we loved ice cream.
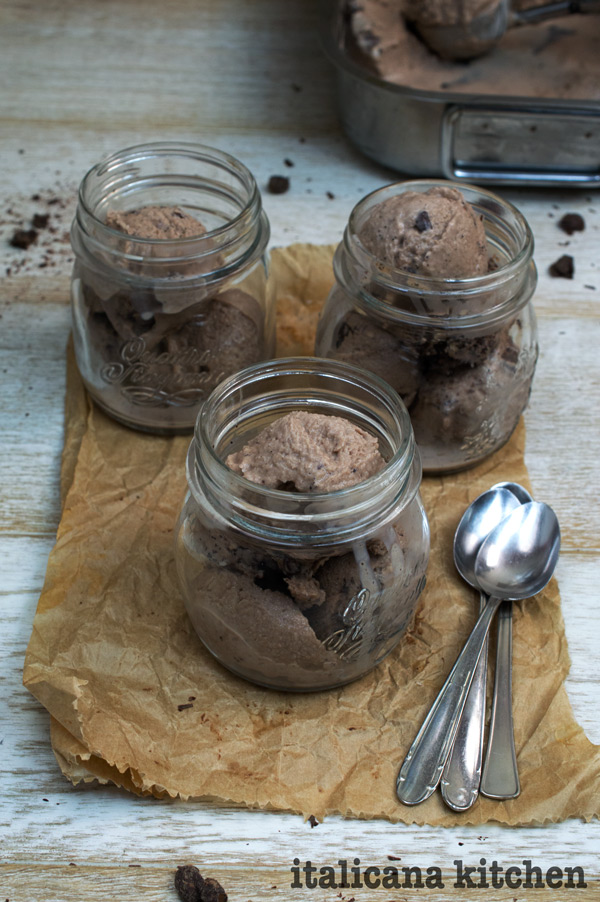
My ice cream eating habits :: abitudini have definitely decreased since my childhood years (thank you slower metabolism…so not cool). And, although I may now only opt for a scoopful instead of a bowlful it is still one dessert that I could eat anytime of day.
Speaking of bowlfuls, my childhood neighbor and friend, Andy and I use to frequently eat ice cream together while studying. I should clarify, it wasn’t just ice cream. No…no…it was a special decadent concoction :: miscuglio that we invented that consisted of: 4-5 scoopfuls of ice cream (flavor of choice), chocolate syrup, caramel syrup, malt powder, crushed oreos and sprinkles. It was an absolute food bomb. We even coined the term “C-Andy Special” for this unique dessert. Get it? C for Cindy….Andy, for Andy, written together it spells Candy and it was obviously special. How could it not be; it was rich, delicious and anything but healthy. Just perfect for adding more pimples to our adolescent cheeks.
After mine and Mr. Italicano’s wedding last summer, we were home at my parents for a few days. We invited over a few people from the neighborhood to eat up some of the gelato and toppings we had left over from our wedding. For old times sakes, Andy and I decided to recreate the C-Andy special and it turned out to be a complete disaster :: disastro! For one it was WAY too sweet, my refined adult taste buds could not handle all the sugary industrial toppings, and secondly, it was WAY too much! Not even a few spoonfuls into the bowl my stomach was already telling me to stop. I felt sacrilegious dumping the C-Andy special into the sink—it was the first time I’ve ever thrown out ice cream. Just, so wrong.
Luckily for you all, this homemade no-churn coffee ice cream is creamy and rich but just the right level of sweetness :: dolcezza.
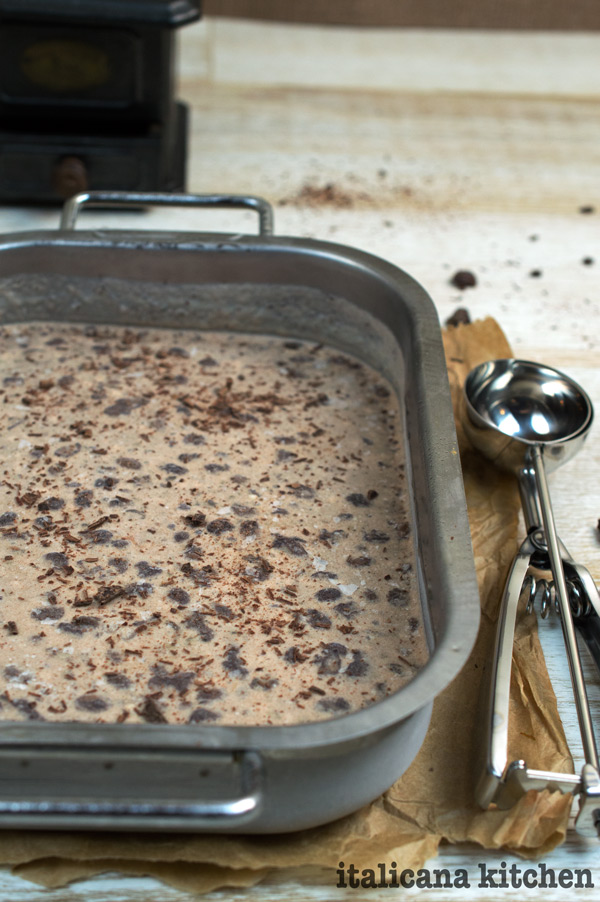
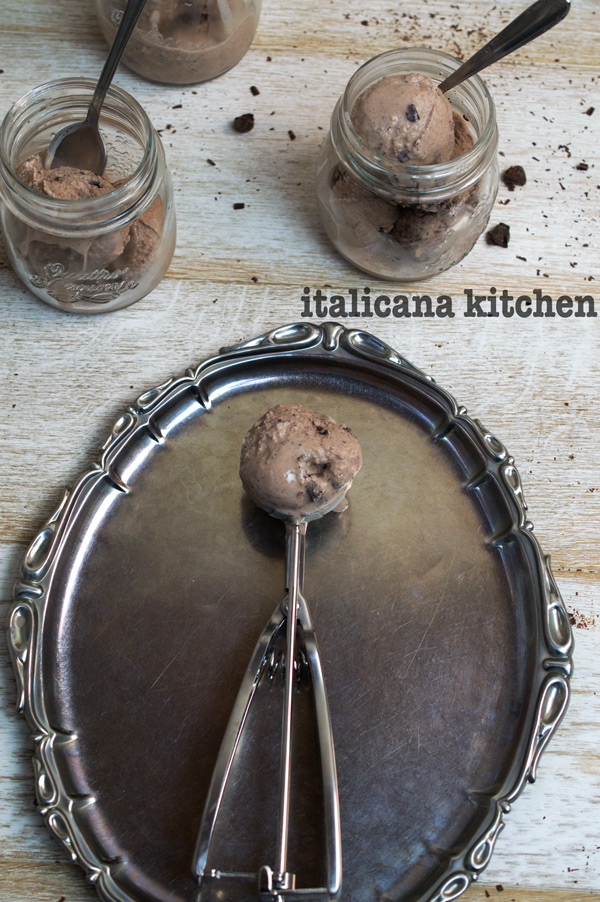
I tested this ice cream 3 separate times before coming up with the right mixture of ingredients. As you can see in the photos I added some chocolate coated coffee beans. My third time around, I skipped this step and actually preferred it better because the coffee beans were quite strong. So depending on your taste buds :: papille gustative, you can either add a handful or omit them.
Mix the ingredients together in the order given. Freeze for at least 6 hours.
*To make the chocolate covered coffee beans, melt 2-3 small pieces of dark chocolate in a bain-marie add a small handful of coffee beans and stir to coat. Then spread the chocolate covered coffee beans on a piece of wax paper until dried. Store in an airtight container in the refrigerator.
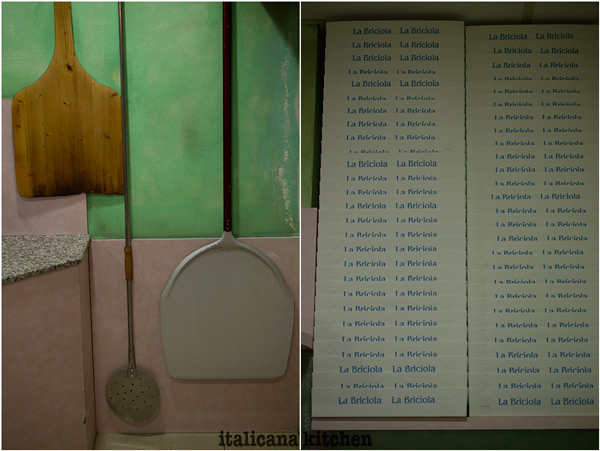
Flour, baking powder, salt, olive oil and water are the base ingredients for making an Italian thin crust wood fired pizza. You would think then that all dough would be the same or that all pizzas would be equal in taste. So, not true. Each pizza chef, or pizzaiolo, as they say in Italian, has his own secret recipe, quality of ingredients and oven that make a big difference in outcome of this beloved dish. According to mine and Mr. Italicano’s taste buds, the pizzeria, The Briciola, in Correggio, Italy is among the best. Carmelo, the owner, was kind enough to let me come in and get a behind the scenes look on making authentic Italian pizzas.
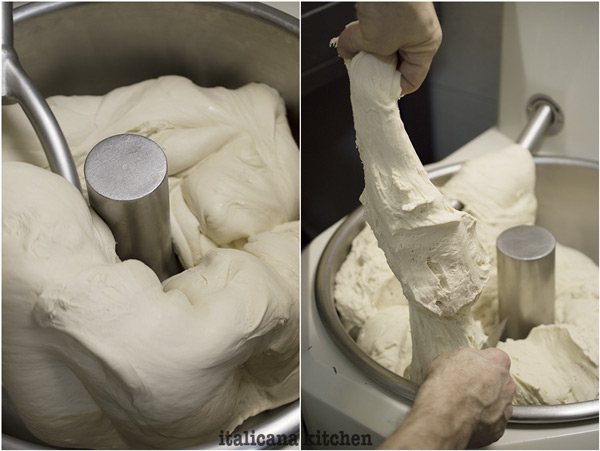
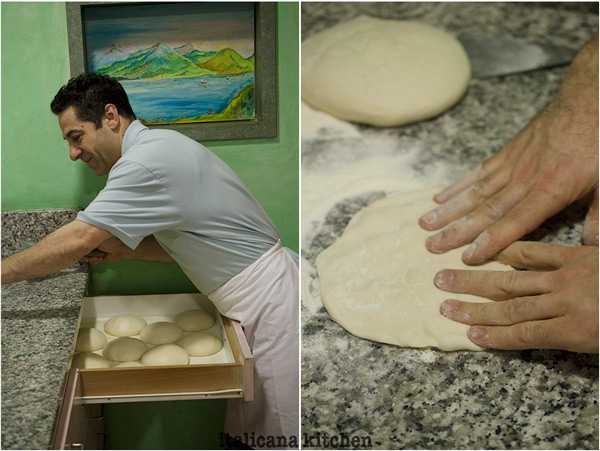
A pizzaiolo’s work day is by no means easy. The hours are long and there is a lot of muscle involved. By 8:00a.m. Carmelo is already in the store pouring in huge sacks of flour and the other ingredients in an enormous professional mixer which twirls everything together until reaching a soft pillow of dough. He then stuffs the dough into large plastic containers and transfers them to the refrigerator to rest for roughly six hours.
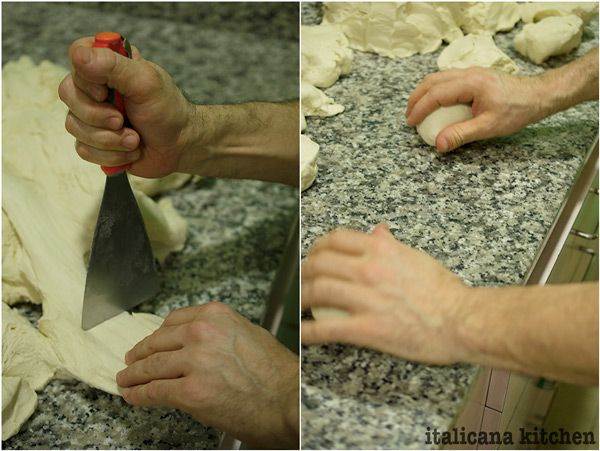
Around 2 p.m. It’s time to get the arm muscles moving. Cutting a big chunk of dough from one of the containers he slaps it on a sparkling clean marble counter and begins to cut off smaller chunks of dough with a pizza spatula.
“How do you measure the size?” I ask Carmelo.
“I’ve been doing this for many years,” he replies, “by now it just comes naturally.” Without losing a beat he lays the spatula down and begins rolling the chunks into small balls against the counter, both hands moving in unison like an automated car waxing machine.
“This size is for a regular pizza,” he says working with such speed that the balls were already formed and he was reaching for the spatula again. “This is the size of a small pizza,” he said while chopping off a few smaller chunks, “and this for a large,” he added while cutting some more, only this time larger.
“The balls of dough will now be placed in the drawers to rise for 4-6 hours, like these,” he said opening two of the drawers that lined the front of the counter. The dough looked like babies cheeks that were soft and flawless and begging to be pinched.
“Now for rolling out the pizza,” Carmelo said throwing flour on the marble countertop like a carefree rich business man tossing his chips in the center of a poker table. He took one of the medium sized balls from the drawer and flung it on the counter, a puff of flour rose in the air. His hands began to press into the dough like a piano player playing a dramatic melody.
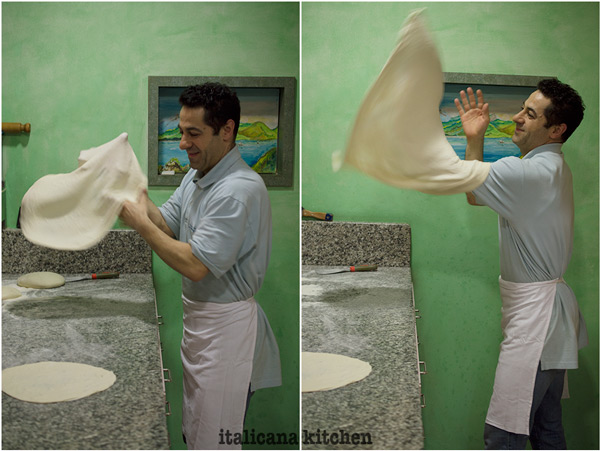
Now comes the fun part, the dough being flipped into the air, mesmerizing just like in the scene from a classic Italian film. In a blink of an eye, the dough that was flattened into a disc turns into a giant flying saucer. Carmelo makes it look so easy; however, I know if I were to try it, I would end up with a dough beret on my head.
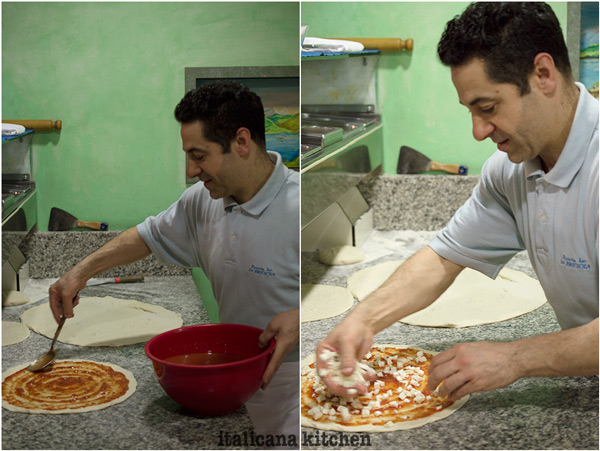
In the time that the dough rose, Carmelo had prepped the topping station. Bunches of fresh basil, sliced olives, salty capers and numerous other ingredients filled the containers. Carmelo grabbed a large bowl filled with a deep red tomato sauce and spooned it onto one of the flattened discs, using the back of the spoon to evenly distribute it out.
“I’ll make you a Pizza Margherita,” he said, reaching for some cubed mozzarella cheese and topping it with a few basil leaves. The Pizza Margherita is a prized pizza invented by Raffaele Esposito in the late 1800’s for the visit of King Umberto 1 and Queen Margherita of Savoy. The pizza represents the Italian flag which is green (basil), white (mozzarella) and red (tomato).
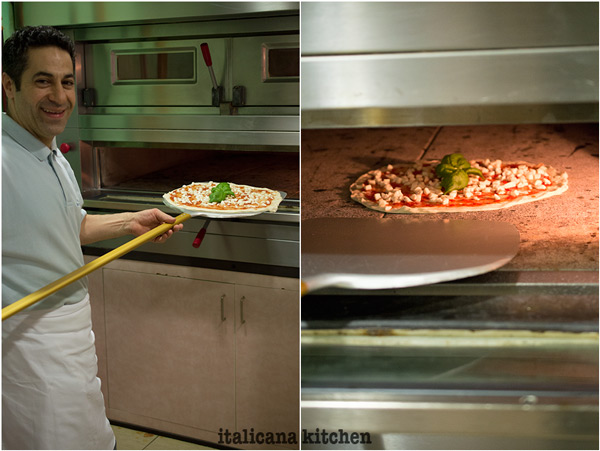
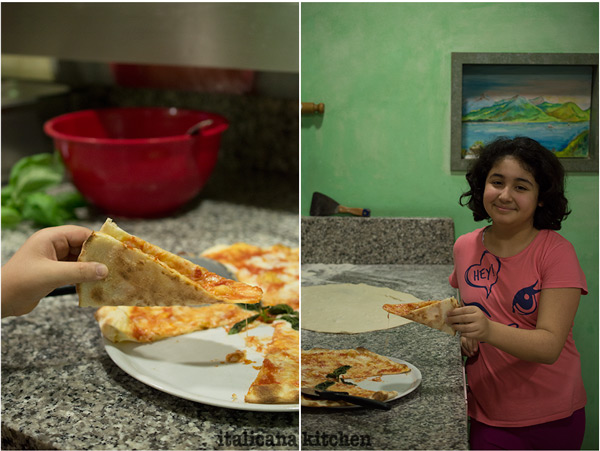
Carmelo carefully pulled the prepped pizza dough onto the pizza peel like a woman pulling on a pair of skinny jeans that are too small, an inch or two at a time until fully on. He then opened the oven and with a few quick jabs of the peel, the pizza was lying on the hot brick to bask away in the 572°F (300°C) heat.
After 3-4 minutes, Carmelo was in front of the oven and with another 2 quick jabs the baked pizza was back on the peel then sitting on top of the countertop, perfectly cooked with a golden crust and glistening melted cheese.
Talk about some self-restraint, I wanted to devour the pizza immediately. I forced the thought to pass as I had work to do in order to capture this delicious edible treat. Carmelo’s daughter, Linda, was a great assistant and hand model. Look at the photo below closely. Do you see how it’s perfectly bent? If you go to some pizzerias you find some pizzas that are so thin and soggy with sauce that you can’t pick up a slice in your hand, others are so thick that you have trouble bending it; Carmelo’s pizzas, however, have just the right thickness and crunch to make you want to eat the entire thing. The best part about eating pizza in Italy, is that you typically do! Whereas in the states we usually order a pizza to share, in Italy each person typically orders their own.
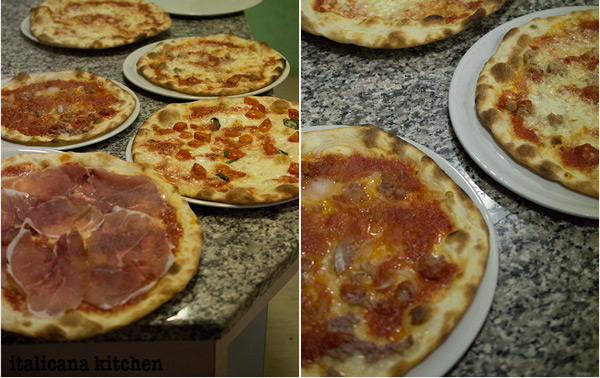
I stopped back in during the evening rush to capture the marble slab full of hot pizzas.
The pizzeria was alive with customers at tables and orders being taken over the phone for pick up. Observing Carmelo was like watching a pendulum in a clock, back and forth he went from the marble counter to the oven, switching out the pizza peel size in between and filling up to-go boxes with hot cheesy discs.
Carmelo slid another pizza in the oven as his employee Paola took two others out to the tables; customers waited in the lobby breathing in the aromatic air of freshly baked bread. It was just another night for Carmelo, but for me it was a taste of Italy and a glimpse of tradition that transformed an ordinary evening into a memorable moment.
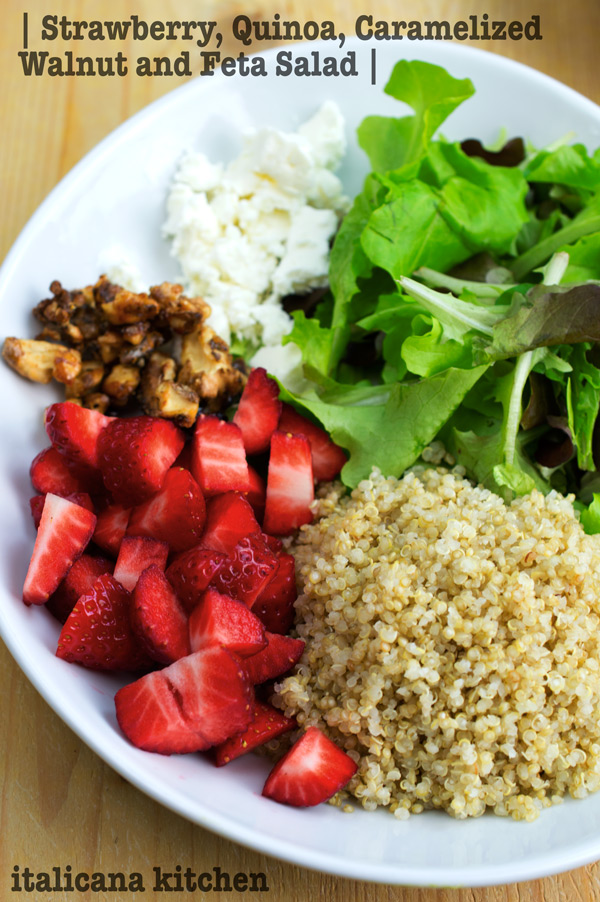
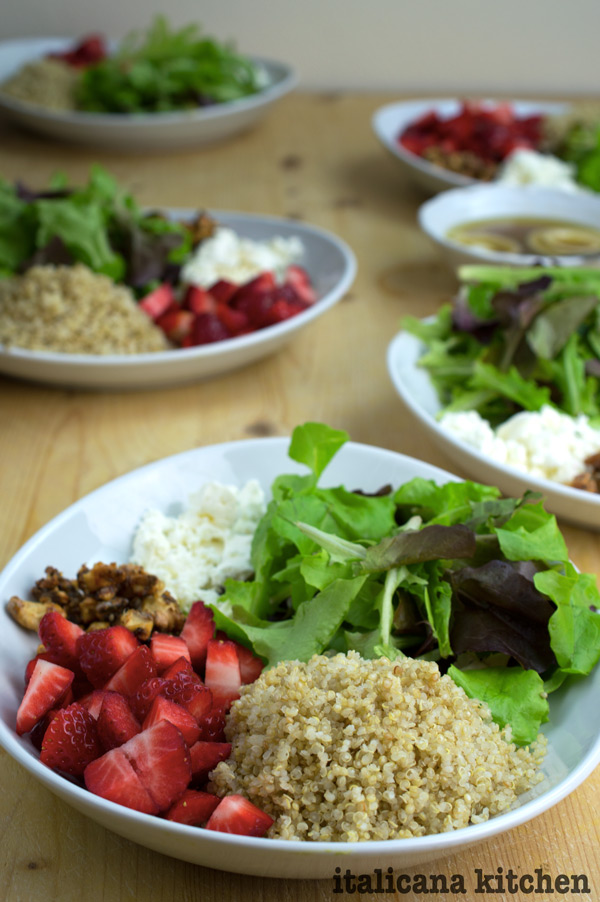
Salads don’t have to be boring. In fact, they shouldn’t be; otherwise you’ll be quick to skip them all together and find yourself with a hamburger in one hand, fries in the other and a pop wedged between your thighs. This salad is anything but bland. The plump :: paffute, juicy strawberries combined with quinoa, caramelized walnuts and feta are little flavor explosions in your mouth, ok, not Pop-Rock style (remember those?), but definitely some taste bud dancing is going on. Which is why I decided this recipe would be perfect for my “girl’s night in” dinner I was hosting.
I adapted this from Lindsey’s recipe at Pinch of Yum. She’s been my food blog guru since I started blogging 2 months ago. Her book “Tasty Food Photography”, filled with how to’s and Photoshop tutorials, is essential for any beginner blogger. Her husband Bjork even writes up detailed posts on how they earn money :: soldi from blogging (a question that everyone asks me.) Hands down good people that produce awesome recipes/content, volunteer/donate to worthy causes and are such an inspiration on finding the right kind of balance between work/life and receiving/giving. Major kudos.
Lindsey’s recipe included pomegranate, baby kale, wild rice, salad, walnuts and feta. Unfortunately, I coudn’t find some of these ingredients so I made some adaptations. Pomegranates are out of season so I substituted with strawberries; I couldn’t find baby kale at the market so I opted for salad; was too lazy :: pigra to go to the store for the 3rd time in a day so I used quinoa instead of wild rice; I caramelized the walnuts and the feta, well, that remained the same.
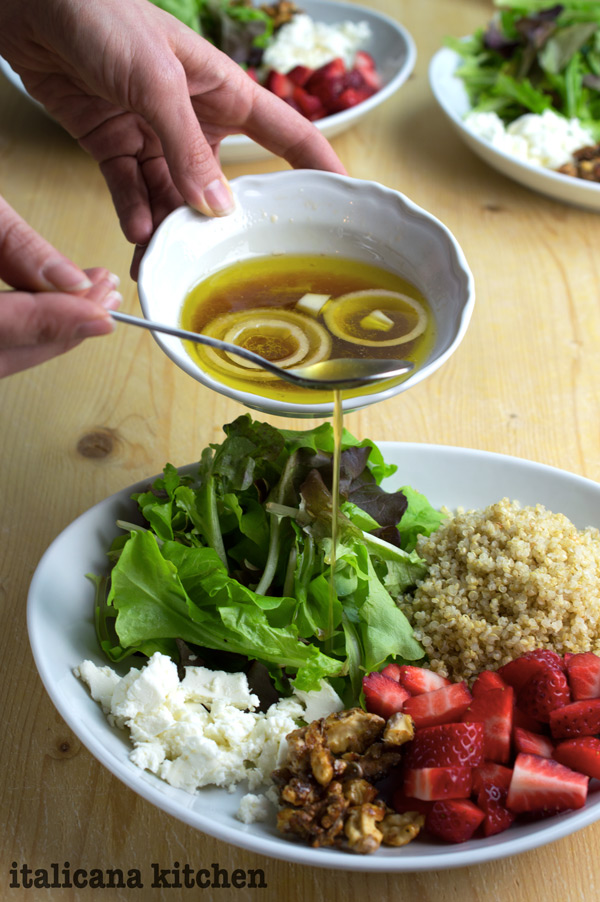
As for the dressing :: condimento, using the same ingredients, I adapted it to my own taste and put the onion slices in a bowl to infuse instead of mincing—great for those who want a little tang but not too much.
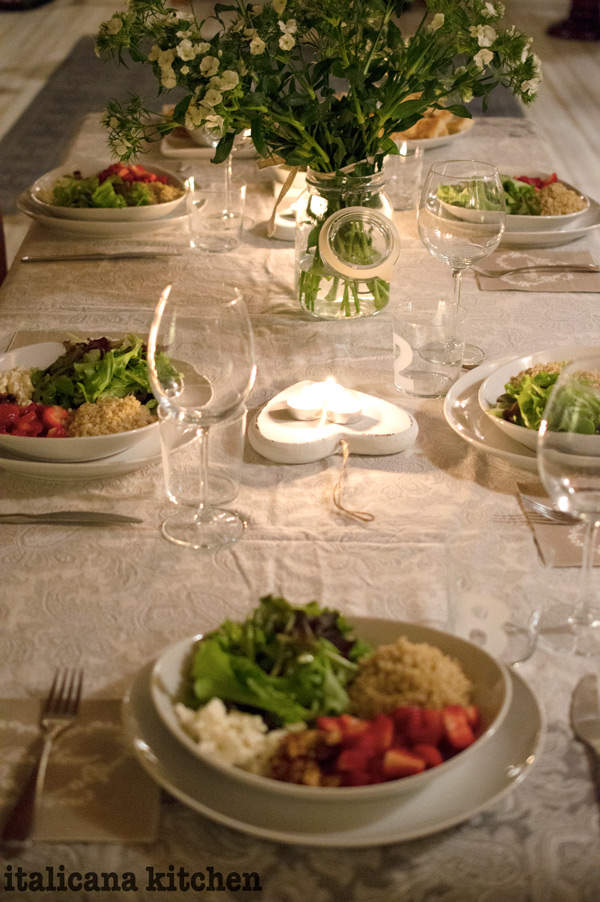
The “girl’s night in” menu included:
Fava Bean and Avocado Dip with Tortilla Chips
Strawberry, Quinoa, Caramelized Walnut and Feta Salad
Double Baked Ricotta, Kale and Roasted Tomato Potatoes
Roasted Purple Carrots with Extra Virgin Olive Oil and Sea Salt
Corn Cake
*Recipes to come!*
I adore dinner parties surrounded by friends around a table of good wholesome food :: cibo sano. Stories are shared, laughter is heard and memories are created. Simplicity at its best.
No TV, no internet, no Facebook during this dinner. Just good real life contact with friends, something that is getting to be rarer and rarer in our digital age :: epoca digitale.
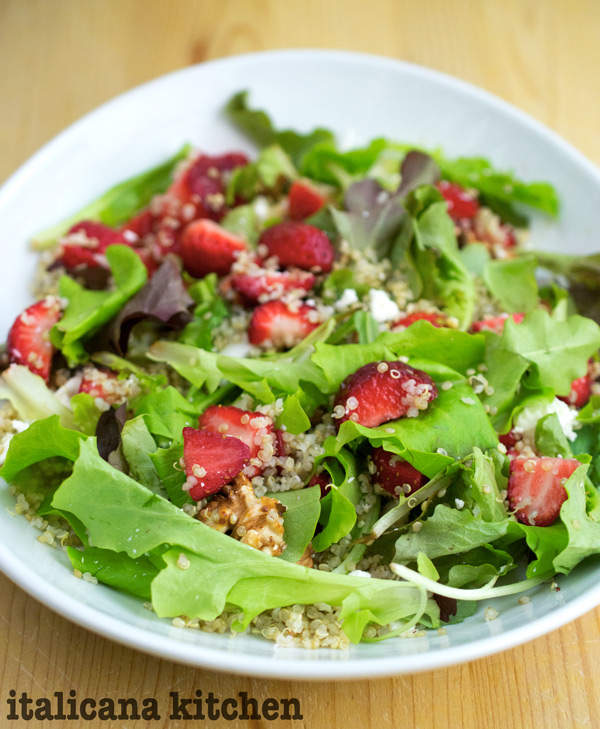
Strawberry, Quinoa, Caramelized Walnut and Feta Salad
Put the walnuts in a skillet, add the sugar and cook over medium to medium-high heat for about 3 minutes stirring continuously. The sugar will melt and will turn brown caramel color. Remove from heat and spread out on a piece of wax paper for a few minutes to cool so the walnut pieces won’t stick together.
Divide the ingredients among 5 plates and top with the dressing before serving.
*To make this salad for 1 person use the following measurements: .7 ounces (25g) mixed green salad, ½ cup (75g) quinoa, ¾ cup (100g) quartered strawberries , 1.4 ounces (40g) feta and 6 walnut halves (15g) (caramelized with 1 teaspoon sugar).
For the dressing:
Combine the ingredients together in the order given and stir well. Use at room temperature or slightly chilled. Store left over dressing in the refrigerator.
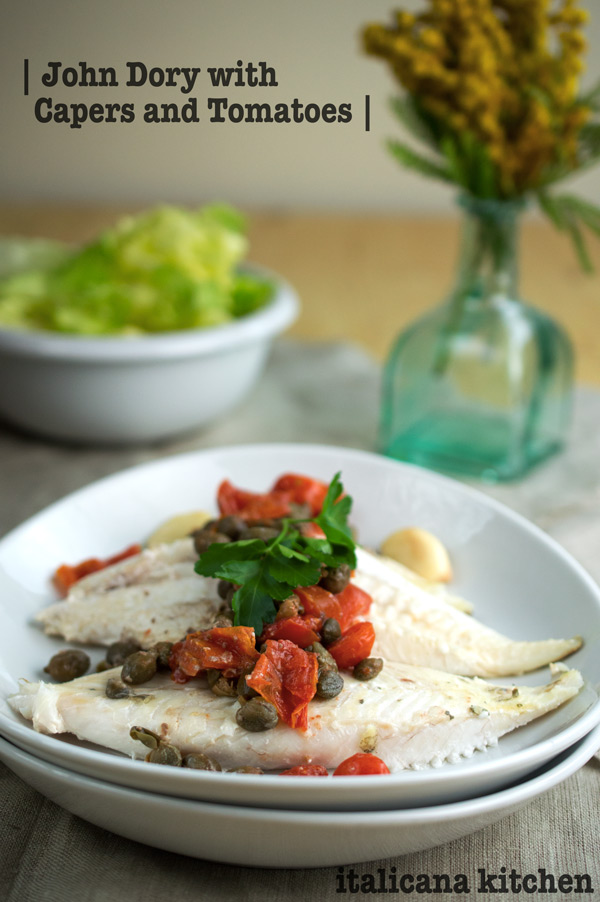
Although you pay in gold for John Dory, known in Italian as pesce San Pietro or “St. Peter’s fish”, it is worth every penny. With a firm texture and a buttery flavor that is superb on its own, it’s best cooked with just a few simple ingredients that won’t steal the show.
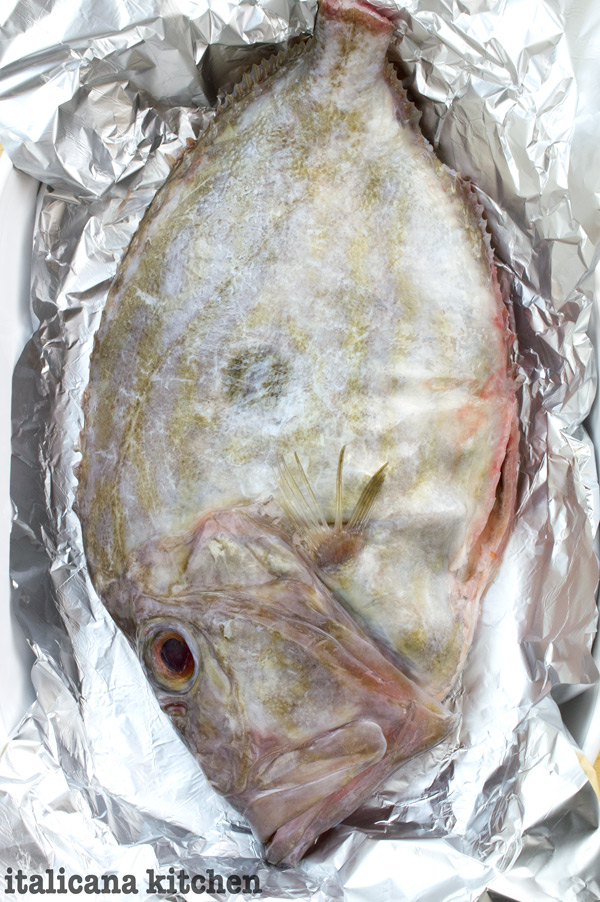
The John Dory boasts long spines :: spine on its dorsal fin and a large dot on both its sides that according to the legend that my fishmonger recounted to me, corresponds to the fingerprints left by Saint Peter when he picked up the fish with his hand, took pity on it and threw it back into the sea. Lucky little guy.
Not only is John Dory prized among chefs for it taste and texture, but the meat also separates into four boneless fillets :: filetti, perfect for kids or for who (*cough* me*) doesn’t have the patience to pick apart the white from the bone and wants to dig into the meal right away.
For many years I thought that cooking a fish whole was a daunting process. I mean it’s what fine dining restaurants do, so it had to be right? I worked on the Italian Adriatic coast for a month each summer :: estate during the first four years that I lived here, and I clearly remember the penguin dressed waiter at my hotel’s restaurant that would waddle to my table pushing a cart topped with a long skinny platter. He would stand in front of me carefully peeling back the fish’s skin as he sectioned off the fillets of white meat and positioned them carefully on a white plate before topping them with an aromatic herb or sauce; what elegant presentation.
To my surprise baking a fish whole requires very little work; in less than 5 minutes you have it prepped and then the oven does the rest of the work. My Italian friend Isabella shared this mouthwatering recipe with me that simply calls for four ingredients: fresh datterini or grape tomatoes, garlic, capers and an aromatic extra virgin olive oil. If you are not a fan of capers :: capperi, just add more tomatoes instead.
With a firm texture and a buttery flavor that is superb on its own, John Dory is best cooked with just a few simple ingredients that won’t steal the show.
Serves: 2-4
Ingredients
1 John Dory, whole with insides removed
2 garlic cloves, smashed
¼ cup capers
¼ cup quartered datterini or grape tomatoes
Extra virgin olive oil
Instructions
Preheat oven to 356°F (180°C)
Rinse and dry the San Pietro thoroughly, then stuff with the garlic, capers and tomatoes. Set on a baking sheet lined with wax paper. Bake for 45-55 minutes or until the skin easily peels away and the meat flakes when pricked with a fork.
To serve: peel the skin off and discard. Section off four fillets and set on a serving platter then top with the capers and tomatoes. Discard the garlic. Drizzle with extra virgin olive oil and eat immediately.
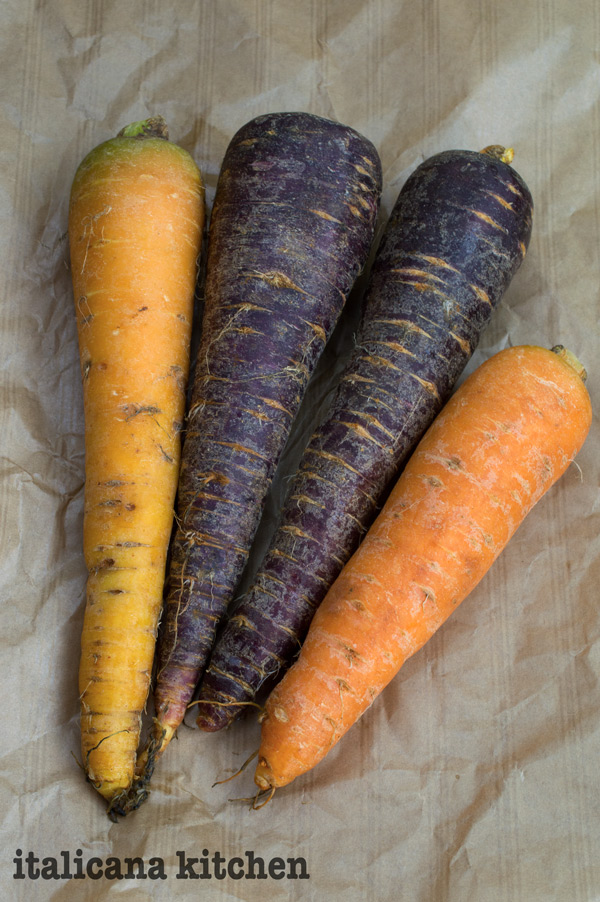

 These roasted purple carrots were part of my dinner party menu, and everyone had seconds. Secretly I was hoping they wouldn’t so I would have leftovers—selfish, I know, but they were so good it was hard to share! Luckily they are easy to make so I can make them when I want without any effort. I used both purple and orange carrots but you can also use just one color. Just wash the carrots well, cut them in strips :: strisce, place on a baking dish lined with wax paper, drizzle with a good quality extra virgin olive oil, sprinkle with course salt and bake for around 20 minutes. You can serve them warm or cold.