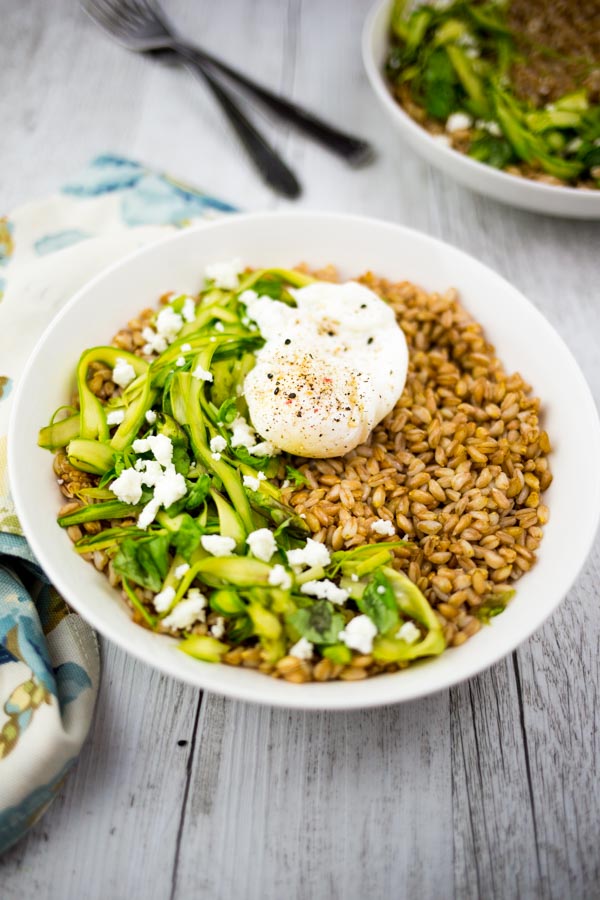
I hope this farro bowl with poached eggs, shaved asparagus and feta rocks your world as much as it did mine!
I have to admit, this dish was extra delicious and special for me. After 9 months of abstaining from undercooked eggs while I was pregnant, I finally sliced my fork into the center of a perfectly cooked poached egg, let all that creamy yolk run out right on top of tangy little feta crumbles, silky shaved asparagus, pungent basil leaves and a mound of farro. If I could put heaven in my mouth, this would be it.
Oh, did I mention how easy this recipe is? Here’s a video recipe that I made with Poggio del Farroa Tuscan farro producer that I collaborate with to make delicious recipes and products.
One of the parts not included in the video is the addition of vinegar (I used white) and swirling the water to make a perfectly poached egg. You can check out Chef Ramsey Gordon’s videoto see how simple it is.
Quick and wholesome meals are essential for my busy life with a newborn. Being that I am breastfeeding, I want to give Pepper all the right nutrients she needs to grow strong and my meal planning has to be efficient as I have limited time to cook. This is why I love this farro bowl. It’s packed with goodness and I can make it in a snap.
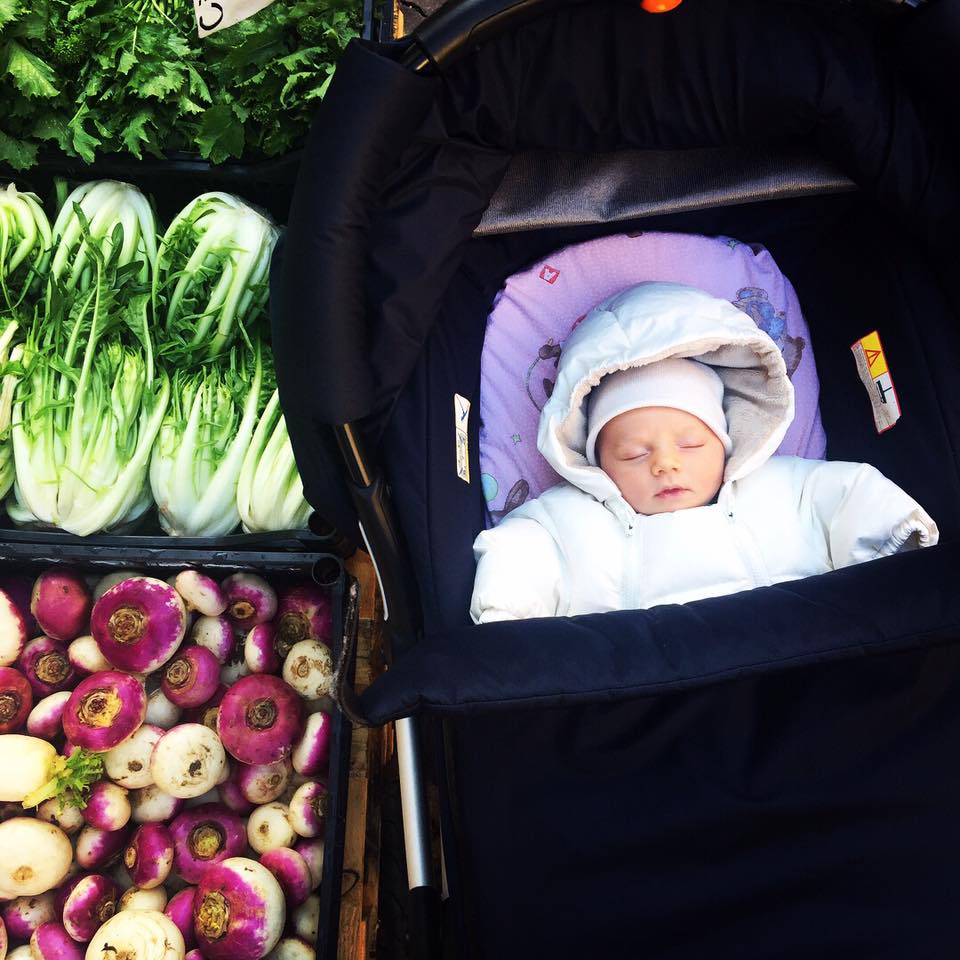
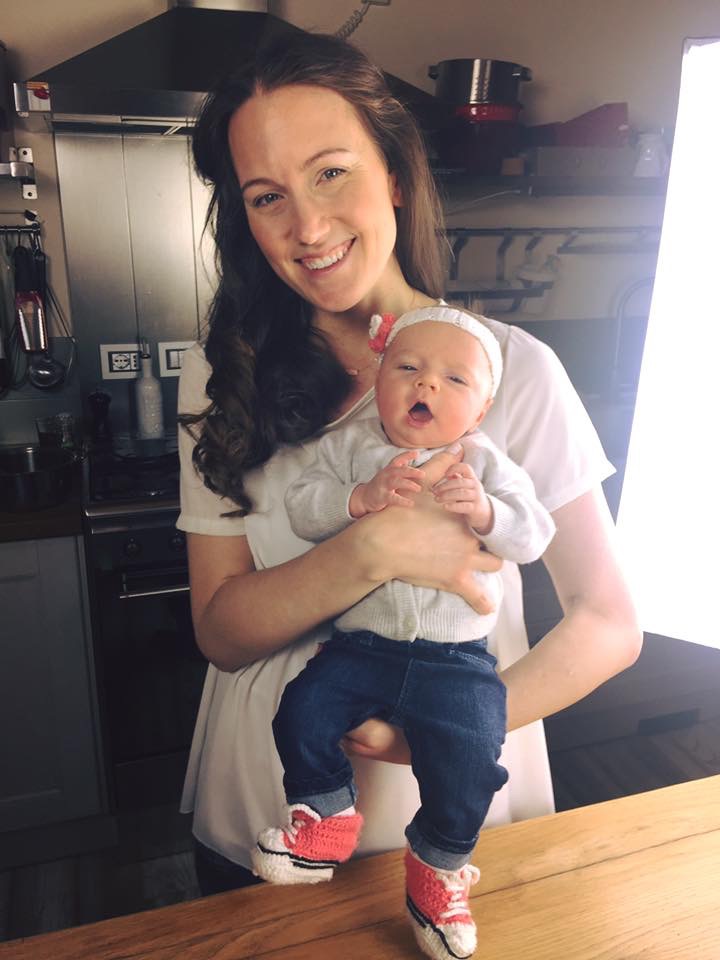
Speaking of Baby Italicana, she turned two months last week! It’s surreal how fast time flies by. Mr. Italicano and I are loving every moment of parenthood, even the middle of the night wake ups and poopy diapers. We wouldn’t trade it for anything. Our life right now has definitely become more routine, but it feels so remarkably amazing.I never knew my heart could feel this full, it just bursts and overflows with love. ❤️ We are so grateful for this little beautiful creature.
I cannot resist posting a blast of photos: I hope they make you smile and brighten your day as much as they do ours. ❤️
Our beautiful newborn photos above were taken by my talented friend and photographer, Michelle Aschbacher.
Farro with Poached Eggs, Shaved Asparagus and Feta
Try this simple farro bowl with poached egg, shaved asparagus, feta and basil. I LOVE how easy it is to make. So delicious too!
Serves: 2
Ingredients
1 ¼ cups (200g) pearled farro
1 tablespoon coarse salt
5 cups water
6 Asparagus
1 tablespoon extra virgin olive oil
1 garlic clove, skin removed
Extra virgin olive oil
Balsamic vinegar
1 handful of basil, chopped
2 tablespoons feta, crumbled
1 tablespoon white vinegar
2 eggs
Gomasio
Salt and black pepper
Instructions
Fill a medium sized pot with water, add the farro and salt and bring to a boil. Cook for 18 minutes.
Use a vegetable peeler to shave the asparagus.
Add the extra virgin olive oil, asparagus and garlic clove to the skillet. Cook for 1 minute over medium heat, stirring occasionally. Discard the garlic.
When the farro is done, drain and divide the farro into two bowls. Drizzle with extra virgin olive oil and balsamic vinegar. Stir to combine.
Top farro with the asparagus, chopped basil and feta.
Bring a small pot of water to boil. Add the white vinegar and reduce the heat to a low simmer. Crack one egg into a small bowl. Now stir the water with a spoon to create a vortex and gently lower the egg into the water. This will help the yolk to be covered by the egg white. Cook for 3 minutes or until the egg white has harden up. Remove with a slotted spoon and pat dry with a paper towel. Repeat for the second egg.
Add the poached eggs to the bowls and top with a sprinkle of gomasio, salt and pepper.
3.4.3177
I made this recipe for Poggio del Farro. Although we often collaborate with this company, this specific recipe is not sponsored by them.
Pre-pregnancy I was a sporadic breakfast eater. I would savor two cups of dark roast coffee when I woke up and eat my first meal of the day when I felt hungry—sometimes around 10am, other times at noon. That meant that lunch was sometimes at noon other times at 3pm. And, dinner? Well, in Italy we typically eat around 8pm so that at least was pretty routine. And, has to be. Mr. Italicano gets super hangry if he doesn’t get fed within a certain hour. 🙂
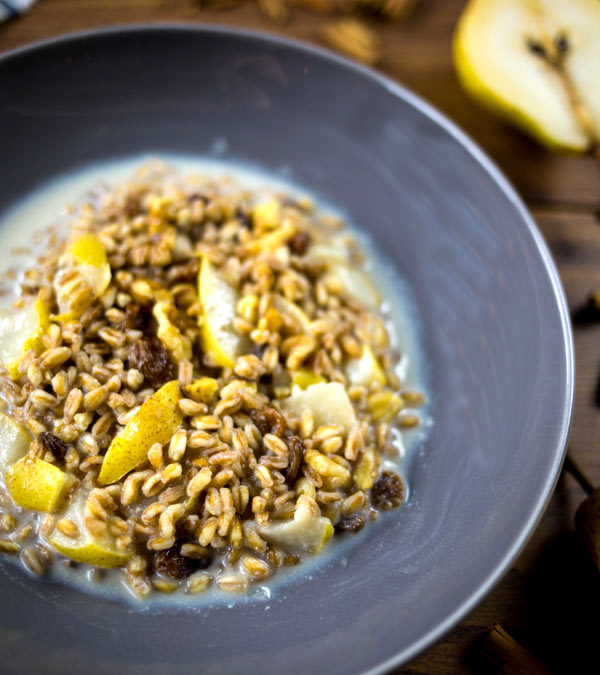
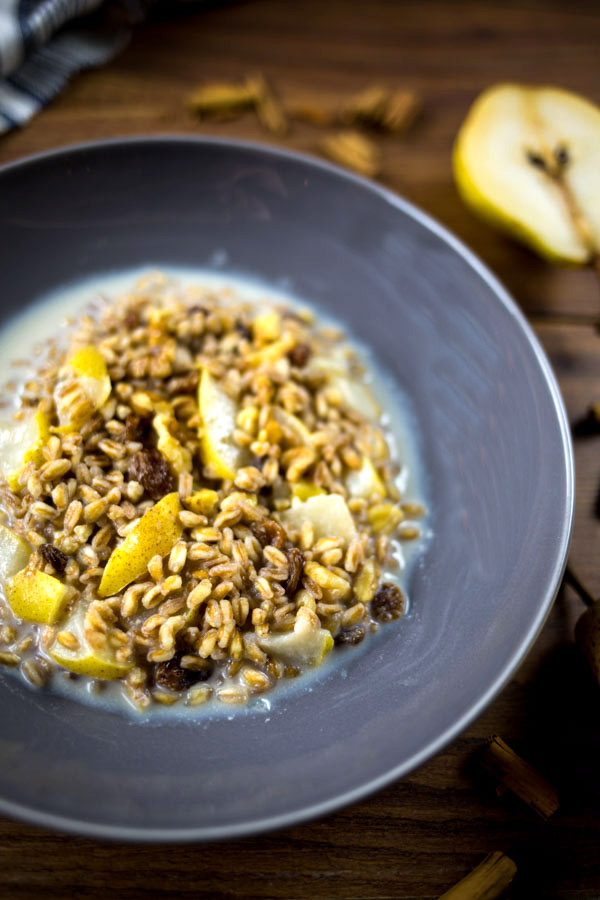
With Pepper growing inside of me, my first priority is ensuring she eats on a regular schedule with nutritious food that will help her mind and body grow. Hello, maple farro porridge with pears, cinnamon, raisins and walnuts. You are a winner. I don’t need any coaxing to eat this breakfast dish early in the morning. It’s warm and cozy, sweet and comforting…it’s composed of simple nutritious ingredients and easy to make. Just check out this video recipe that Mr. Italicano and I made for Poggio del Farro.
A FEW HEALTH BENEFITS
FarroHigh in fiber and a good source of protein, antioxidants and iron (great for those who eat a plant-based diet)
Walnuts– rich in omega-3 fatty acids and important for brain development and memory
Pepper is already learning from me about good nutrition, and she too is teaching me to be more mindful of my eating behaviors. I have always paid attention to what I eat but now specifically to when I eat, the quantity and variety. It’s made quite a difference already. At the beginning of my pregnancy I had low amounts of iron, but thanks to my mindful eating, my OB pointed out that my test results have drastically improved. She was impressed, as many women who are pregnant have a higher risk of developing anemia during pregnancy.
Baby Italicana is not even born (only 3 weeks to go!); yet she is helping me to be more mindful in my everyday life. Thank you little one. Your mom and dad can’t wait to meet you. ❤
What about you? Are there any nutritious breakfast dishes you love or loved during your pregnancy to start your day?
Maple Farro Porridge with Pears, Cinnamon and Raisins
In a small pot add the farro, water, cinnamon stick and salt. Bring to a boil over medium heat, then lower to a simmer and continue cooking for 10 minutes or until the farro is tender but still slightly chewy. Discard the cinnamon stick and drain any remaining liquid.
Add the whole milk, maple syrup, pear and raisins. Warm over medium-low heat until the milk thickens slightly; 2-3 minutes. Divide among two bowls, top with walnuts, a sprinkle of cinnamon and a drizzle of honey. Buon appetito!
*Any farro grain can be substituted for this recipe. In this case, just follow the cooking time on the package.
3.4.3177
Mr. Italicano and I made this recipe for Poggio del Farro. Although we often collaborate with this company, this specific post is not sponsored by them.
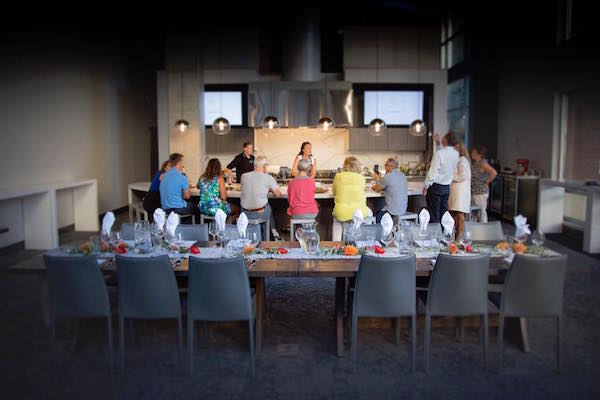
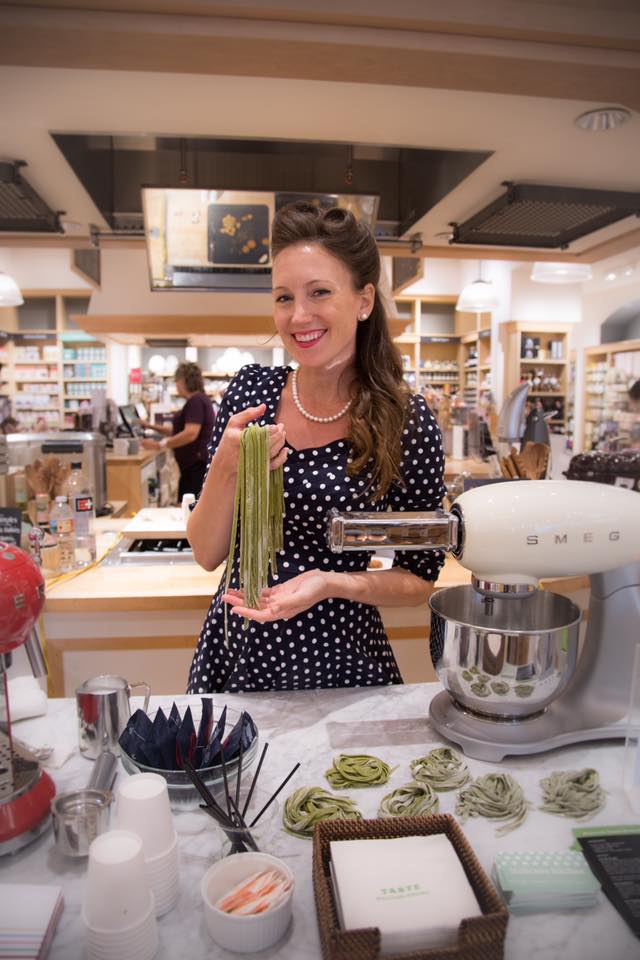
Sorry for dropping off the map! Mr. Italicano, Baby Italicana and I spent over a month in the USA visiting my family ❤ and I did cooking classes and demos around Seattle, Portland and in Virginia for Caruccio’s and Smeg USA. Now we’re back in Italy, and I’ve been aching to write a recipe post, so let me get straight to it and tell you about these amazing mini farro tarts!
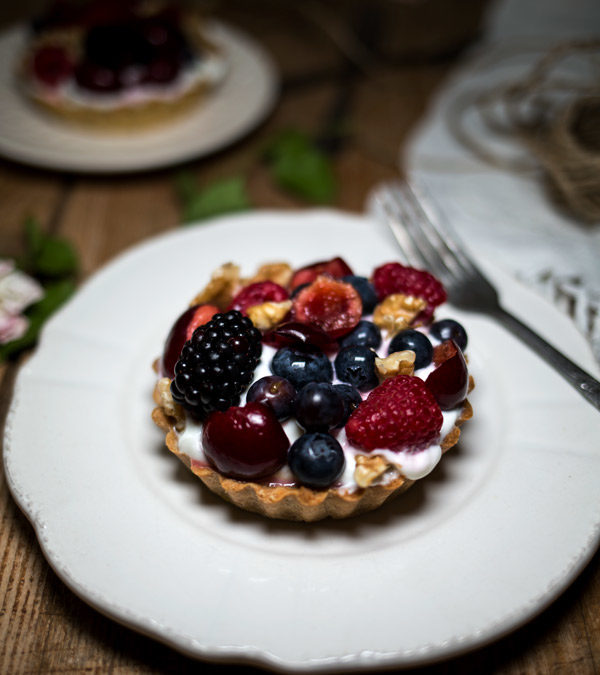
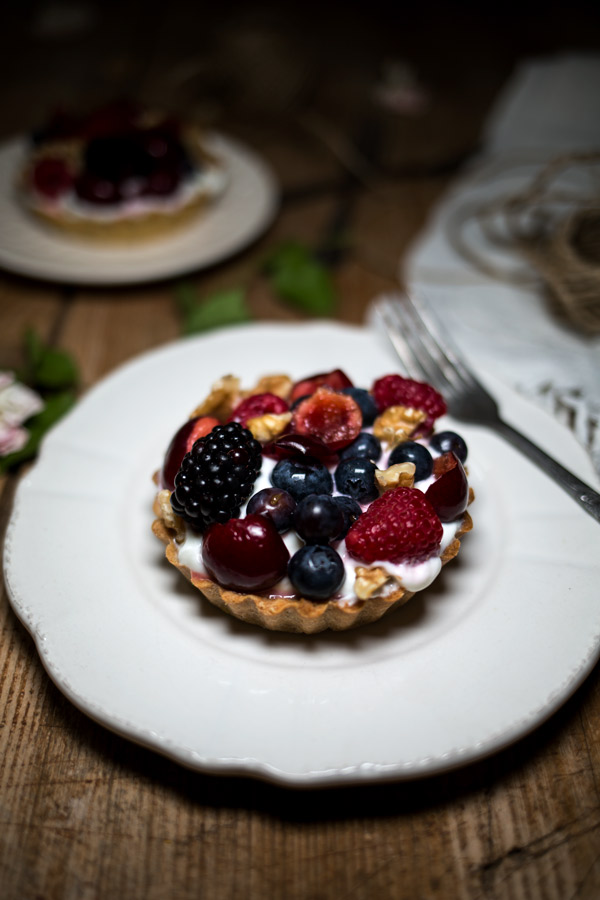
Besides being just extremely cute, these mini farro tarts were a huge hit with the participants at my kid’s cooking class at Caruccio’s, a beautiful new culinary event space in Mercer Island. In this cooking class each child made her own tart, filled it with a homemade lemon curd and topped it with fresh berries. Not a crumb remained!
Here is what a I love about these mini farro tarts:
Kid Friendly — They are the perfect recipe to make for (or with) your child. Fill them with homemade lemon curd, jam or yogurt and top them with berries for a healthy breakfast, dessert or after school snack.
Low in Sugar — Most desserts are pumped with sugars. This tart crust just has 1/3 cup raw turbinado sugar. Obviously, depending on what you fill it will make it more or less sugar-y, so if you are looking for a simple & healthy treat, opt for a good yogurt and fresh fruits, nuts and/or seeds.
Farro — I am a huge proponent of farro. It’s an ancient grain grown in Italy which is nutty in flavor, high in protein and fiber and is often suitable for people who have gluten sensitivities (but not those who have celiac disease). Just search farro recipes in the search box for more recipes. One of the brands I collaborate with and absolutely love is Poggio del Farro.
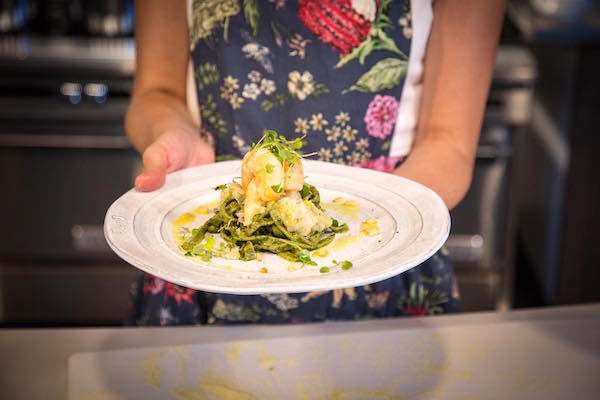
Since I love discovering new ways to cook with farro, I thought I would bring my knowledge to the USA! I created farro recipes for all of my adult classes, pop-up dinner and demo’s at Caruccio’s. Throughout the various events, we made homemade farro salad, farro beet soup, farro ravioli, farro matcha pasta, farro beet pasta, farro crostataand farro chocolate chip cookies. Participants were enthusiastic to learn more about farro, the health benefits and and the best recipes to make with this ancient grain. I was really delighted to see how curious everyone was (even kids!) to learn about farro. ❤
The pasta is bright in color, packed with antioxidants and I put in just the right amount of matcha to not leave any bitter taste—making it easy to pair with any sauce.At some of my demos, I also showed how to make matcha tea with Smeg’s Variable Temperature Kettle (<—affiliate link). I really enjoyed using Sugimoto America ’s delicious organic matcha culinary and ceremonial grade teas. I’m not a big tea drinker, unfortunately I often find it too bitter, but matcha tea is one that I actually like because it’s smooth and I find it less pungent.
I’m surprised with how “italicana” I’ve become over the eight years of living in Italy. My usual craving for a Starbucks coffee has passed—for me it’s too sugary and sweet. I usually drink American drip coffee (straight up black) or I choose to make a homemade latte with just a little added maple syrup for flavor or I’ll make a quick espresso, macchiato or cappuccino. I love how Smeg’s 1950’s style Espresso Machine(<—affiliate link) is easy to use, so stylish and takes up such little space on my countertops. In this video I show you how simple it is to make a macchiato using it!
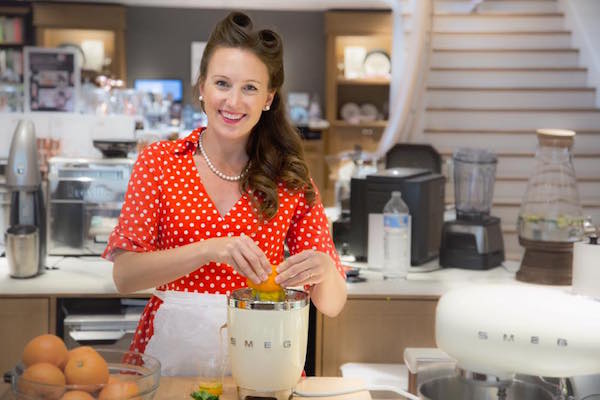
Another simple but satisfying recipe I had the pleasure of demoing is a sparkling citrus juice using Smeg’s 1950’s style citrus juicer (<—affiliate link).
Now that I have Baby Italicana to think about, I’ve been consuming many homemade non-alcoholic drinks. Here’s the easy and delicious recipe:
For a Sparkling Citrus Juice:
1. Squeeze some oranges or grapefruit in a glass
2. add equal parts sparkling water
3. top with a mint leaf
It’s that easy! Great for prego’s like me, for kids or to serve as a nice refreshing drink for your family and friends. 🙂 I made these citrus juice drinks for my nieces and nephew at Lake Chelan when were there with my entire family celebrating my mom’s 70th birthday. They adored this “fizzy drink” and I love knowing that I, their auntie, was giving them something that is 100% natural. ❤
How is Baby Italicana?
This little globe trotter is doing well! She’s 29 weeks old and we’re already in the 3rd trimester! She has become a little ninja in my belly and is kicking all the time (the most incredible feeling ever). She loves her daddy and responds with kicks and high fives when Mr. Italicano taps three times on my tummy (I think he’ll soon start teaching her morse code. Hah!). We love celebrating life moments with her. For my and Mr. Italicano’s 4th wedding anniversary we took her to a Seattle Seahawks game…
…and spent a night at Sleep Lady Mountain Resort in Leavenworth where we got married.
We took her on the outdoor stage where we said our vows, to a beautiful rock overlook where with views of the river and mountains and strolled through the rest of that magical place describing to her all of the special memories of that unforgettable day. ❤
These mini farro tarts are the perfect recipe to make for your family. Fill them with homemade lemon curd, jam or yogurt and top them with berries for a healthy breakfast, dessert or after school snack.
⅔ cup (150 g) cold butter, cut into cubes + more to butter pans
Zest from 1 organic lemon
⅓ cup (75 g) turbinado sugar
1 large organic egg + 1 egg yolk
For the filling:
Greek yogurt, lemon curd, homemade jam (etc)
Fresh berries
Instructions
Preheat the oven to 350°F (180°C).
In the bowl of a stand mixer equipped with the paddle attachment, add the flour, baking powder, salt and butter. Mix on medium speed for 1-2 minutes.
Add the lemon zest, turbinado sugar and eggs. Combine until the dough comes together as a ball. Flatten the dough into a disc, wrap with plastic wrap and place in the refrigerator for 30 minutes.
Butter fifteen 4-inch tart pans with removable bottoms. Divide the dough into 15 pieces. Push each piece of dough into the tart pan until the dough evenly covers the bottom and sides. Pierce the bottom of the dough with a fork many times. (If you have fewer tart pans, you can take turns baking. In this case, keep the dough in the refrigerator until ready to use. You can also use this recipe to make the crust for an 11-inch (28cm) pan crostata. If so, follow the recipe in that link for tips on how to roll out the dough and fill the crostata.)
Bake the mini farro tarts for 22-24 minutes or until the crust is golden brown.
Add your filling of choice (Greek yogurt, lemon curd, homemade jam etc) and top with fresh berries. Enjoy!
3.4.3177
In this post, there are affiliate links and links to the companies I work with. These collaborations allow me to work full time on this blog. I am very selective in my choices of collaborations and products that might be of value to those who follow me. Thank you for your support. ❤
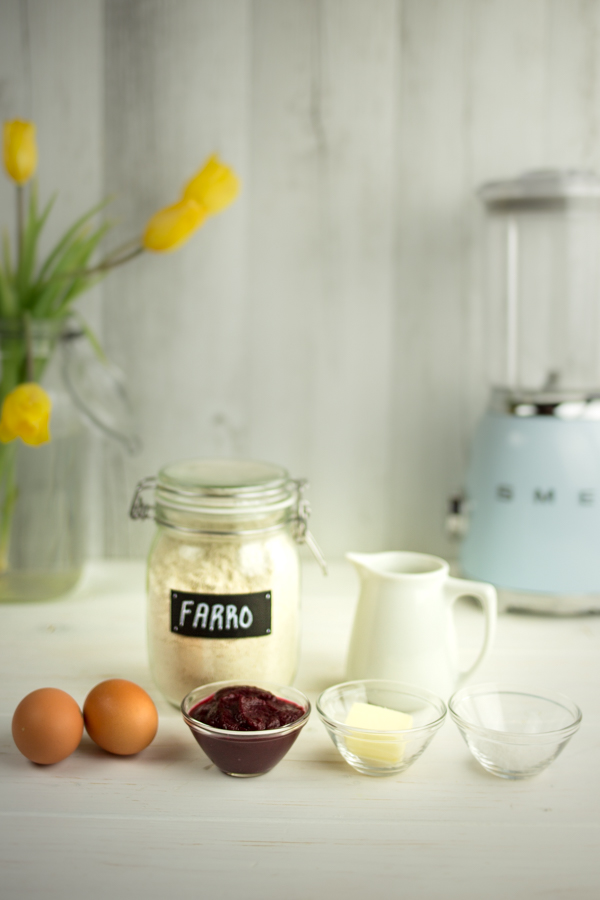
Farro beet crepes! As you can imagine, these beautiful crepes are naturally colored with beet puree. They are the perfect dish for Mother’s Day brunch.
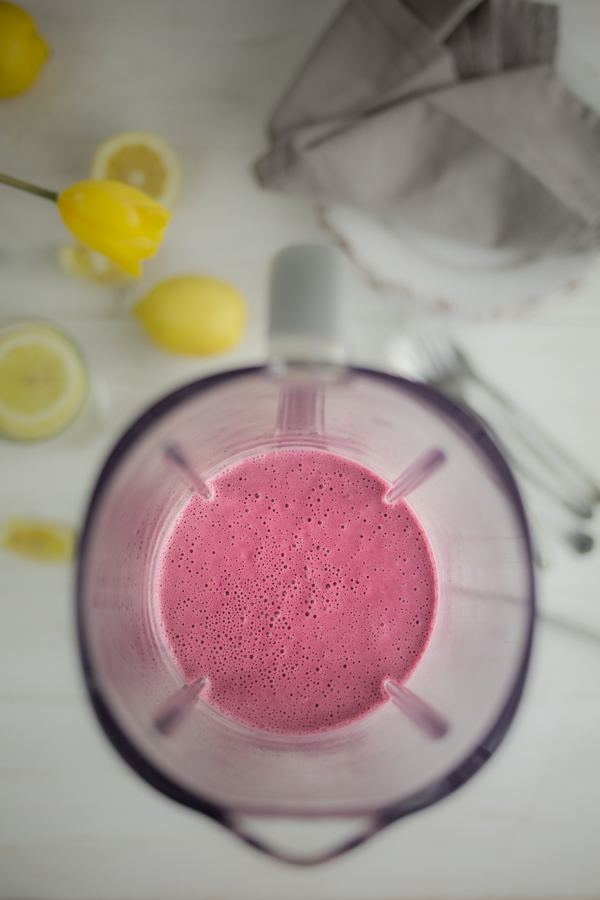
Ever since I learned how easy it is to naturally color my food, I have been experimenting more and more in my kitchen. I love the esthetic look of colored food—Bright! Fun!—I also love packing in more nutritious vegetables to every meal. Plus, it’s easier than you think—way easier.
This post is sponsored by Poggio del Farro. I created the recipe, photos and video—which you can also find on their website along with many other delicious farro recipes. The writing and opinions are my own.
I remember the first time I made a crepe; I was in high school. My feet on a step stool and my hands reaching in the far corners of the wooden pantry shelf (where sometimes my older brother hid the best snacks), I ran across an old 1960s box with a crepe pan designed on the front—probably a wedding present. I was intrigued. I pulled it out, dusted it off and opened it up to find a little recipe book on top of the black crepe pan. That night I made cannelloni crepes for my family. I remember they turned out absolutely terribile. I was disappointed. My dad, on the other hand, continued to eat them. “It’s just one meal, Cindy,” I remember him saying. Ahh, my dad’s simple wisdom. He was right. I was just 16. In my lifetime I would have thousands of more meals to make and whole lot of opportunities to get it right.
The second time I made a crepe was last year, almost 20 years later (wow does that make me feel old). I was recipe testing for Smeg {affiliate link}, an Italian design appliance brand. Since their small appliances have adorable colors, I wanted to create something stylish and colorful as well. My blender spinach crepes were so good that I brought them to my friends house where we created a beautiful outdoor aperitivo (Italian style happy hour).
Since spinach worked so well, I had to try it with beets. I also used farro wheat from Poggio del Farro for these crepes. I have come quite obsessed with Poggio del Farro’s products. Farro has lower gluten content and higher amounts of protein and fiber compared to modern day grains. I use their farro grains to make soups and salads, and their flours to make crepes, pancakes, chocolate chip cookies and homemade pasta, among many other recipes. Farro is pretty much replacing all other flours in my kitchen.
The beet crepe on its own is not so beet-y tasting, so you can top it with a myriad of fillings from sweet to savory. My favorite for this recipe is fresh crispy arugula, creamy ricotta, juicy blood oranges, crunchy pistachios all drizzled with extra virgin olive oil, aged balsamic vinegar (affiliate link) and sweet honey. Pure deliciousness.
Happy Mother’s day to all and especially to my mom, an extraordinary woman whom I admire.
Beet Crepes with Ricotta, Blood Oranges and Pistachios
In a blender or a bowl, add all of the ingredients for the crepes then blend or whisk until homogenous. Chill in the refrigerator for ½ hour.
Add a small knob of butter to a crepe pan or frying pan. As the butter and as it melts over medium heat, swirl the pan so that the butter covers the bottom. Pour in ½ cup of the crepe and quickly swirl the pan so that it distributes the liquid evenly. Cook for 1-3 minutes then flip and cook for another 1-2 minutes. Repeat for the rest of the crepes. Keep the crepes warm by putting them in the oven at a low temperature.
Fill each crepe with some ricotta, arugula, blood orange pieces & zest and pistachios. Drizzle with extra virgin olive oil, aged balsamic vinegar and honey.
Notes
Batter should be chilled in the refrigerator for ½ hour before using.
*If you are not able to find farro flour you can replace with other flour.
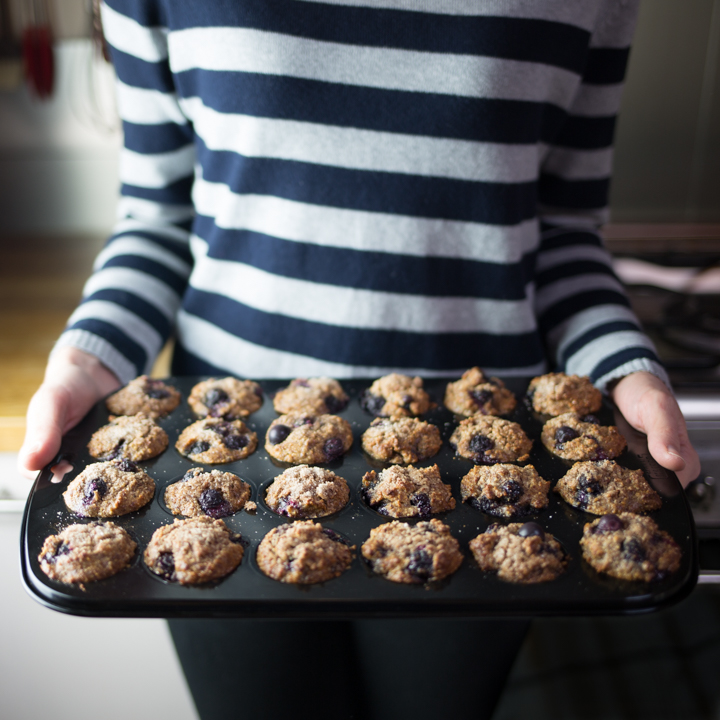
Yes! Gluten-free mini blueberry muffins that actually taste amazing!
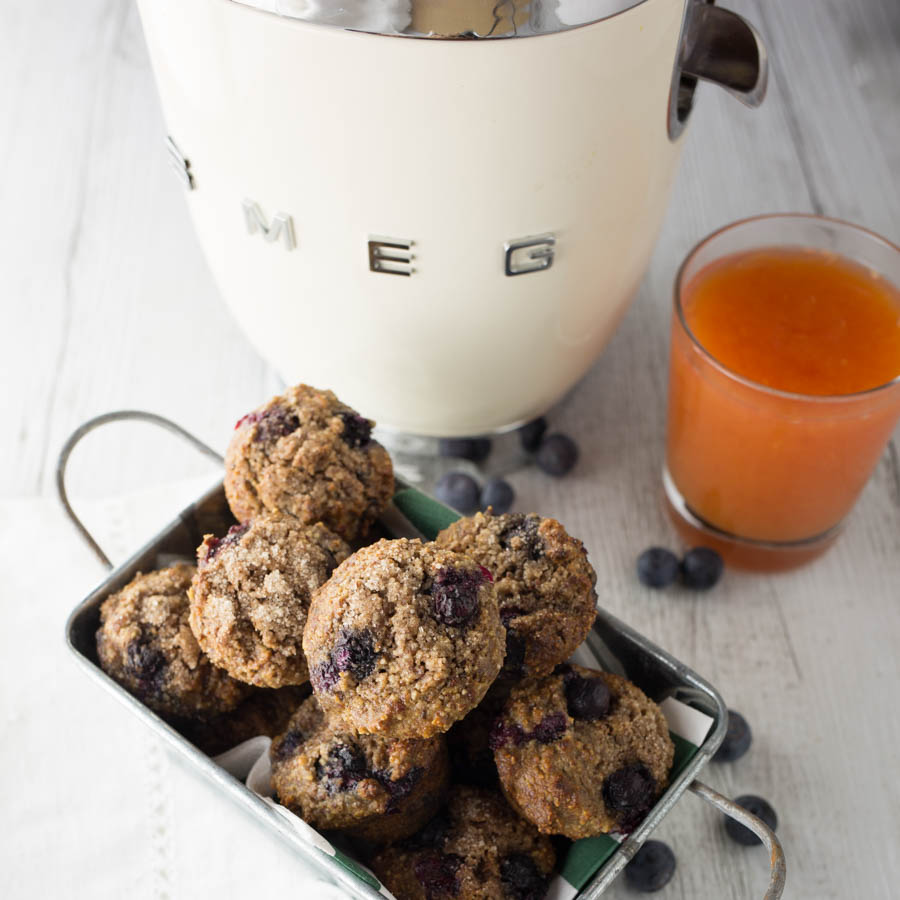
Guys, you are going to love these. Whether or not you follow a gluten-free diet or you just want to mix up your diet with other healthy flour substitutes, these gluten-free mini blueberry muffins are so delicious that you will be too busy having a second one to even think about “normal” muffins.
What I love about these muffins is that they are made with almond meal (just throw raw almonds in your blender or food processor and blend until it because a crumbly flour.) Almonds— and all nuts in general—are one of my favorite go-to snacks. Why? Just a handful of almonds give me a boost of energy throughout the day and they are full of healthy fats, fiber, protein and all sorts of other nutritional benefits. I always bring them with me when I go hiking or on road trips. And, I love topping almonds in mysalads or making almond butter to swirl in my smoothie orgrain bowls.
When I was a kid, my mom always had a wooden bowl full of nuts. Not the already shelled kind that I usually have in my cupboards, but a bowlful of almonds, walnuts, hazelnuts and Brazilian nuts to actually crack. Surely you’ve seen the shells of walnuts, but have you ever seen the shell of an almond? With its tan oval shape and tiny little holes, it looks like its made out of cork. Or, how about a hazelnut shell? It looks like an acorn missing its little top. Then there is the peculiar Brazilian nut shell with its brown rugged surface that seems like a chunkof washed up wood that you’d find at the beach. All so distinctive and unique, all so delicious too.
These gluten-free mini blueberry muffins are made with almond meal and are a great breakfast or snack filled with a good source of protein and fiber.
Serves: 24 mini muffins
Ingredients
3 cups (330g) cups almond meal
¼ (1g) tsp salt
½ tsp (3g) baking soda
1 tsp (2g) cinnamon
1 tablespoon (12g) chia seeds
2 tbsp (45g) honey
¼ cup (50g) melted coconut oil
½ cup almond milk
3 organic eggs
1 cup (150g) fresh blueberries
2 tablespoons raw cane sugar
¼ teaspoon cinnamon
Instructions
Preheat the oven to 350°F (175°C). Butter or spray a mini muffin pan.
In the bowl of a stand mixer equipped with the whisk attachment, add the following: almond meal, salt, baking soda, cinnamon and chia seeds. Mix on speed 4 for 10 seconds.
In a separate bowl mix together: honey, coconut oil, almond milk and eggs.
Add the wet ingredients to the bowl of the stand mixer and whisk on speed 4 until just combined, about 10 seconds. Remove the bowl from the stand mixer and stir in the blueberries with a spatula.
In a small bowl, mix together the raw cane sugar and cinnamon.
Fill the greased muffin cups until full. Sprinkle with the cinnamon sugar mixture.
Bake for 12-14 minutes or until a toothpick inserted into the center comes out clean.
Store in an air tight container for up to 5 days or freeze in an airtight container for up to 2-3 months.

 I have to admit, this dish was extra delicious and special for me. After 9 months of abstaining from undercooked eggs while I was pregnant, I finally sliced my fork into the center of a perfectly cooked poached egg, let all that creamy yolk run out right on top of tangy little feta crumbles, silky shaved asparagus, pungent basil leaves and a mound of farro. If I could put heaven in my mouth, this would be it.
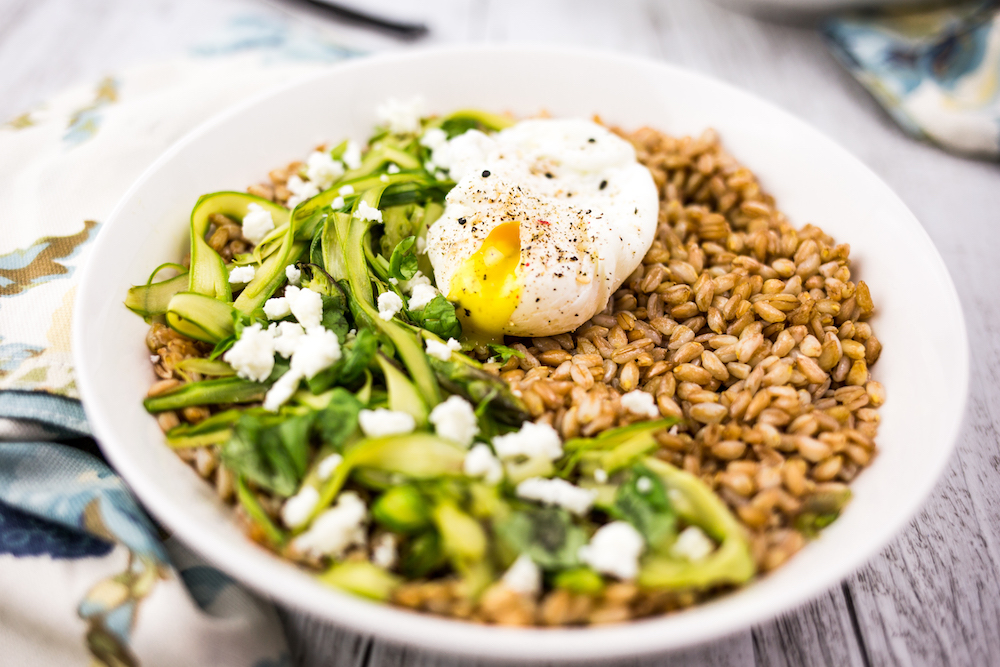 Quick and wholesome meals are essential for my busy life with a newborn. Being that I am breastfeeding, I want to give Pepper all the right nutrients she needs to grow strong and my meal planning has to be efficient as I have limited time to cook. This is why I love this farro bowl. It’s packed with goodness and I can make it in a snap.


 Our beautiful newborn photos above were taken by my talented friend and photographer, Michelle Aschbacher.


 …and spent a night at Sleep Lady Mountain Resort in Leavenworth where we got married.
 We took her on the outdoor stage where we said our vows, to a beautiful rock overlook where with views of the river and mountains and strolled through the rest of that magical place describing to her all of the special memories of that unforgettable day. ❤
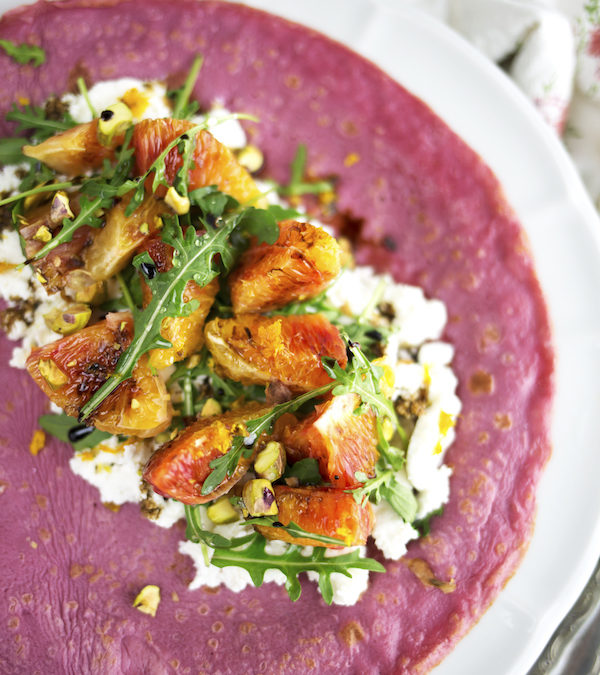
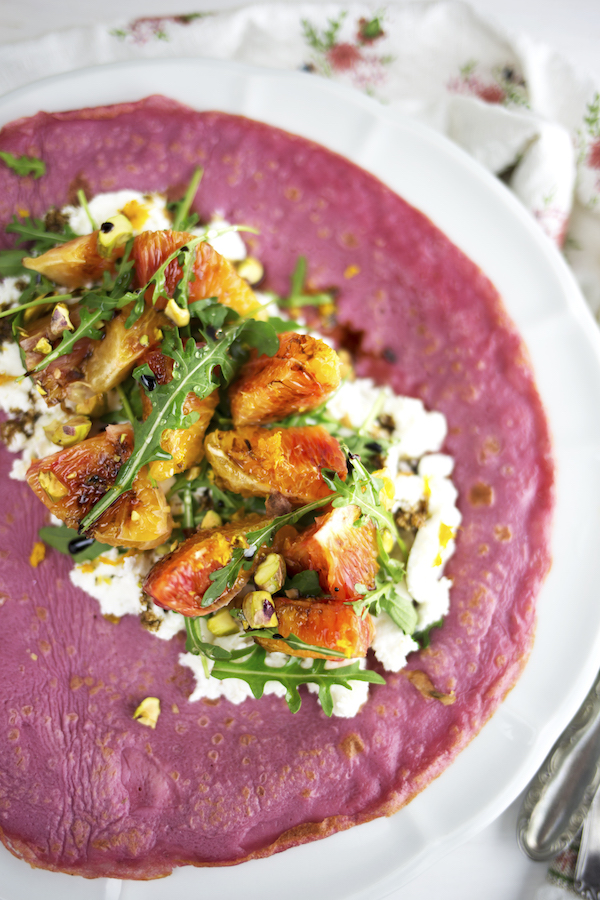
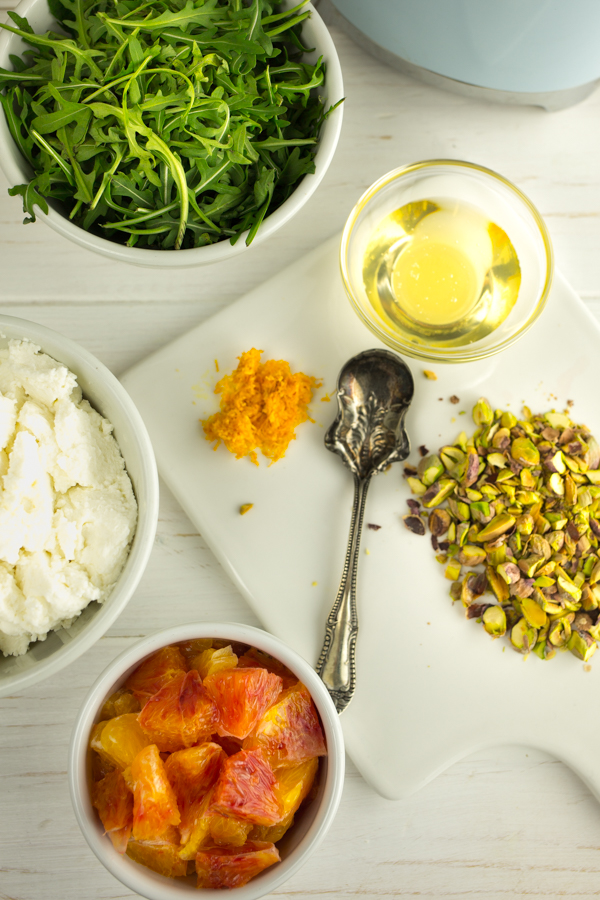 The beet crepe on its own is not so beet-y tasting, so you can top it with a myriad of fillings from sweet to savory. My favorite for this recipe is fresh crispy arugula, creamy ricotta, juicy blood oranges, crunchy pistachios all drizzled with extra virgin olive oil,
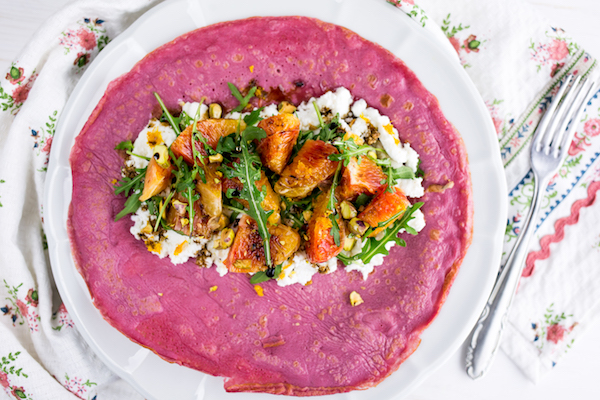

 Guys, you are going to love these. Whether or not you follow a gluten-free diet or you just want to mix up your diet with other healthy flour substitutes, these gluten-free mini blueberry muffins are so delicious that you will be too busy having a second one to even think about “normal” muffins.